
Teton Crest Trail: my epic 5-day backpacking route to Delta Lake + Middle/South Teton summits
Last Updated on 12 April 2026
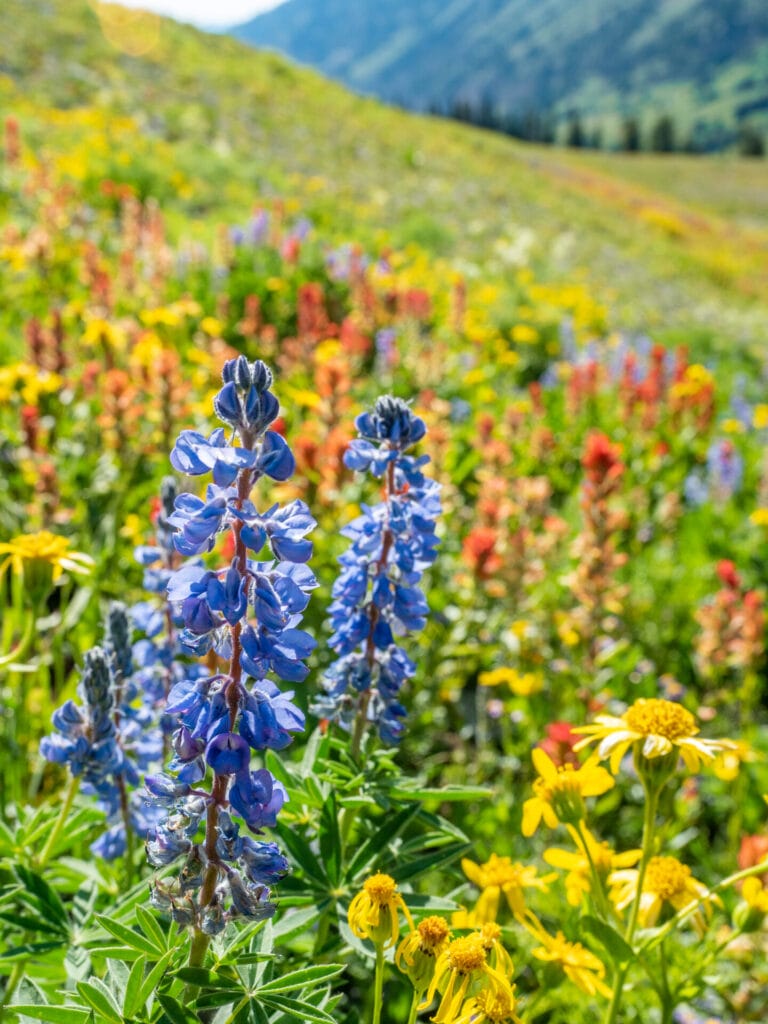
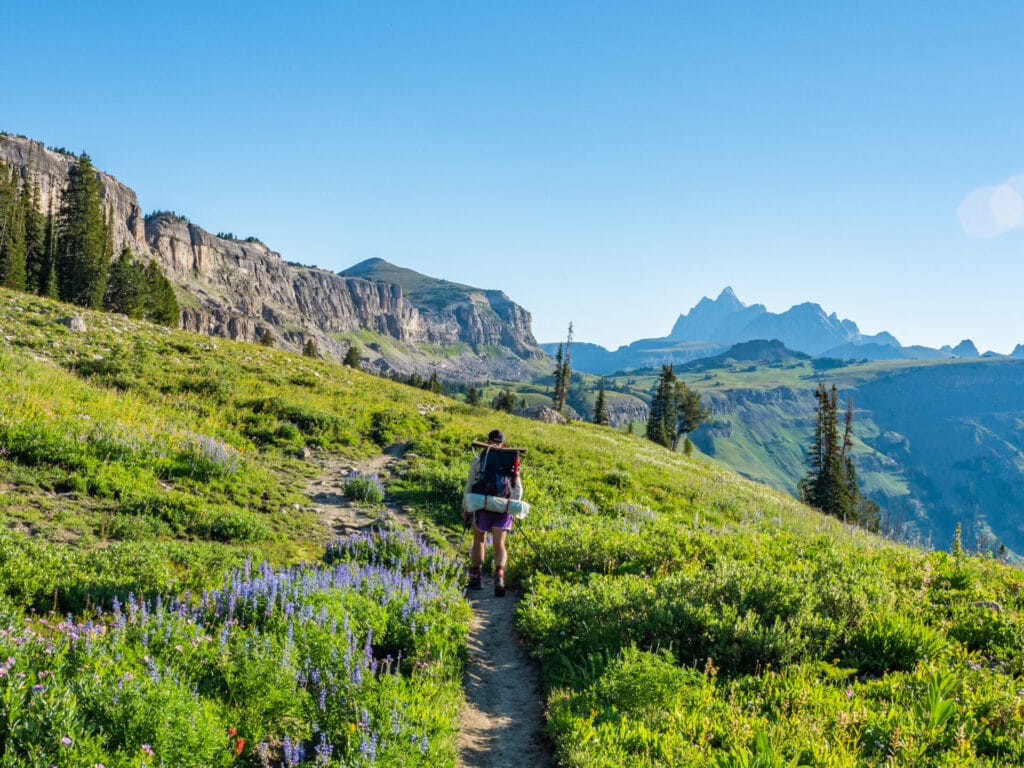
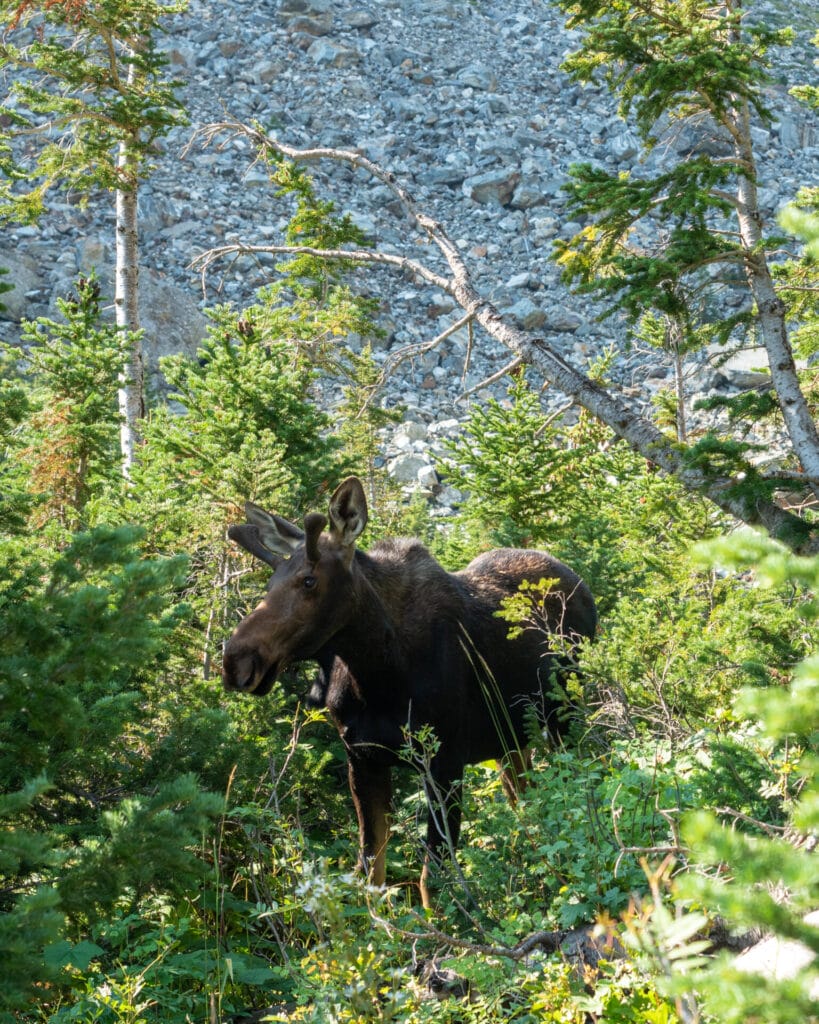
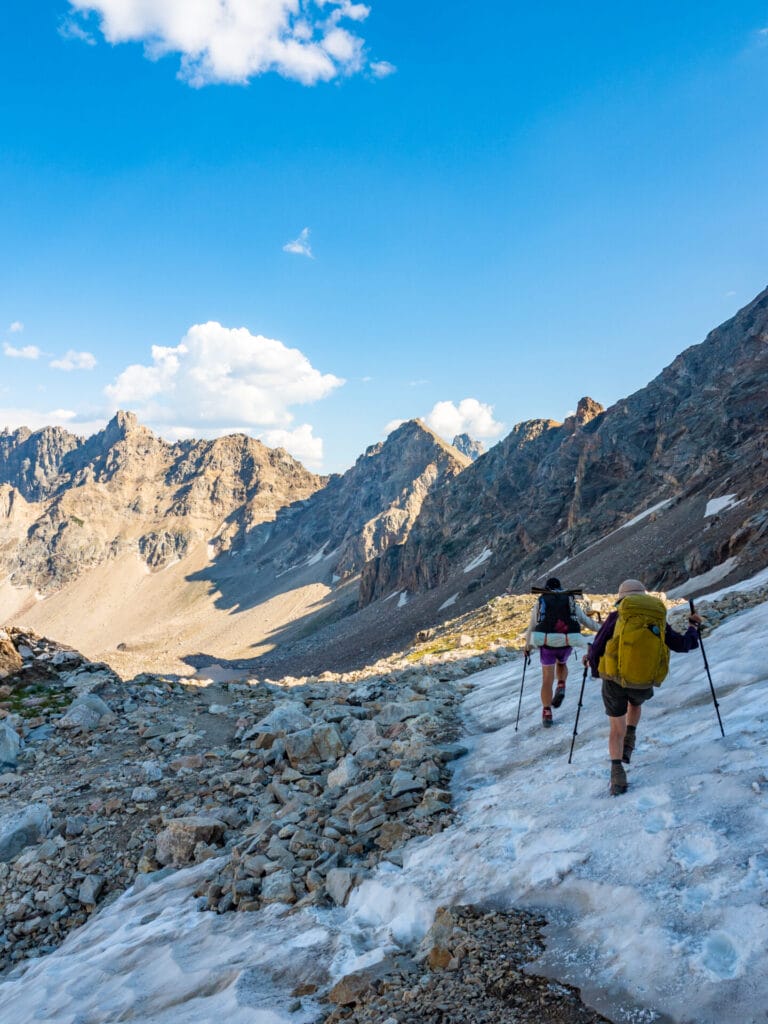
Winding through Wyoming’s beautiful mountain landscapes, the Teton Crest Trail is one of the most spectacular multi-day backpacking routes in the US. In just a few short days, the TCT parades through wildflower-encrusted meadows, along the shores of alpine lakes, under dramatic granite peaks, and offers countless opportunities for moose-spotting— and that’s all before considering route alterations and side-quests that offer even more incredible Teton action!
This trail guide covers everything you need to know about my custom 5-day Teton Crest Trail route from Rendezvous Mountain to Delta Lake and up to the summits of Middle + South Teton for unparalleled adventure on an already spectacular hike.
About the Teton Crest Trail
The classic Teton Crest Trail traverses the Jedadiah Wilderness Area, the Bridger Teton and Caribou-Targhee National Forests, and finally the heart of Grand Teton National Park from Phillips Pass to String Lake or Leigh Lake, showcasing the full grandeur of the Tetons in one epic trek. Most hikers take 3–5 days to complete the ~40mi (64km) trail, with approximately 8,000ft (2,440m) of elevation gain and loss.
Expect moderate trail conditions, a few steeper ascents and rocky sections, and jaw-dropping views every single day. Most of the trail is above 8,000ft (2,438m), so altitude can also be a factor, but otherwise this is an accessible, intermediate route suited to most hikers with multi-day backcountry experience.
My custom Teton Crest Trail route!
Perhaps the best thing about this trail is the seemingly innumerable ways in which you can customise it— starting from alternate trailheads, adding in worthwhile side-summits, and even extending deeper into the National Park. Rarely are two TCT itineraries are the same!
My custom 5-day Teton Crest Trail incorporates more alpine lakes, more staggering vistas, and of course more summits than the standard itinerary, traversing from Rendezvous Mountain to Delta Lake and Garnet Meadows (to summit Middle + South Teton) before culminating at Lupine Meadows Trailhead. These additions involve some Class 2-3 scrambling (rare low 4th Class), so sufficient experience on terrain, steady footwork, and appropriate safety gear are non-negotiable.
In exchange for the added difficulty, you’ll get away from the crowds and experience the Tetons in the most adventurous way possible!

Planning your Teton Crest Trail adventure
When to hike the Teton Crest Trail
The best time to hike the Teton Crest Trail is between mid-July and mid-September, when snow has melted and the alpine wildflowers are in full bloom. Here’s what you can expect each month:
- JUNE: lingering snow makes it tricky; some high passes may be impassable without technical gear (ice axes, microspikes/crampons)
- JULY: trails open up, wildflowers begin blooming, weather is warm, but storms are possible
- AUGUST: peak wildflower season and stable weather, but also peak trail traffic and campground competition (this is when I hiked the Teton Crest Trail and it’s 100% worth it for the flowers!!)
- SEPTEMBER: fewer crowds and beautiful autumn colours, but possible early snow, especially on Paintbrush Pass
Permits for Grand Teton National Park
Permits are required for all overnight backcountry camping within Grand Teton National Park, and they can be competitive during the summer months. Permits cost $20 per trip + $7 per night, so you’ll need to specify your entry date, exit date, number of people (up to 6 per permit), and exact camping zones when applying.
There are two ways to secure a permit:
- Advance reservations – Released online at precisely 8am on the 7th of January for the entire hiking season. These are booked in real-time and fill up crazy quickly, but they are just a reservation— you’ll still need to collect your actual permit from one of the Grand Teton National Park Visitor Centres (Craig Thomas Discovery & Visitor Center, Colter Bay Visitor Center, or the Jenny Lake Ranger Station) BEFORE 10am on the permit start date.
- Walk-up permits – Issued on a first-come, first-served basis at any Grand Teton Visitor Centre starting at 8am one day in advance. You’ll need to go line up in person around 5-6am and be flexible with your camping zones, but 2/3rds of all permits are specifically set aside for walk-ups, so it’s far easier to get your desired campsites this way!
If you don’t get the exact campsites you want, don’t stress— I’ll suggest alternate options for each night below. As long as you’re within designated camping zones and following permit regulations, you’ll still have an amazing hike. Check the Grand Teton National Park site for the most current camping info.

Camping on the Teton Crest Trail
There are designated camping zones along the Teton Crest Trail and you’ll need to specify your preferred zones when reserving or requesting your backcountry permit. You can technically pitch your tent anywhere within the entire camping zone, but where sites have been established or marked, opt for these to minimise environmental impact.
This 5-day Teton Crest Trail itinerary includes:
- Night 1: Death Canyon Shelf
- If you don’t score one of the elusive Death Canyon Shelf camping permits, you can also descend from Fox Pass to Death Canyon and camp here (with the proper permit) OR camp without a permit around Fox Creek Pass, which is technically out of the park and therefore not necessary to reserve.
- Night 2: Cascade Canyon South Fork
- Around Sunset Lake (before crossing Hurricane Pass), there’s camping available within Caribou-Targhee National Forest at Alaska Basin (which does not require a permit) about 1.5-2hrs short of the Cascade Canyon South Fork. An even closer option is the Cascade Canyon North Fork camping zone, which is still permitted through the National Park, but only requires an additional 1hr of hiking from South Fork.
- Night 3: Upper Paintbrush
- Although it’s not quite as scenic, Lower Paintbrush might be a preferable camping zone for today, as it moves about 1.5hr of hiking from Day 4 (which is 7hrs and quite demanding) to Day 3 (which, as it’s written here, is 3.5hrs and more leisurely). If you do end up with a short Day 3, spend your extra time hanging out at Lake Solitude, which is truly spectacular!
- Night 4: Garnet Meadows
Importantly, none of these sites (except Garnet Meadows) provide bear storage lockers, so you will be required to carry a bear canister for food and scented items on the entire Teton Crest Trail— see my complete packing list for bear storage recommendations!
Essential resources & maps
Although there are reasonable trail markings for much of the Teton Crest Trail, a GPS is essential for staying on route and safely getting off-trail to the summits!
Check out my custom Teton Crest Trail GPS map for the exact 5-day route from Rendezvous Mountain to Lupine Meadows via Delta Lake and Middle + South Teton, with daily tracks, trail stats, campsites, summit detours, and other essential navigation!
Getting to & from the trailhead
Getting to Grand Teton National Park
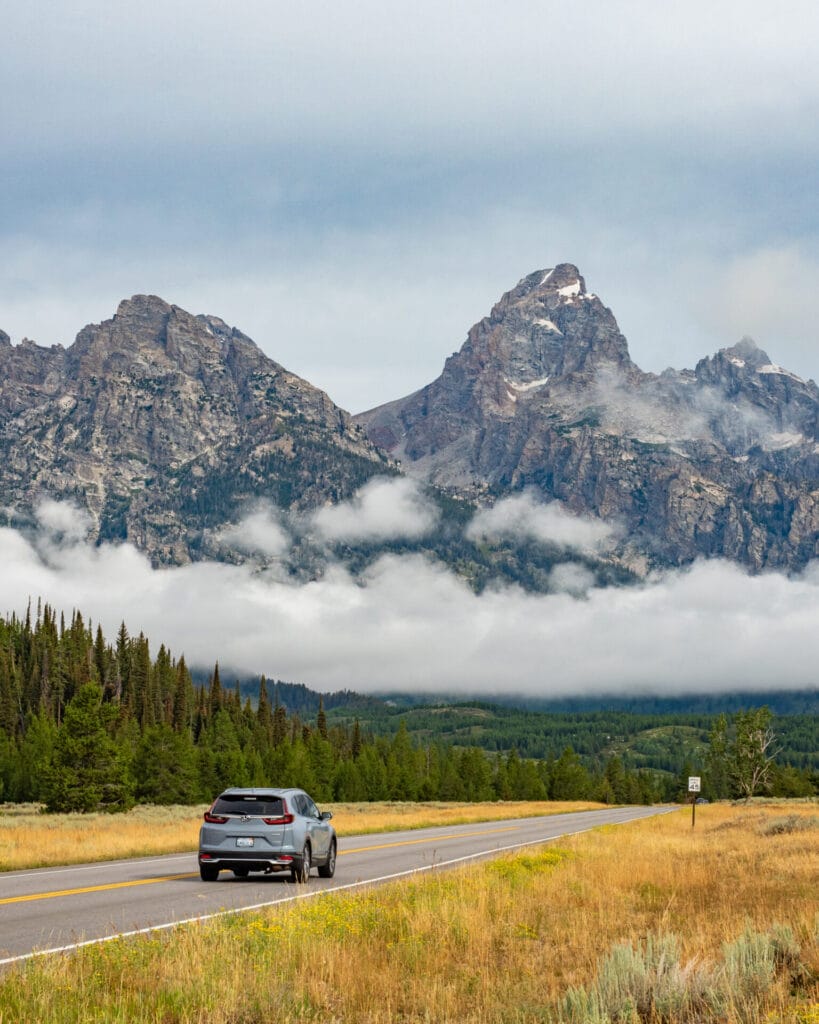
The easiest way to get to Grand Teton National Park is to fly into Jackson Hole Airport, which is just 20min from the town of Jackson and the closest airport to the park. You can rent a car, catch a shuttle, or take a taxi into town. We picked up a car to make transport a bit easier!
Where to stay near Grand Teton National Park
To secure a walk-up permit (must be in line at 5-6am for 8am open) or pick up your permit with an advanced reservation (must pick up by 10am), you’ll need to spend at least one night near Jackson before you hike. This is an extremely charming and upscale mountain town with heaps to do in the area, if you have a few extra days up your sleeve!
Alternatively, with your own car it’s possible to camp at several frontcountry campsites operated by the National Park Service. We stayed at Gros Ventre Campground in Kelly, just a short drive from Jackson, and this worked perfectly for a quick drive to Jackson Hole Mountain Resort to begin the trail.
Getting to the trailhead at Rendezvous Mountain
- Park for free in the Ranch Lot at Jackson Hole Mountain Resort
- Take the free shuttle to the main resort base (or taxi directly here if you don’t have a car)
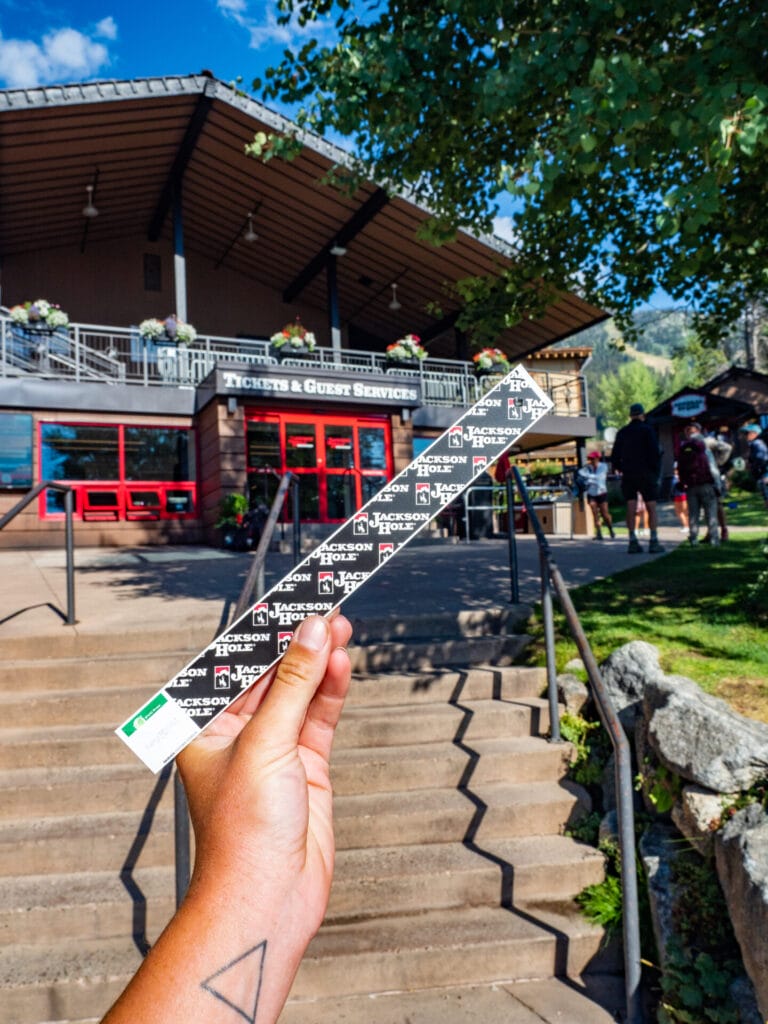
- Buy aerial tram tickets online for a discount ($54 → $49)
- Pick up your wristband at Guest Services and hop on the tram!
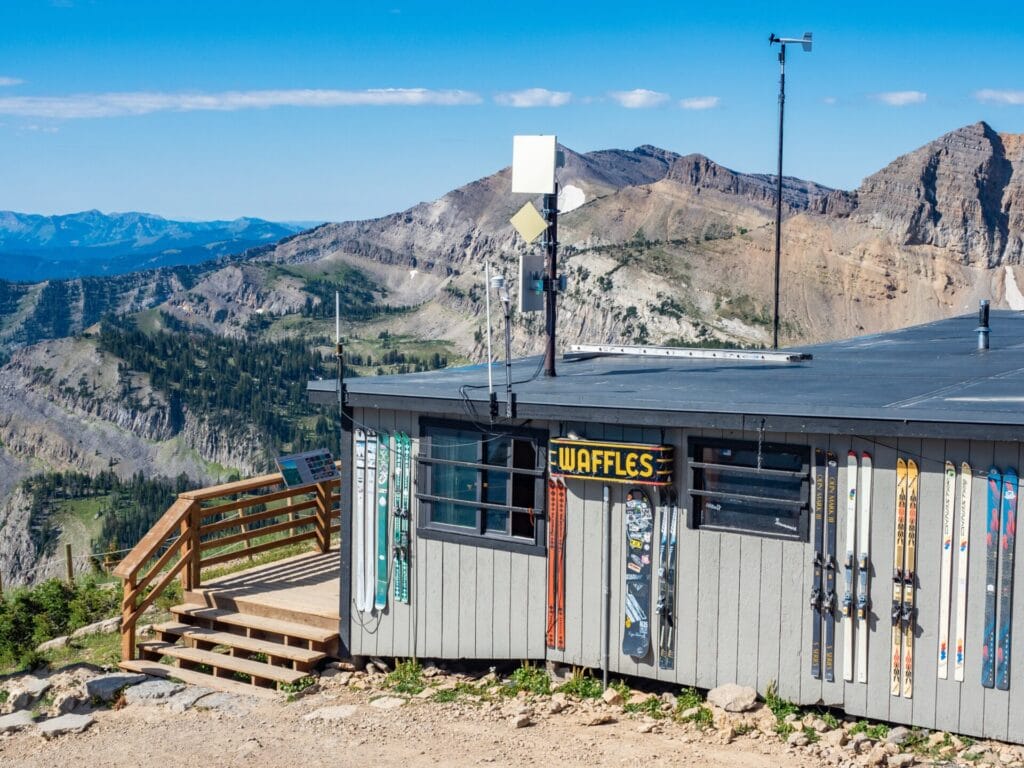
The tram climbs 4,140ft (1,260m) and saves 5mi (8km) of ascent, delivering you straight to start of the Teton Crest Trail at 10,450ft. This is a popular approach and the best way to set yourself up for an adventurous 5-day itinerary— there’s also a beloved alpine cabin serving gourmet waffles right at the top, the perfect pre-hike treat!
Getting from Lupine Meadows Trailhead back to Jackson
There’s no public transport from the end of the route at Lupine Meadows Trailhead, so you’ll need to arrange a private shuttle in advance. Expect to pay around $50–70 back to Jackson (about a 40min drive), depending on availability and time of day.
When I hiked this route with friends, we parked one car at Jackson Hole Mountain Resort (30min from Jackson) and a second at Lupine Meadows Trailhead (40min from Jackson) to make our own shuttle. If you’re travelling in a group, this is the easiest option— just make sure both trailheads are accessible and have overnight parking.
*5-day Teton Crest Trail itinerary
- Day 0: pick up backcountry permits from the Grand Teton Visitor Centre
- Day 1: Rendezvous Mountain to Death Canyon Shelf (5hrs, 9mi, 1,940ft gain)
- Day 2: Death Canyon Shelf to The Wall to Cascade Canyon South Fork (7hrs, 14mi, 3,215ft gain)
- Day 3: Cascade Canyon South Fork to Upper Paintbrush (3.5hrs, 7mi, 2,855ft gain)
- Day 4: Upper Paintbrush to Delta Lake to Garnet Meadows (7hrs, 17mi, 3,480ft gain)
- Day 5: Garnet Meadows to Middle & South Teton to Lupine Meadows (10hrs, 10mi, 4,660ft gain)
Day 1: Rendezvous Mountain to Death Canyon Shelf
- Trail hours: 5hrs
- Distance: 9.3mi (15km)
- Elevation gain & loss: +1,940ft, -2,770ft (+590m, -845m)
- Side trips: Cody Peak
- Campsites: Fox Creek, Death Canyon Shelf, Death Canyon, Alaska Basin
Rendezvous Mountain to Marion Lake (3hrs)
After speedily ascending 1,261m (4,139ft) from the Jackson Hole Ski Resort to the top of Rendezvous Mountain via tram, grab waffles at the iconic Corbit’s Cabin and then take your first official steps on the Teton Crest Trail!
The route descends for a little over 30min into a grassy basin below Rendezvous— as you’re coming down the wide path from the tram, be sure to watch carefully for the trail on your right, as it can be easy to miss. If you do walk right by it, as I did, you’ll end up on a much rougher trail through the bushes that does eventually connect with the maintained trail below, but you’ll lose some time in the process.
The hike undulates steadily for the next hour and a half, climbing pleasantly out of the grassy basin, crossing a plateau, and finally descending to a river (expect it to be quite shallow in summer, but still a great place to fill up on water).
Allow another hour to climb from the river up, down, and back up again to the sparkling shores of Marion Lake. Swimming is all but mandatory in this beautiful alpine lagoon, and with a plethora of waterfront campsites, it’s also an excellent place to sit down for lunch.
Marion Lake to Fox Creek Pass (1.5hrs)
The route from Marion Lake ascends and descends in relatively short, alternating bursts, never amounting to anything terribly difficult but affording the best views of the day. Particularly as you come up and over a small high point and descend into the middle below Fossil, the wildflowers can be mind blowing! Expect photo delays.
Fox Creek Pass to Death Canyon Shelf (10min–1hr)
After reaching the signed Fox Creek Pass at 9,560ft, it’s only a short hike uphill to reach the start of the Death Canyon Shelf camping zone. There are plenty of established spots in this area, many with beautiful views of the surrounding peaks and even the distant Grand Teton, and these extend for several kilometres along the length of the shelf. Camp anywhere within this zone when you find an ideal site!
⛺️ Alternate campsites for Day 1: If you don’t score one of the elusive Death Canyon Shelf camping permits, you can also descend from Fox Pass to Death Canyon and camp here (with the proper permit) OR camp with no permit whatsoever around Fox Creek Pass, which is technically out of the park and therefore not necessary to reserve.
Day 2: Death Canyon Shelf to Cascade Canyon South Fork
- Trail hours: 7hrs
- Distance: 14mi (22.3km)
- Elevation gain & loss: +3,215ft, -4,130ft (+980m, -1,260m)
- Side trips: Mt Meek, The Wall
- Campsites: Alaska Basin, Cascade Canyon South Fork, Cascade Canyon North Fork
Death Canyon Shelf to Mt Meek Pass (1hr)
Depending on where you camped last night, it can take up to an hour to reach the end of the Death Canyon Shelf camping zone, just under Mt Meek. For reference, today’s stats are quoted from one of the first campsites within the zone (download my custom Teton Crest Trail GPS map to see the exact route and navigate confidently along the trail!)
Mt Meek Pass to The Wall junction (2hrs)
Crossing from Grand Teton National Park into the Jedediah Smith Wilderness under Mt Meek, the trail descends into a rocky basin on a series of comfortable switchbacks. In the summer, the wildflowers are absolutely beautiful here!
After about 45min, the trail levels out on granite slabs and follows a line of smaller rocks laid out to form a path until reconnecting with dirt. The final climb to Sunset Lake is gradual but sustained, and just before the shore, you’ll reach a trail junction where you can drop packs and detour up to The Wall.
Side trip: The Wall (1.25hrs)
Head uphill over soft grass and somewhat loose dirt for 10min to connect with a faint trail through scree. Views back towards Mt Meek and the Basin Lakes are incredible, and after about 45min of hiking up gently sloping tundra, you’ll reach the dramatic overlook known as The Wall.
Below lies Snowdrift Lake and the rugged peaks of Wister, Veiled, and the Tetons beyond. This is a quick but spectacular side trip for amazing views of the park— return the same way in about 30min.
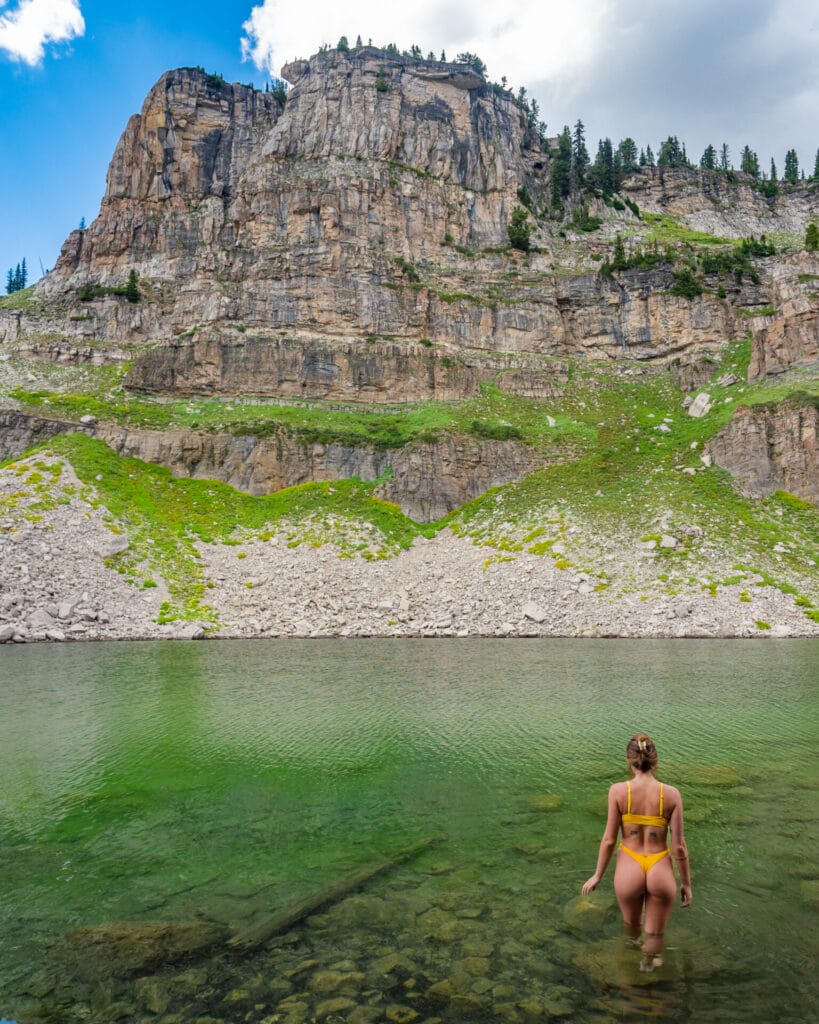
The Wall junction to Sunset Lake (10min)
Once back to the junction, the onward hike to Sunset Lake takes 10min or less, dropping gently to emerald shores that offer a great (if very cold) swimming opportunity, or at the very least, a fantastic lunch spot.
Sunset Lake to Cascade Canyon South Fork (2.75hrs)
From Sunset Lake, ascend 1,000ft through vibrant wildflower meadows. In under an hour, you’ll re-enter Grand Teton National Park and shortly after enjoy panoramic views of the western Tetons near Hurricane Pass.
Half an hour brings you down into the basin and onto a pleasant trail that continues downwards through the Cascade South Fork camping zone for several miles. Because South Fork is so large (1.5hrs end to end), the time taken to compete this section of the hike varies considerably depending on your campsite— we stopped about 1.25hrs into the camping zone (15min from the end), which is how I’ve quoted the stats within this post.
⛺️ Alternate campsites for Day 2: Around Sunset Lake (before crossing Hurricane Pass), there’s camping available within Caribou-Targhee National Forest at Alaska Basin (which does not require a permit) about 1.5-2hrs short of the Cascade Canyon South Fork. An even closer option is the Cascade Canyon North Fork camping zone, which is still permitted through the National Park, but only requires an additional 1hr of hiking from South Fork.
Day 3: Cascade Canyon South Fork to Upper Paintbrush
- Trail hours: 3.5hrs
- Distance: 7.3mi (11.8km)
- Elevation gain & loss: +2,855ft, -1,670ft (+870m, -510m)
- Side trips: Paintbrush Peak, Littles Peak
- Campsites: Cascade Canyon North Fork, Upper Paintbrush
Cascade Canyon South Fork to North Fork (1hr)
Depending on where you camped within the South Fork zone, you could walk anywhere from a few minutes to an hour to reach the end of the zone (if you’re following my Teton Crest Trail GPS route, it’s only 15min to the end of the zone; the entire zone is about 1.5hrs in length). From there, continue for another 40min to reach the start of the Cascade Canyon North Fork camping zone.
The trail winds along a beautiful valley with expansive views and several sturdy wooden bridges over creeks. Along this stretch, you’ll also pass a junction with a potential bailout trail down to String and Jenny Lakes— stay left to continue on the Teton Crest Trail.
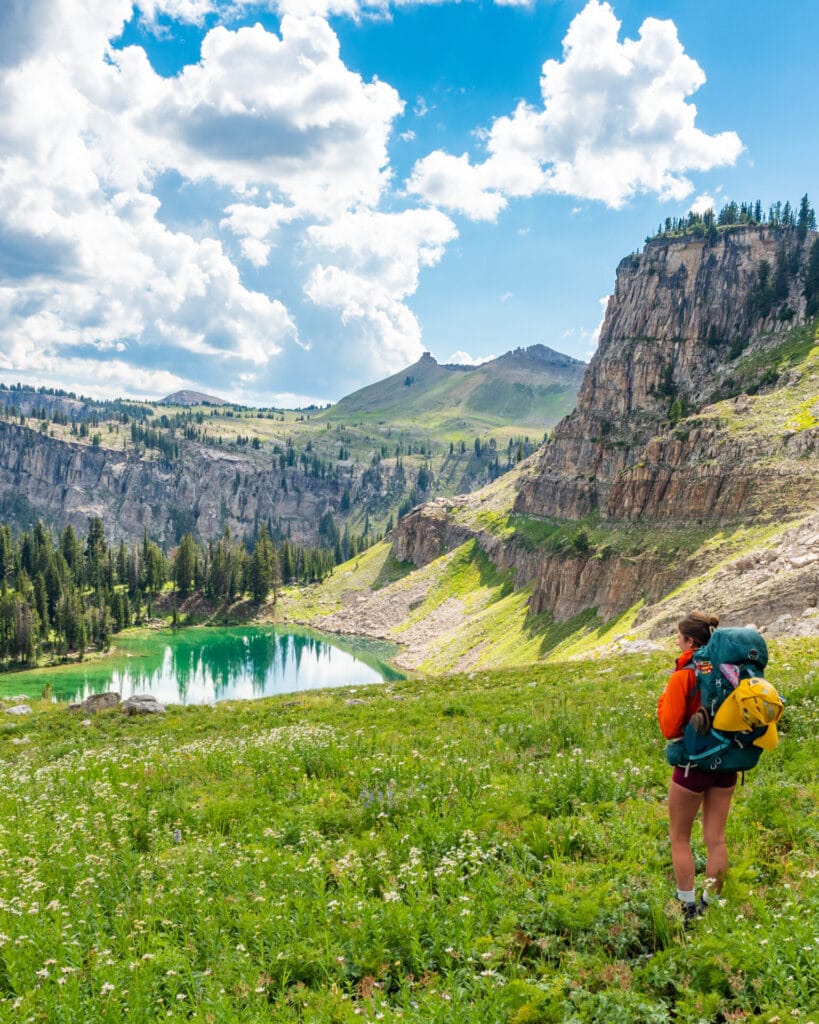
Cascade Canyon North Fork to Lake Solitude (40min)
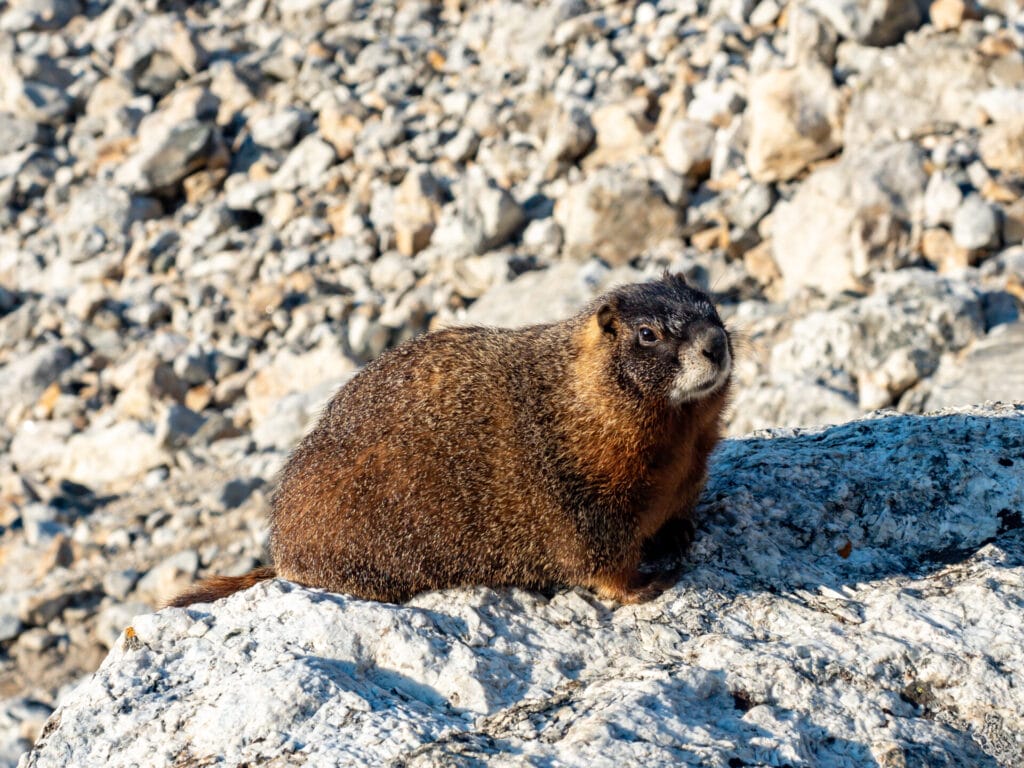
Several creek crossings (on sturdy wooden bridges) punctuate the morning’s walk, but once across the largest of these, begin a gradual ascent on rocky trail through a boulder field. Keep your eyes open, almost everyone in our group saw a pika when we hiked through at different times— and I saw two!
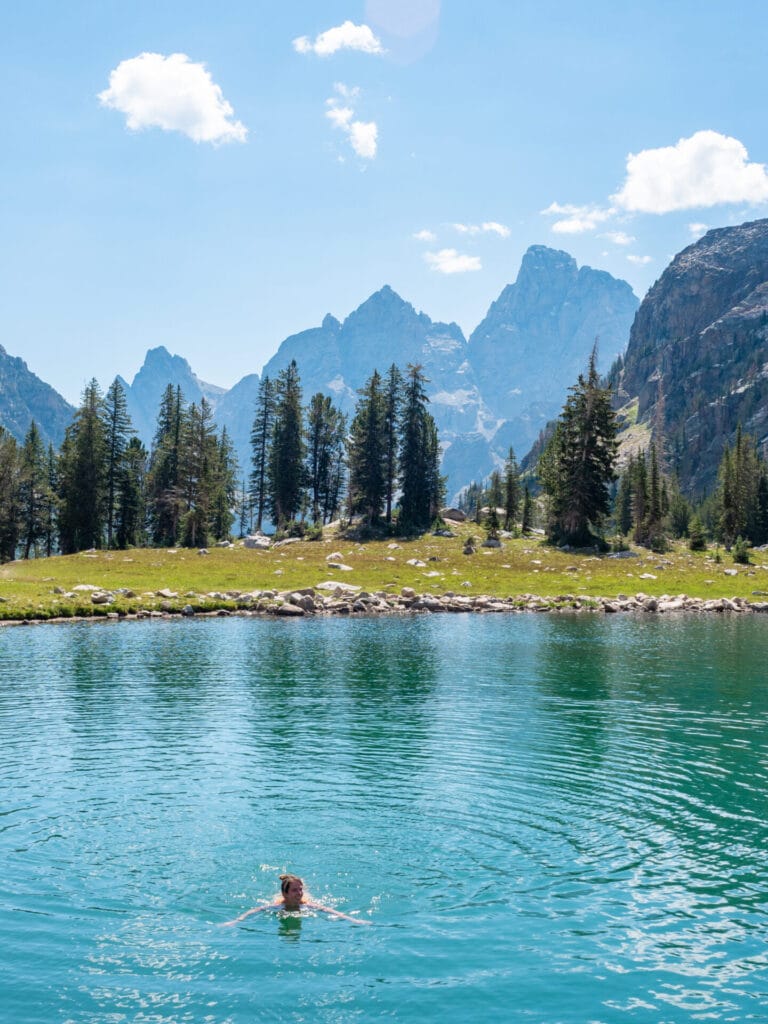
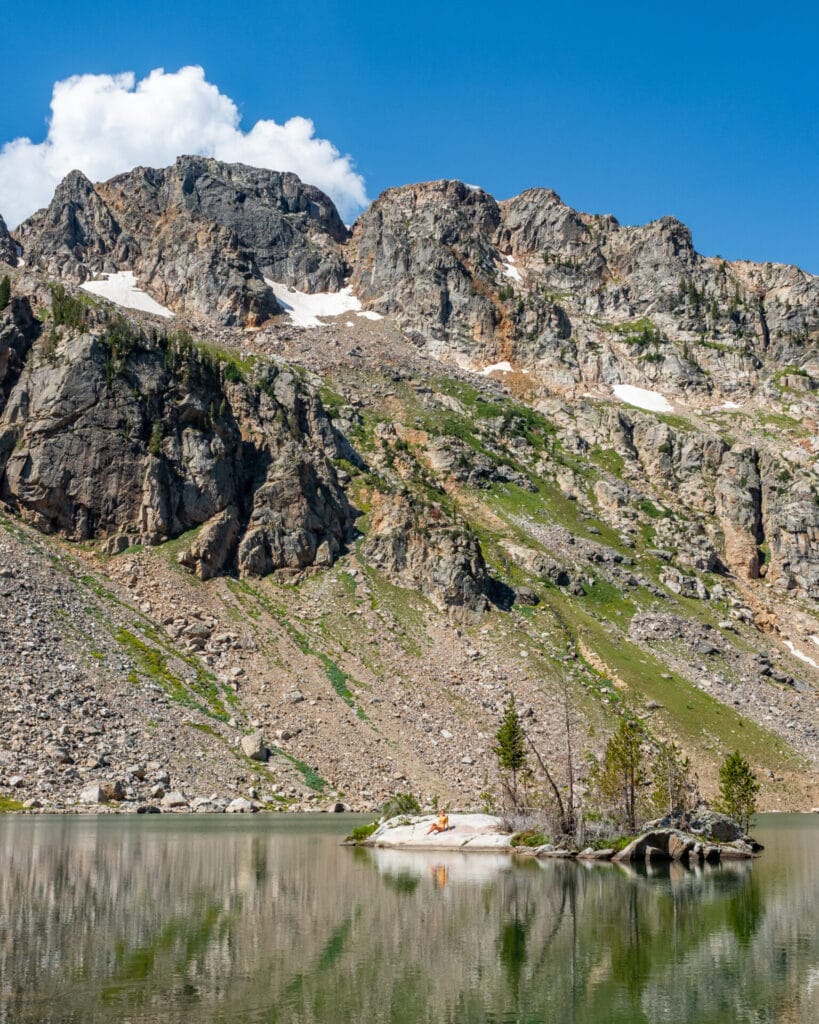
The North Fork Camping Zone is about 30min long and a further 10min uphill push will bring you to the sparkling shores of Solitude Lake. This is by far the nicest alpine lake directly visited on the Teton Crest Trail— cool but pleasant water, jumping rocks, plenty of sunbathing spots, even a little stone island to swim out to! Plan to stay for an extended lunch and soak up the beautiful scenery, especially since today is such a short day.
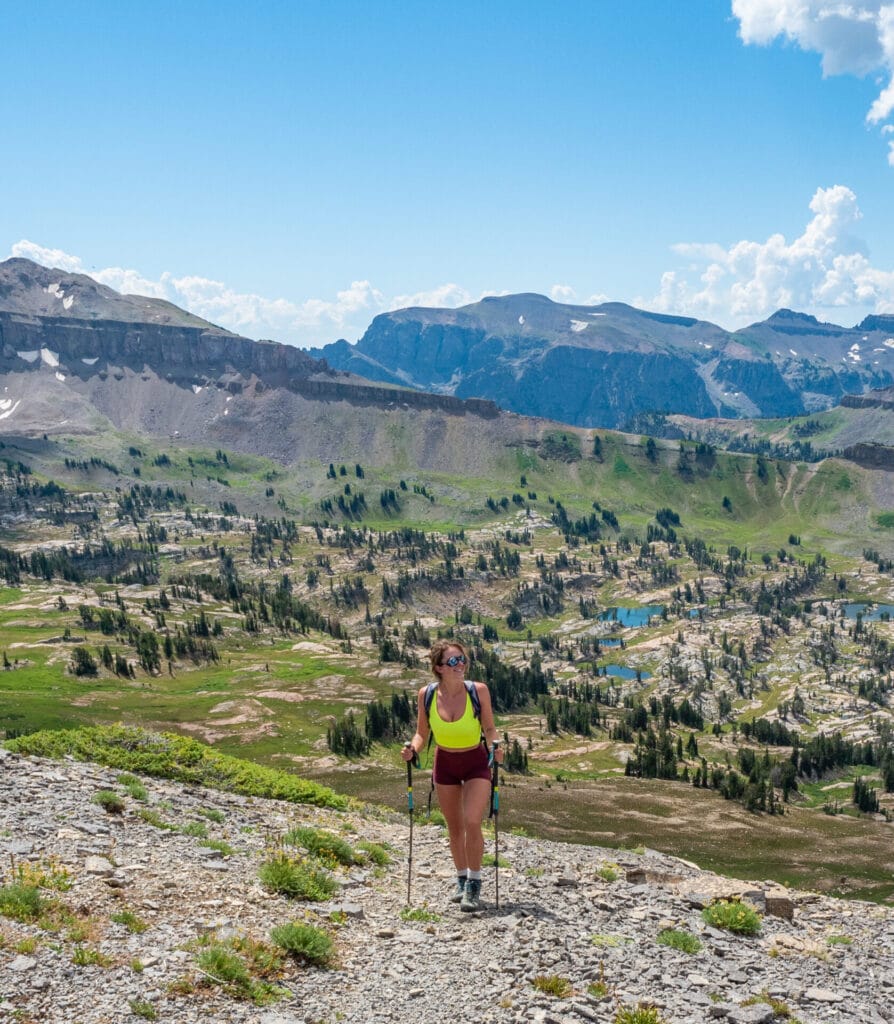
Lake Solitude to Paintbrush Divide (1hr)
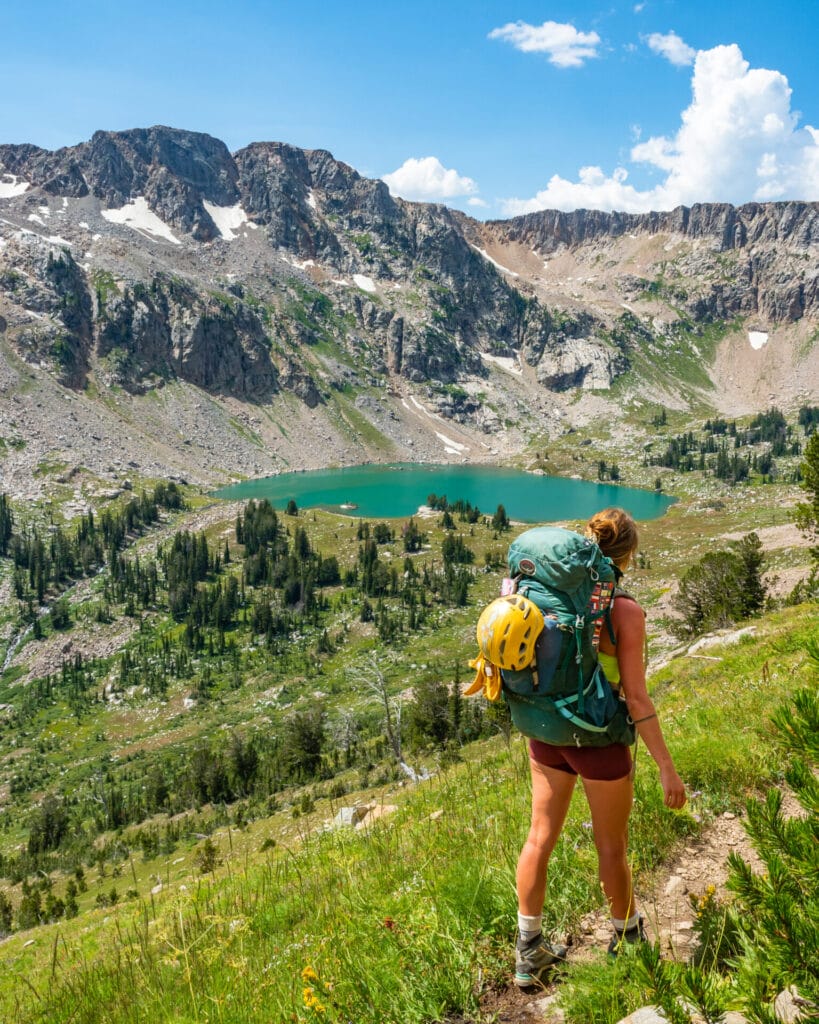
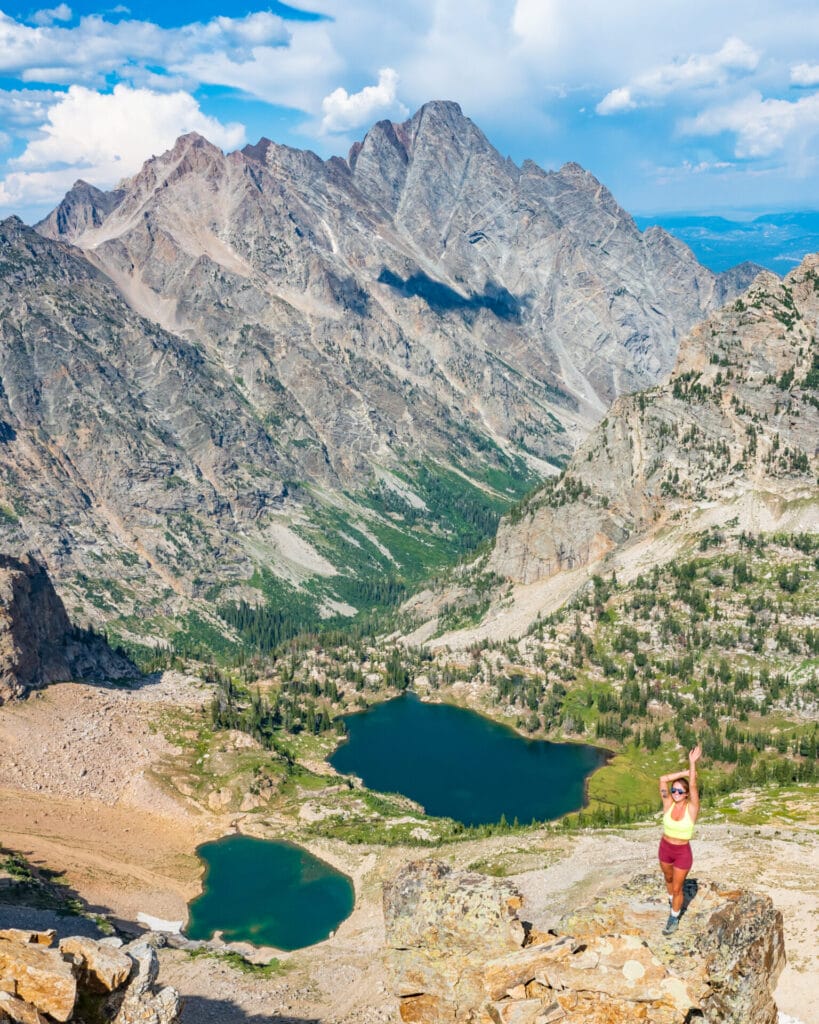
Reluctantly departing the lake, a rocky trail ascends steeply along the opposite mountainside— this is the most sustained climb of the entire Teton Crest Trail, but even so, it takes little more than an hour to top out at Paintbrush Divie. There is absolutely no shade to be had and the rocky path does require a little bit of attention, but the view looking back down at Solitude Lake and several smaller alpine lakes is truly spectacular!
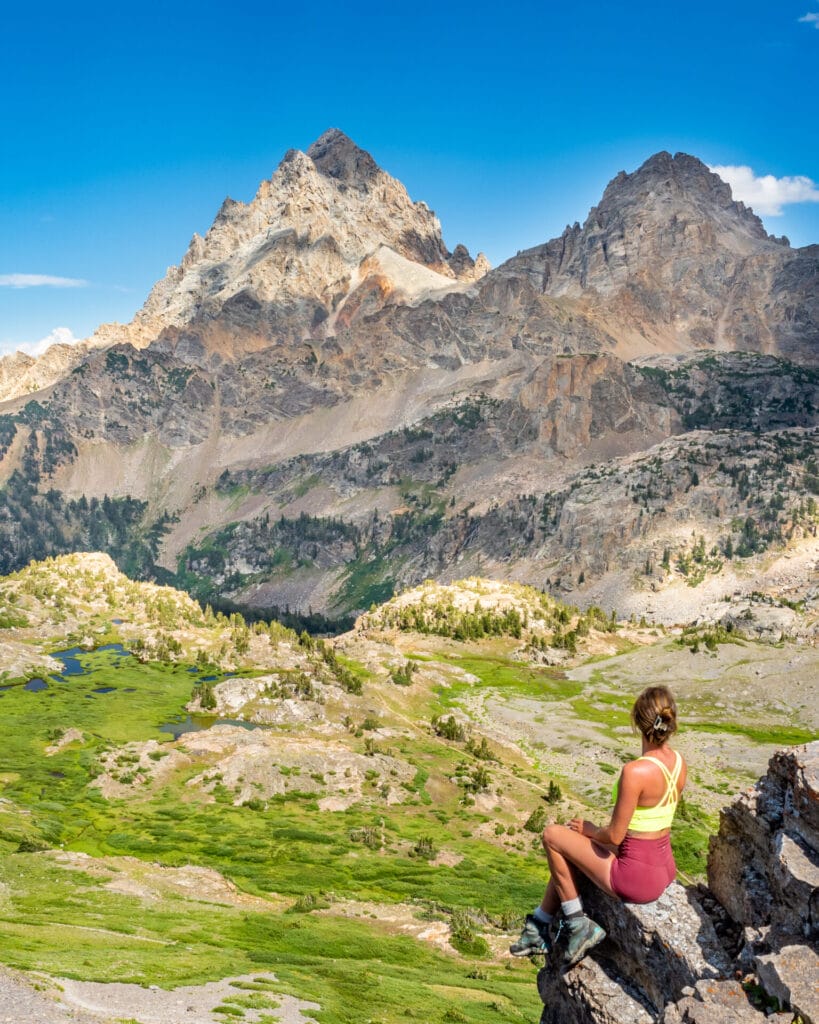
Side trip: Paintbrush Peak (20min)
Just before you descend from Paintbrush Divide, drop your pack and scramble up a short scree slope to the summit of Paintbrush Peak. It only takes a few minutes up and down, but the views are well worth the effort— give yourself time to soak in the panorama before continuing!
Paintbrush Divide to Upper Paintbrush (30min)
The trail drops dramatically from Paintbrush Divide on a very rocky trail with occasional large steps— this is probably the most challenging descent of the Teton Crest Trail, but it’s short-lived and won’t present any trouble for the experienced hiker. After a few minutes, the worst of the descent levels off into a more manageable decline on rocky trail, and within 20min of the pass, reach the start of the Upper Paintbrush Camping Zone.
⛺️ Alternate campsites for Day 3: Although it’s not quite as scenic, Lower Paintbrush might be a preferable camping zone for today, as it moves about 1.5hr of hiking from Day 4 (which is 7hrs and quite demanding) to Day 3 (which, as it’s written here, is 3.5hrs and more leisurely). If you do end up with a short Day 3, spend your extra time hanging out at Lake Solitude, which is truly spectacular!
Day 4: Upper Paintbrush to Delta Lake to Garnet Meadows
- Trail hours: 7hrs (2.5hrs to String Lake + 3.5hrs to Delta Lake + 1hr to Garnet Meadows)
- Distance: 16.8mi (27km)
- Elevation gain & loss: +3,480ft, -4,070ft (+1,060m, -1,240m)
- Side trips: Delta Lake
- Campsite: Garnet Meadows
Upper Paintbrush to Lower Paintbrush (1.25hrs)
Depending on where you stopped last night within the Upper Paintbrush Camping Zone, you’ll have up to 1.5hrs to reach the start of Lower Paintbrush. It’s entirely downhill, and altogether pleasant and very well graded.
Lower Paintbrush to String Lake Junction (1.25hrs)
The trail and scenery transition notably over the course of this morning’s hike, dropping from the dry, rocky trail of Upper Paintbrush to the brush and aspen-lined dirt of Lower Paintbrush. The Lower Paintbrush camping zone is less than 15min long, but I saw 3 moose within this time, so keep your eyes peeled alongside the trail, both before and after you drop into the tree-line!
Continue just under an hour from the end of Lower Paintbrush along a shaded, comfortable trail to reach a trail junction that would bring you out to the String Lake Trailhead. Some may choose to end their hike here, but I’d highly recommend continuing onwards for another adventurous day on the trail— to stunning Delta Lake and up both the Middle and South Tetons!
String Lake to Lupine Meadows via Valley Trail (1.5hrs)
Hiking around the backside of Jenny Lake for about 1.25hrs, expect to see more people than you’ve seen on the entire Teton Crest Trail. This is a relatively flat hike readily accessible to the public, and therefore one of the most popular day hikes in Grand Teton National Park— thankfully, the beautiful lake views provide ample distraction from the crowds!
Finally, turn right off the Jenny Lake Trail, following signs for the Valley Trail to Amphitheater Lake, Taggart Lake, and Bradley Lake. Walk along a narrow track through the grass parallel to a dirt road; after 10min, connect onto the road for the final stretch to the trailhead. If you see an enormous number of cars, you’ll know you’re in the right place!

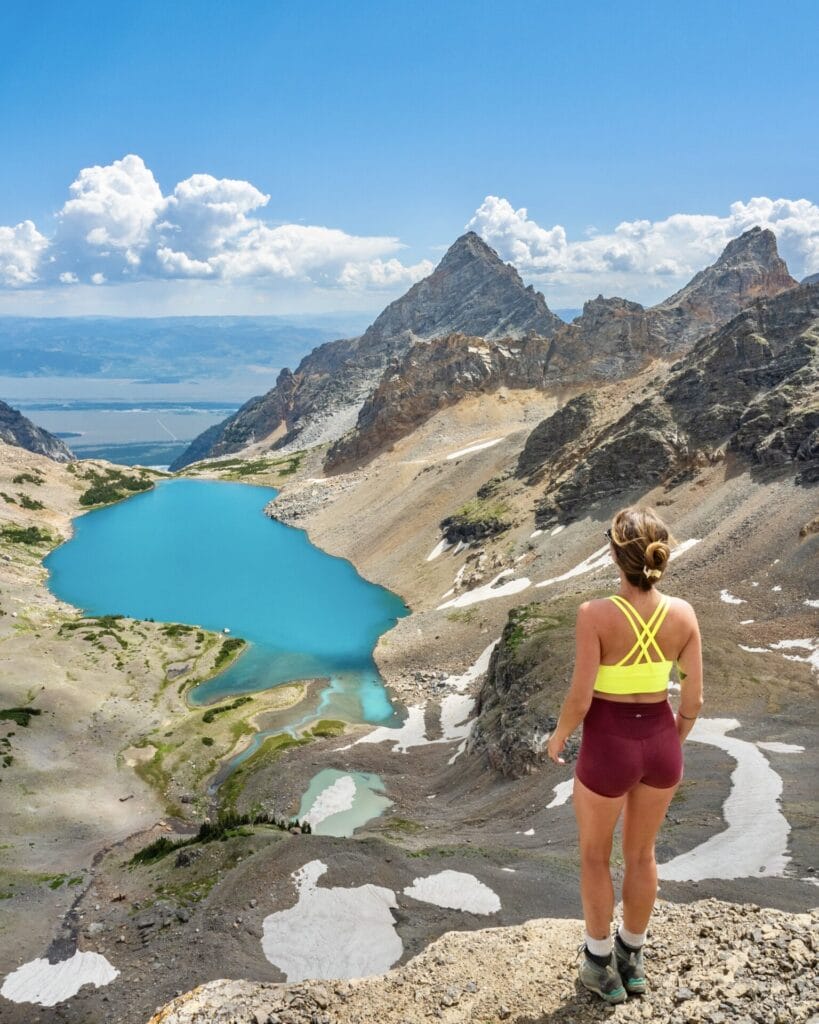
Lupine Meadows to Delta Lake (2hrs)
Lupine Meadows Trailhead is enormously popular and you’ll easily see a hundred people on the trail, but the good news is that, by the time you arrive in the afternoon, a majority of the hikers are headed down and you may well find you have the lake nearly to yourself after 4pm!
The trail begins pleasantly, gradually increasing in steepness without ever becoming unreasonable. With a full pack and direct afternoon sun, however, you’re likely to feel the entire 1.25hr ascent to the junction with Garnet Canyon! From here, follow signs towards Amphitheater Lake for another few minutes (Delta doesn’t appear on any of these signs, but it is far and away the best of the 3 lakes in this area).
After just 5min, another sign will point left and uphill towards Amphitheater Lake; instead, continue straight and slightly downwards (only momentarily) towards the unsigned Delta Lake. This trail is considerably more challenging, leading you through a boulder field, over roots and loose dirt, up a curdling incline.
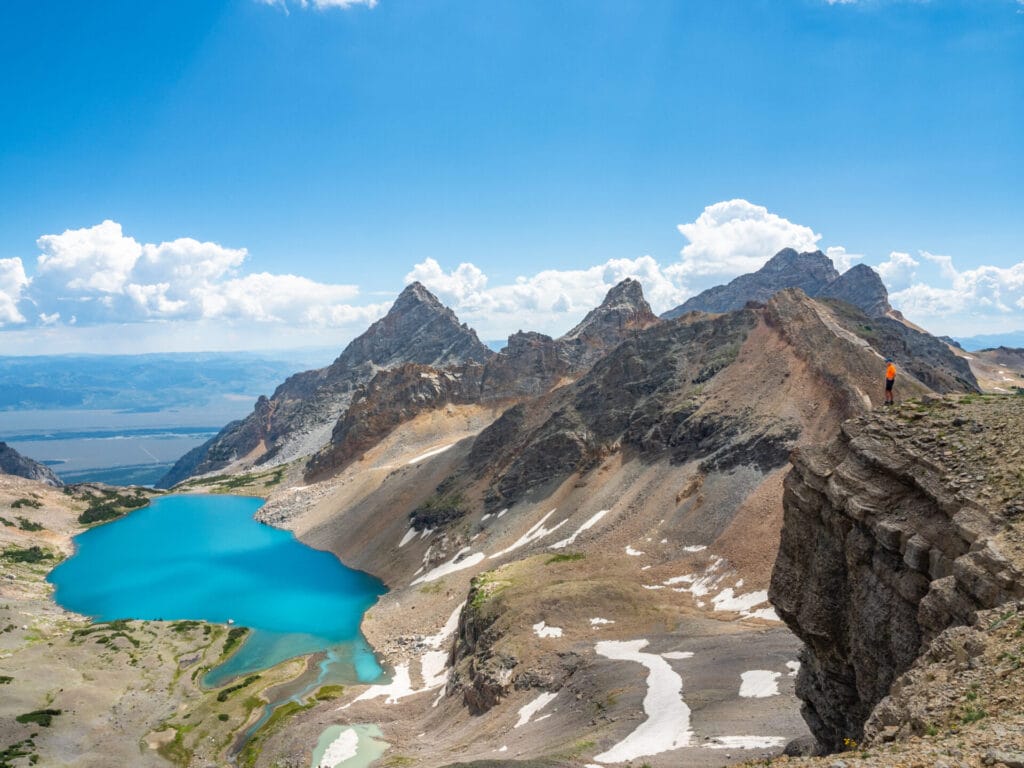
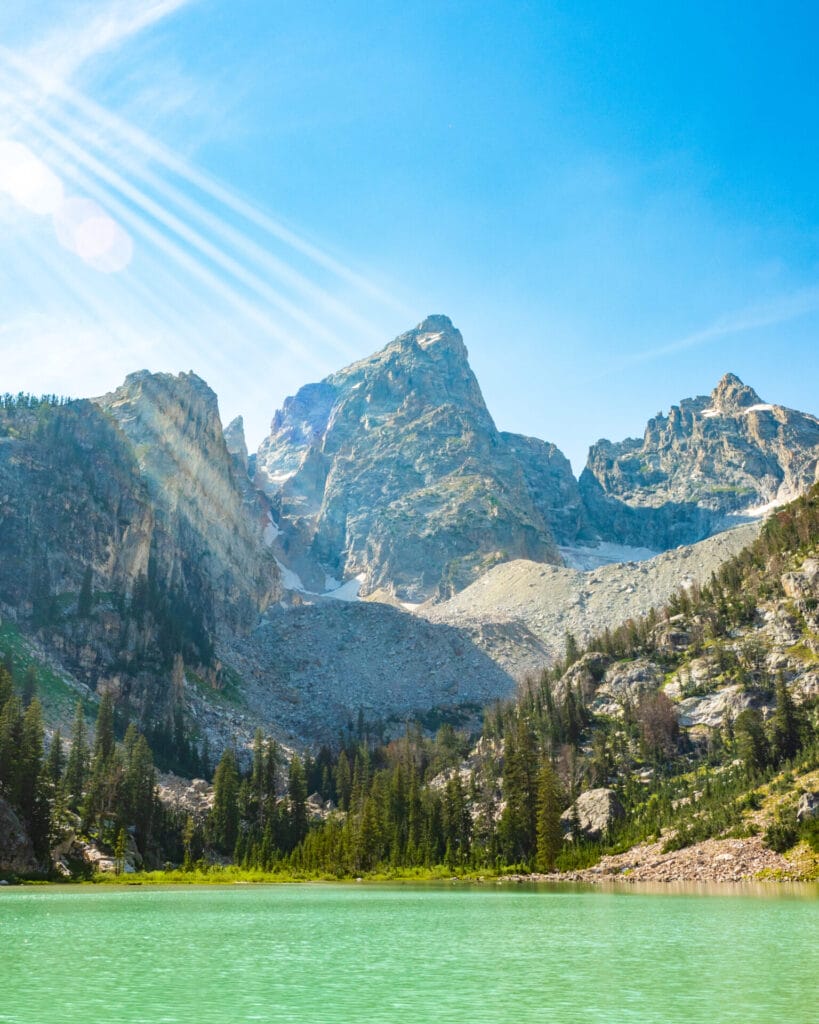
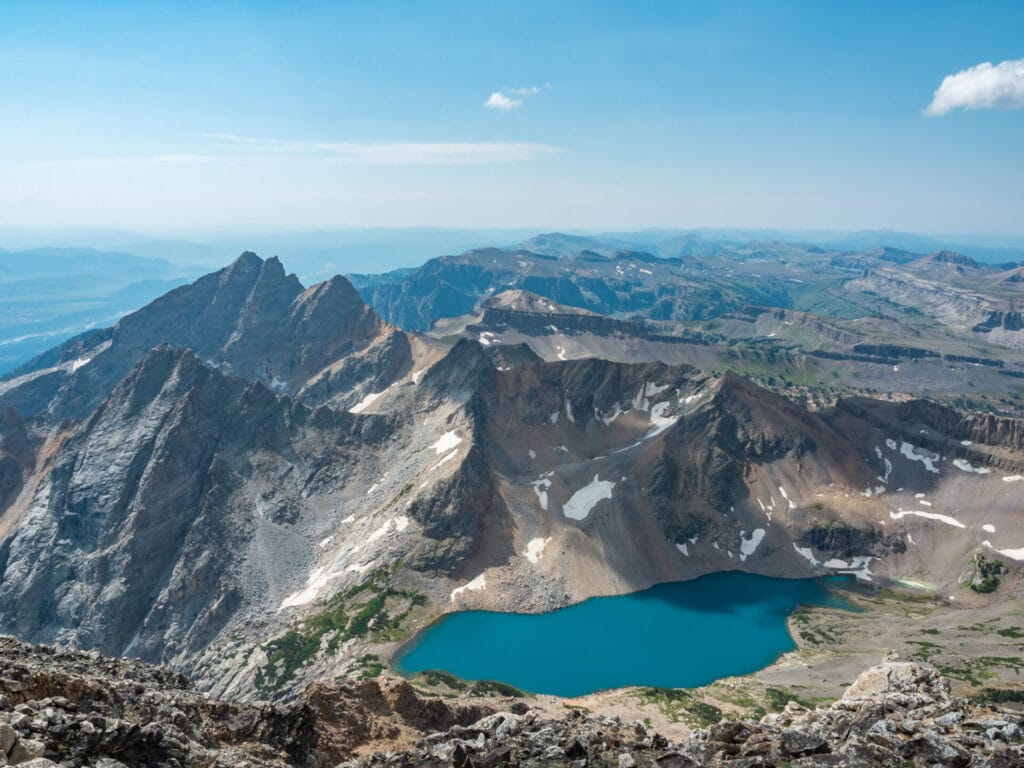
Allow 30min from the junction to reach the jaw-dropping milky blue shores of Delta Lake, laid perfectly beneath the Grand Teton. The water is glacial and correspondingly cold, but absolutely irresistible!


Delta Lake to Garnet Meadows (1hr)
Backtracking about 20min from Delta Lake to the junction with Garnet Meadows, head upwards on a rather level trail that wraps around the mountain and into Garnet Canyon.
Not long after, the trail terminates at a boulder field and you’ll need to hop and scramble your way through. There’s a faint climbers’ trail that brings you along a particularly expeditious route, but all roads lead to Garnet Meadows— stay on the right side of the river and keep heading up to the grassy basin under the prominent Middle Teton.
Having tackled a majority of the elevation gain en route to Delta Lake, a further 45min and you’ll be standing on gravel tent sites in the Garnet Meadows camping zone at 9,300ft. Bear boxes provide convenient food and toiletry storage overnight and during your climb the following day; fall asleep to the gentle rush of the river and prepare for an early start.
Day 5: Garnet Meadows to Middle & South Teton to Lupine Meadows
- Trail hours: 10hrs
- Distance: 10mi (16km)
- Elevation gain & loss: +4,660ft, -7,135ft (+1,420m, -2,175m)
- Exit: Lupine Meadows Trailhead
Garnet Meadows to the saddle between Middle & South Teton (2hrs)
This is a big day— but if you’re up for it, summiting Middle and South Teton is the perfect finale to this already epic itinerary. Expect a long day of steep trail, light scrambling (Class 2–4), and jaw-dropping summit views. Helmets on!!
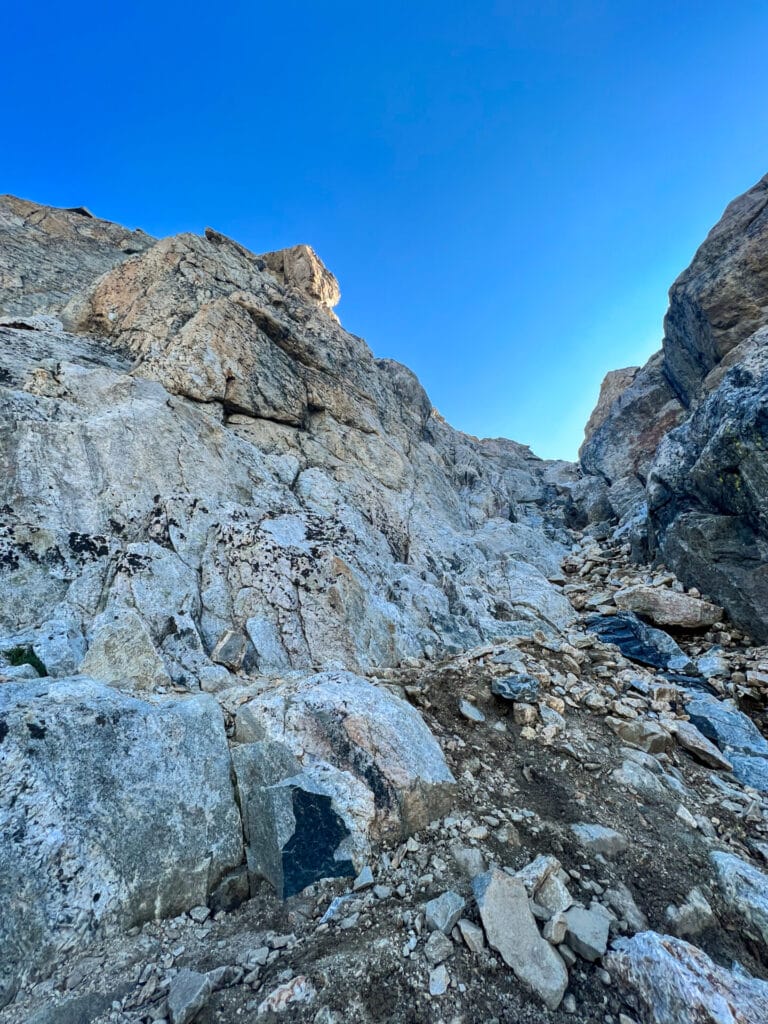
From Garnet Meadows, a climber’s path runs all the way to the saddle between Middle and South Teton, winding through the rocks and often providing a flatter, more stable option than boulder-hopping. Importantly, do NOT head up the snowy gully that appears more directly beneath the Middle Teton— stick to the rock gully just left of this.
After about 30min, pass a sign for the South Fork Garnet Canyon camping zone and continue upwards. The middle section of the ascent relaxes only slightly, but it’s an altogether unrelenting climb that should take quick scramblers around 2hrs to crest over the saddle.


Saddle to Middle Teton summit (1.5hrs) & back to Saddle (30min)
From the saddle, ascend right towards Middle Teton and follow a faint climbers’ path that hugs the right of the ridgeline— don’t go too high too soon or you’ll lose the route in the talus; if this happens, it’s worth scrambling back down to the cairned path, which runs much faster to the summit. I found the best path was just above (or through the uppermost section of) the snowfield.
After 15-20min from the saddle, reach a flat, grassy bench around 11,750ft with fantastic views and a clear sightline of the Southwest Couloir (narrow shaded gully just below the summit block in the photos below). Sparsely placed cairns will direct you approximately up the centre to connect with the rocky face of Middle Teton at the couloir; for reference, it took me about 50min to reach the couloir from the saddle.


As the couloir narrows around 12,300ft, you’ll start climbing through loose Class 3 terrain (a bit more solid if you stick far left) and eventually exit the couloir on your left to scramble to the ridge at ~12,650ft— if anything starts to feel like Class 5, you’ve gotten off the route and should backtrack immediately!
The final 150 vertical feet follows the ridge on solid rock (Class 3 and occasional Class 4) to reach the dramatic summit of Middle Teton at 12,804ft, about 30min after entering the couloir and just under 1.5hrs from the saddle. Enjoy the view for a few minutes and then retrace your steps carefully down to the saddle to reset for South Teton!

Saddle to South Teton summit (1hr) & back to Saddle (45min)
From the saddle between Middle and South Teton, the ascent to South Teton’s summit follows a slightly more straightforward yet still steep route, primarily involving Class 2-3 scrambling (a bit easier and with less exposure than Middle Teton).
Attempt to follow a faint path through the scree towards a notch in the summit ridgeline, shown in the photo below. The final approach to the summit involves a short, steep push of careful scrambling, but never gets too exposed; also unlike Middle Teton, the summit is quiet and you may enjoy it entirely to yourself, the spectacular views of Middle and Grand Teton layered in front of you.
From the saddle, it took me a little under 1hr to the summit and 45min to descend on the same route back to the saddle.


Saddle to Garnet Meadows (1.5hrs) & down to Lupine Meadows (2.5hrs)
Descend from the saddle following more or less the same ascent route, navigating the boulder field to return to camp, pack up your tent, and continue down the trail.
Finally, retrace your route through Garnet Meadows for about 8km to reach the end of the trail at Lupine Meadows Trailhead. And give yourself a high five— you just completed one of the most unique and rewarding routes in Grand Teton National Park!!
What to expect on the trail
Navigation
The Teton Crest Trail is well-maintained and signed, but for side trips and alternate routes (The Wall, Paintbrush Peak, Delta Lake, Middle/South Teton), it is essential to have a GPS.
Especially for those following my custom Teton Crest Trail route, the absolute BEST navigational resource is my custom Teton Crest Trail GPS map— packed with nearly 60 waypoints & crazy-detailed trail notes to help you navigate safely, on and off trail.
The map is available as a JSON & GPX download, and is compatible with all major GPS mapping devices/watches AND inexpensive GPS apps available on your smartphone, like CalTopo, Gaia GPS, and AllTrails. Let me help you plan & confidently navigate the Teton Crest Trail!
Terrain
The classic Teton Crest Trail is a well-maintained and straightforward backcountry route— expect packed dirt, rocky switchbacks, and some short sections of loose scree or exposed slopes, particularly around Paintbrush Divide and Mt Meek Pass. Sturdy hiking boots and trekking poles are a must, but there’s nothing strictly technical about the standard route!
If you’re scrambling to The Wall, Paintbrush Peak, and especially Middle and South Teton, however, you’ll be venturing into far more technical ground. These peaks involve steep talus, boulder-hopping, and exposed scrambling (up to low Class 4), so lightweight mountaineering boots and appropriate safety gear is essential. ⚠️ These routes are only suitable for those with prior scrambling/climbing experience, a solid head for exposure, and comfort on loose terrain!!
Bear safety in the Tetons
Grand Teton National Park is prime bear country, home to both black bears and grizzlies, so proper bear safety is absolutely essential on the Teton Crest Trail. You are required to carry a bear canister and/or a bear-proof sack for all food, toiletries, and scented items, and it’s important to cook and eat meals at least 100ft away from your tent.
Always store your canister in a secure location away from camp (preferably wedged under a log or tree) and never bring anything smelly into your tent. While bear encounters are rare, being proactive and respectful of wildlife keeps everyone (and the bears) safer!
Water access
Water is readily available along the Teton Crest Trail, with frequent access to alpine streams, lakes, and meltwater creeks throughout the route. Most major climbs and campsites are bracketed by reliable water sources, so you’ll rarely need to carry more than 1–2 litres at a time. I always use a lightweight 1L Katadyn filter to refill directly from streams near camp or mid-hike!
Packing list for the Teton Crest Trail
Check out my complete Teton Crest Trail packing list for specific gear recommendations, essential scramble safety gear, bear storage recommendations, and more!
TRAIL/SCRAMBLE GEAR
⭐️ backpack (50-75L): Osprey Aura AG 50 (women’s) / Atmos AG 65 (men’s)
⭐️ mountaineering boots: La Sportiva Trango Tech Leather GTX Boots (women’s) / (men’s)
⭐️ helmet: Black Diamond Half Dome Helmet (women’s) / (men’s)
⭐️ trekking poles: Black Diamond Trail Trekking Poles
SAFETY & NAVIGATION
⭐️ PLB/SOS: Garmin InReach Mini 2
⭐️ GPS: CalTopo app on mobile & Garmin fenix 7X Pro Watch
⭐️ First Aid Kit: Adventure Medical Kits Backpacker
⭐️ headlamp: Black Diamond Spot 400-R
⭐️ powerbank: VRURC Portable Charger with Built-in Cables, 10000mAh
⭐️ solar charger: BigBlue 28W Solar Charger
CAMPING GEAR
⭐️ backpacking tent: Nemo Dragonfly OSMO 3P (best for 2 people)
⭐️ sleeping bag: Sea to Summit Spark 0
⭐️ sleeping pad: Therm-a-Rest NeoAir XLite NXT Sleeping Pad
⭐️ camp pillow: Sea to Summit Aeros Premium
⭐️ camp shoes: Teva Original
⭐️ toiletries + bathroom bits
CAMP KITCHEN, WATER STORAGE & FOOD
⭐️ bear storage: Ursack Major Bear Sack + BearVault BV450 Jaunt Bear Canister
⭐️ camp stove (+ fuel): Jetboil Zip
⭐️ cup: Frontier Ultralight Collapsible Cup + spoon: Toaks Titanium Long Handle Spoon
⭐️ water filter: Katadyn BeFree 1.0L Water Filter
⭐️ water reservoir: HydraPak Seeker 2L
⭐️ 2x water bottles: Nalgene Wide Mouth
⭐️ electrolytes: Liquid IV
⭐️ freeze-dried meals + snacks: see my complete guide to backcountry food
TOP + BOTTOM LAYERS
⭐️ sports bra + underwear: Vuori AllTheFeels Bra
⭐️ wool base layer: Smartwool Classic Thermal Base Layer Top (women’s) / (men’s)
⭐️ heavyweight fleece mid-layer: Arc’teryx Kyanite Zip Neck Top (women’s) / Rho HV Zip Neck Top (men’s)
⭐️ synthetic insulation: Arc’teryx Atom Hoody (women’s) / (men’s)
⭐️ shell jacket: Arc’teryx Beta SL Jacket (women’s) / (men’s)
⭐️ hiking shorts: Vuori AllThe Feels Shorts
⭐️ fleece mid-layer bottoms: Arc’teryx Kyanite Base Layer Bottoms (women’s) / (men’s)
HEAD, HANDS & FEET
⭐️ sun hat: Arc’teryx Gamma 5-Panel Cap
⭐️ glacier glasses: Julbo Vermont
⭐️ neck gaiter: Buff Original
⭐️ lightweight hiking gloves: Outdoor Research Trail Mix Gloves (women’s) / (men’s)
⭐️ liner socks: Injinji Liner Crew
⭐️ boot socks: Darn Tough Hiker Micro Crew Cushion Socks (women’s) / (men’s)
Read more about the Teton Crest Trail
navigate confidently on & off the trail ->custom Teton Crest Trail GPS map!