• home
  • about me
  • latest
  • brooke beyond

  • destinations
    • WORLD MAP
    • Africa
      • Botswana
      • Morocco
      • Namibia
      • South Africa
      • Zambia
      • Zimbabwe
    • Asia
      • Cambodia
      • China
      • Indonesia
      • Laos
      • Thailand
      • Vietnam
    • Aus + NZ
      • Adelaide & South Australia
      • Brisbane & Queensland
      • Hobart & Tasmania
      • Melbourne & Victoria
      • Perth & Western Australia
      • Sydney & New South Wales
      • New Zealand
    • Europe
      • Austria
      • Czech Republic
      • France
      • Germany
      • Hungary
      • Iceland
      • Ireland
      • Italy
      • Netherlands
      • Poland
      • Slovenia
      • Spain
      • Switzerland
      • UK
    • Latin America
      • Mexico
        • all Mexico
        • Baja Peninsula
      • Argentina
      • Bolivia
      • Brazil
      • Chile
      • Colombia
      • Ecuador
      • Panama
      • Peru
    • USA
      • Arizona
      • California
      • Colorado
      • Hawaii
      • Idaho
      • Montana
      • Nevada
      • New Mexico
      • Oregon
      • Utah
      • Washington
      • Wyoming
  • hiking guides

brooke beyond

Vanlife essentials packing list
USA

Vanlife packing list: kitchen essentials, storage solutions & the best camp set-up

November 23, 2021

Imagine living in a 60sqft. space that needs to function as your kitchen, bedroom, bathroom, office, AND vehicle all at once, and you’ll immediately understand why packing is so incredibly important for vanlife. It can often feel like an impossible task to balance the need for compactness and multi-functionality with energy efficiency and robustness, but it’s ultimately the difference between having a comfortable, liveable space and “sleeping in your car”.

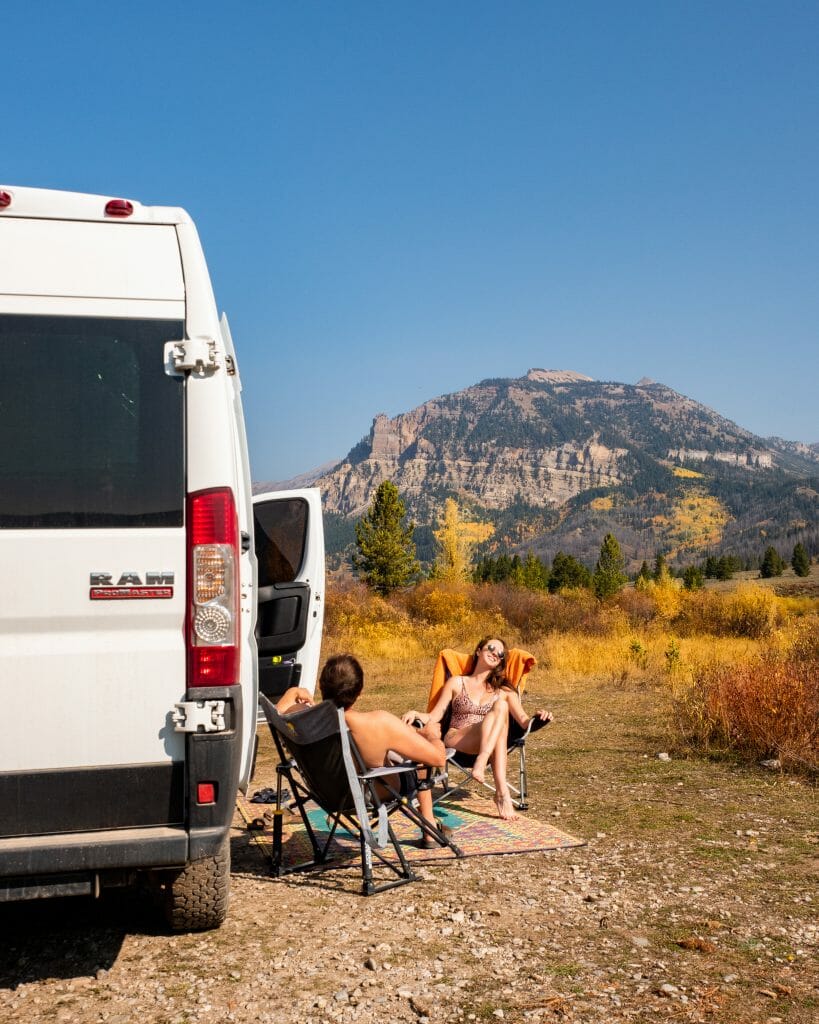
My partner Dan and I have spent almost a year living in our 159″ Dodge RAM Promaster van (so far!) and have dialled in our home with all of the best kitchen essentials, storage solutions, and outdoor camp equipment— we’ve figured out how to maximise our space through better organisation, cook huge meals with only a small kitchen, and feel at-home anywhere we park.

Whether you’re moving into your van full-time or preparing for a cross-country road trip in a rented camper, this vanlife packing list contains absolutely everything you need to turn your vehicle into the perfect tiny home on wheels!

What's in this travel guide

    • Packing tips for vanlife
  • 1 | Kitchen essentials for vanlife 
  • 2 | Cleaning essentials for vanlife
  • 3 | Bedroom essentials for vanlife 
  • 4 | Clothing organisation & closet essentials for vanlife
  • 5 | Bathroom & shower essentials for vanlife 
  • 6 | Functional décor for vanlife
  • 7 | Garage & outdoor camp essentials for vanlife
  • 8 | Maintenance & safety items for vanlife 
  • 9 | Travel essentials for vanlife

This post may contain affiliate links, which means that if you purchase something I’ve recommended, I’ll get a small commission at no additional cost to you. As always, I only promote products that I personally use & love!

vanlife
I love having a well-stocked, organised kitchen– even in our little van

Packing tips for vanlife

There are a number of significant (and often at-odds) considerations for how you pack & stock your van, and we’re constantly inventing better ways to do things that conserve space and power without sacrificing functionality, durability, or aesthetics. 

We’ve returned hundreds of dollars of items to Amazon after a single day when they just didn’t fit like we thought they would, and broken several dozen more that we didn’t foresee as problematic— but all that trial and error now means we have a van that feels far more like a home than a car, one we love hanging out in at night and that we’re proud to show people! 

Here’s what we’ve learned:

  • Smaller isn’t always better. Space is at a premium, so smaller items can be a great way to maximise space, BUT smaller can sometimes mean flimsy and translates to major sacrifices on functionality. For example, the smallest 3L Instant Pot is almost unusable for cooking, but our 6L makes as many as 8 meals in a single batch and leaves us with a fridge full of leftovers! It takes up more space in our bench, but we use it ALL the time and there’s no way we’d be happy with the smaller size. 
  • Conserve power for the things that matter most. Although it may be tempting to bring a high-wattage blender or hair dryer in the van (they’re so small, after all!), these kind of electronics guzzle power and will drain your battery quicker than you can imagine. Instead, we choose to save power for things like our Instant Pot and our very low-watt space heater (which both still use a fair bit of electricity, but are more important to us for comfortable living). It’s worth considering what you personally want to prioritise power for and then making sacrifices in other areas.
  • Organisation is king. It only takes a few items out of place to make our van feel like the aftermath of a terrible hurricane, so don’t underestimate the importance of bins and baskets for every shelf, drawer, and cabinet in your van. Storage containers give things a proper place to go so the entire van feels larger, but also prevent things from jumbling or even breaking while driving.
  • And on that note, movement is the enemy. The more you can do to secure items within your van (whether it be organising the contents of a drawer into dividers, tacking your candle directly onto the benchtop with Museum Putty, or securing wall hangings at half a dozen points), the less damage you’ll sustain to the interior of your van after a bumpy drive down a dirt road. Some casualties seem to be an inevitable part of the learning process, but obviously it’s always nice to arrive at camp and find everything exactly as you left it.
  • Less is more. It may seem obvious, but you probably won’t be able to fit the entire contents of your apartment into a van. I’m naturally a minimalist (I moved to the US with just 2 suitcases a few months before we bought the van), but Dan had a harder time narrowing down which shoes and jackets and personal items to bring. Ultimately, we’ve both discovered just how little you need to enjoy vanlife and have already moved a bunch of stuff out of our van to free up living space and storage for items that are more important than spare bath towels or that fifth pair of pants.
vanlife

1 | Kitchen essentials for vanlife 

Before moving into our van, I feared how I’d be able to prepare meals in such a small space, but honestly, I’ve cooked better in this kitchen than ever before!

By organising our drawers and cabinets carefully, choosing cookwear that serves multiple purposes, and keeping clutter off the benchtop, our van kitchen feels like a restaurant-quality prep space!

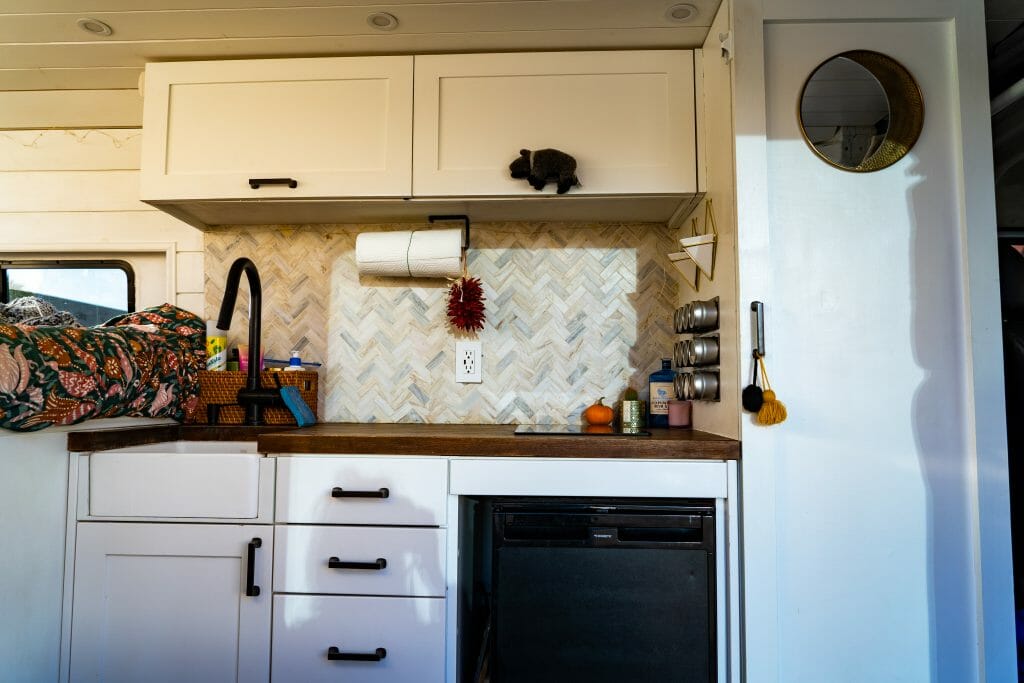
About our kitchen: We have a 4.5ft x 2ft butcher block bench in our kitchen, which has a 14″ x 14″ x 4″ sink cut out of the wood and a single induction burner on the opposite end that’s approximately the same size.

Our sink has both cold and hot water (piped from the 45gal fresh water reservoir & 5gal hot water heater in our garage), as well as a 5L grey tank that collects under the bench. We also have a Dometic CRX-65 12v fridge/freezer under the induction plate and the remaining under-counter space is occupied by drawers that hold all of our dishes, cookwear, and cleaning supplies. Above the counter, we also have 2 cabinets (roughly 2.2ft x 1.2ft x 1.1ft each) that we use for pantry storage.

  • Instant Pot | without a doubt, this is the most versatile, useful item in our entire kitchen, and despite concerns on my part that this new-fangled gadget would make everything harder (I even bought a wok initially, believing I wouldn’t like the Instant Pot!), I truthfully couldn’t live without this now and we’ve become pretty hardcore Instant Pot evangelists, telling everyone we meet about how AMAZING this thing is! We have the 6L Instant Pot and it is large enough to make up to 8 meals (ie. dinner for me and Dan on the first night & then 2-3 subsequent nights of left-overs), but the best thing about the IP is how it replaces every other piece of cookwear in our van— you can use it as a skillet to saute or heat up food, as a pot to boil water, a steamer for veggies, a rice cooker— and then there’s only a single item to be washed and cleaned. I can even cook spaghetti in this thing by throwing in all the raw meat, vegetables, sauce, and UNCOOKED pasta, and within 15min, we have a full meal. Can you tell how much we love our Instant Pot?! My only additional piece of advice would be to purchase the non-stick inner on Amazon and ditch the stainless steal it comes with, since the non-stick is WAY easier to clean.
  • Skillet | although I was initially fearful that a single 10″ skillet wouldn’t be enough to recreate my favourite recipes, I’ve ended up using the Instant Pot for all of our cooking and really only use the skillet for reheating or the occasional toasting of quesadillas (& now I feel like 10″ is the perfect size!)
  • Magic bullet | this tiny blender is the perfect low-wattage (and easily storable) option for making smoothies in the van, which is one of our brekky favourites
  • Shatter-proof bowls & plates | we have a set of 4x large plates, 4x small plates & 2x bowls, and also like to supplement with paper bowls & plates when we don’t have sufficient water to wash dishes; this is a great set on Amazon
  • Drinking cups + mugs | we have several mason jars and a few beer-can-style glasses from a brewery, and surprisingly most have remained intact even during bumpy drives due to tight storage in the kitchen drawers; we also have a ceramic mug and an insulated mug each for coffee/tea in the morning
  • Ice cube tray | these small silicone ice trays fit perfectly into our Dometic fridge!
Dividers in kitchen drawers are essential!
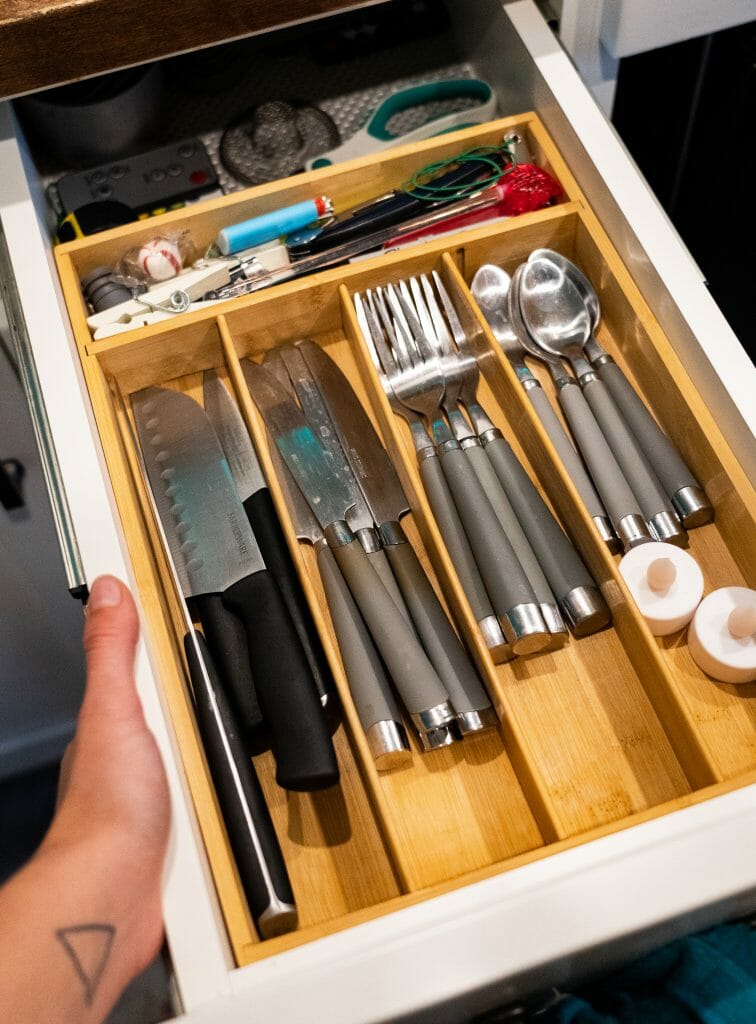
  • Cutlery + knives + organiser | a few sharp knives & a basic set (4x each of forks, spoons, knives) of cutlery has been more than enough for us living in the van; we used Museum Putty to stick our wooden cultery organiser to the bottom of the drawer so it doesn’t slide while we’re driving
  • Everyday kitchen tools | we keep a bottle opener, potato peeler, zoodler, scissors & other odds and bobs in our top kitchen drawer; the Dollar Store is an excellent place to find some of these tools on the cheap!
  • Cutting board | choose a plastic board for easier cleaning with limited water
  • Over-sink dish rack | this rollable wire rack is amazingly useful as a safe surface for hot pans after I take them off the burner and we even unfurl it every night to keep our blankets from falling into the sink (we’ve hardly used it as a drying rack, but it also does that!)
  • Tupperware, ziplock bags & aluminium foil | one of the best ways to save money on the road is by cooking in the van, so we always try to make large batches of curry or pasta & refrigerate the leftovers for our next meals; we have a 5-piece set tupperware set from this company on Amazon and love them
Pantry storage bins
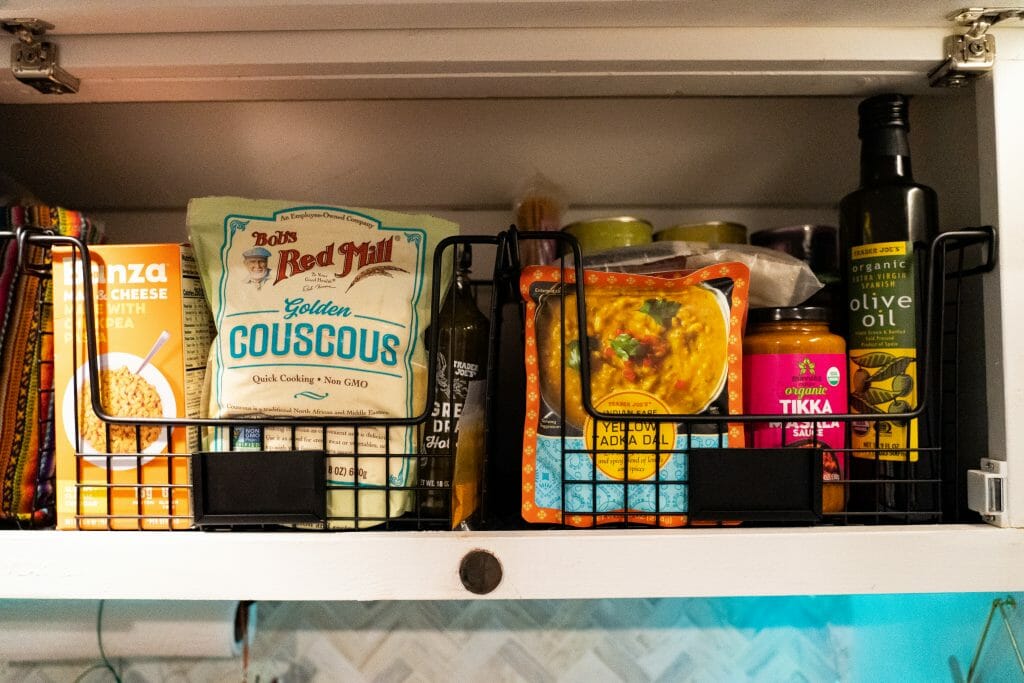
  • Pantry organisers | we searched high and low for the perfect baskets for our upper kitchen cabinets, which is where we store the majority of our food, and finally found these awesome pantry organisers from The Container Store; we also bought cheap placemats from the Dollar Store to line our cabinets and prevent the metal organisers from damaging the wood
We love having this bin behind our sink for extra counter storage
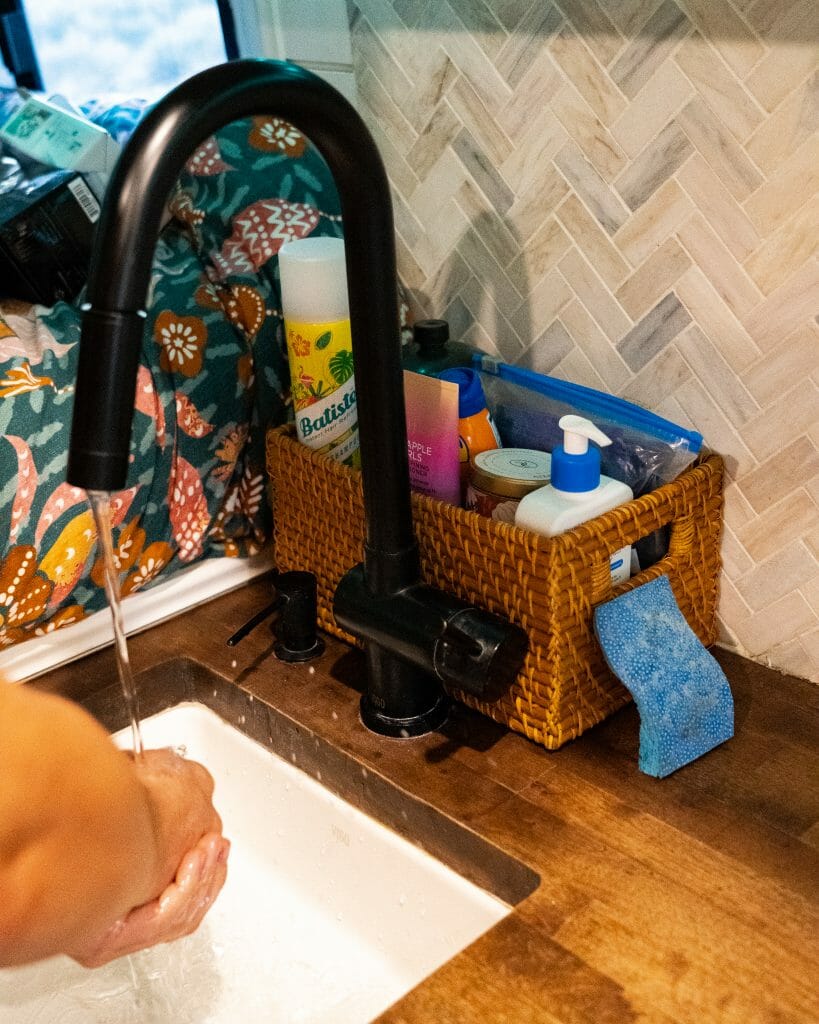
  • Benchtop storage basket | we recently added this small woven storage bin from The Container Store to our countertop and it fits perfectly behind our sink to hold random odds and ends (like spare propane for our heater, room spray, and my dry shampoo that literally doesn’t fit anywhere else)
This spice rack has held on during every bumpy Forest Service road!
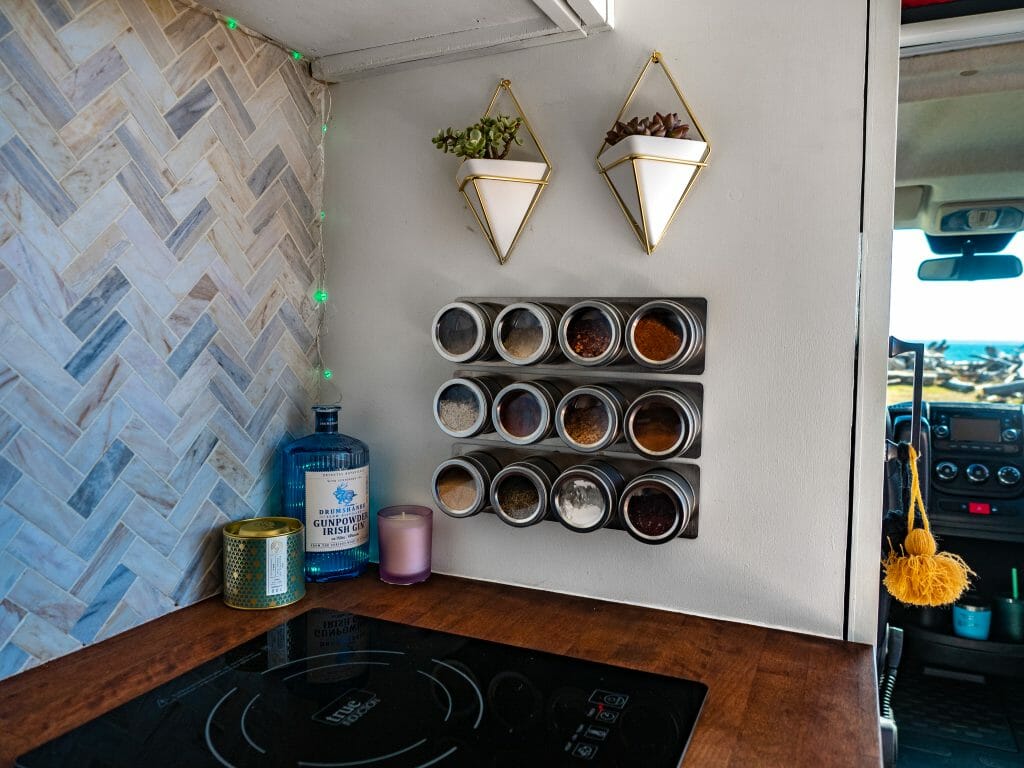
  • Spice rack | a magnetic spice rack that attaches to the wall or fridge is absolutely essential to maximise space, and this is the best magnetic spice rack out there— in 9 months on the road, we’ve never had a single jar fall off while driving (and we’ve had plenty of other casualties on bumpy Forest Service roads, so that’s saying a lot!)
  • Dish towels | we purchased 2 inexpensive dish towels from the Dollar Store and they’ve held up exceptionally well!
  • Under-sink organiser | designed to be used in a bathroom, we adhered this super-handy organiser in the cabinet under our kitchen sink to hold extra sponges, plastic bags, etc

Shop these items & more from my Amazon store: kitchen essentials for vanlife

vanlife essentials packing list

2 | Cleaning essentials for vanlife

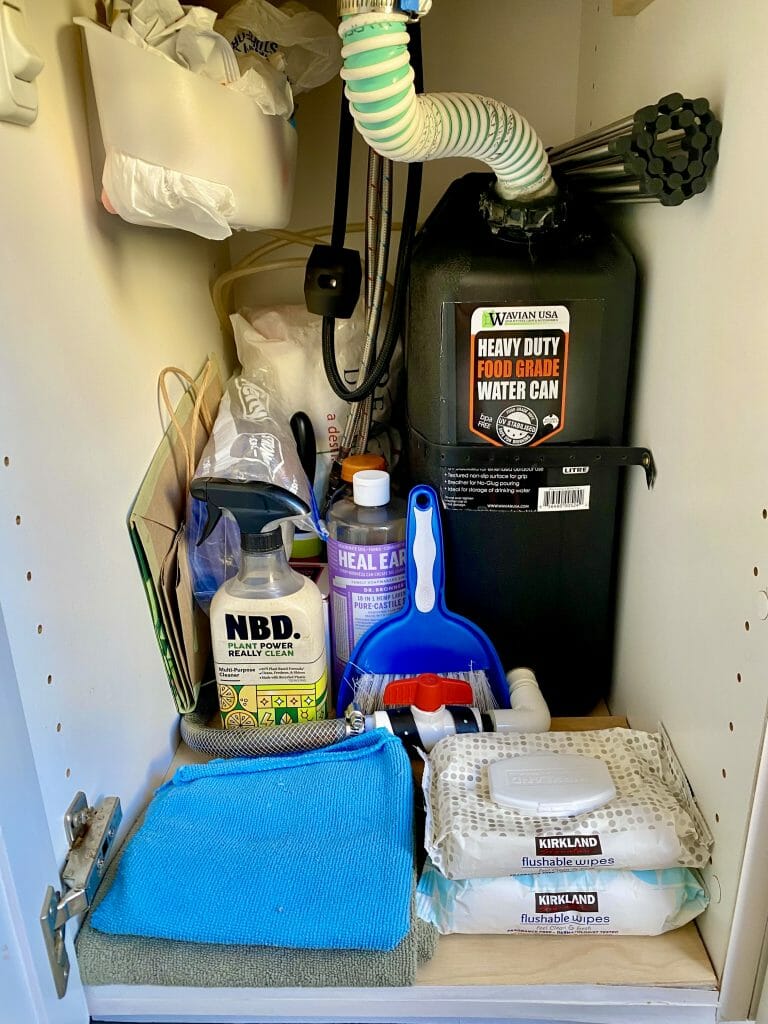
Cleaning in a van is also slightly different than in a house, since we don’t have space for a full range of products and we also have to be very cautious about what is washed down the sink (water & biodegradable soap only!). For reference, we store a majority of our cleaning supplies under the sink in our kitchen for easy access.

  • Dr Bronner’s | this biodegradable castile soap can be used as everything from dish soap to body soap and shampoo, and it works excellent in our kitchen; we dilute it with water (usually 2:1) to prevent our soap dispenser from clogging up and use it to scrub all of our dishes, clean our sink, and even mop our floor
  • Paper towels | as much as we’d like to be paper-free in the van, we use paper towels A LOT, particularly for wiping out all of our dishes and cookwear before washing in the sink to prevent grease & foodscraps from collecting in our pipes
  • Sponge | essential for washing dishes; we always buy a multi-pack of sponges and keep spares under the sink
  • Magic eraser | nothing beats the original magic eraser for cleaning all the white cabinetry and walls in our van
  • White vinegar & salt | of all the products we’ve used to clean our composting toilet, this simple solution has worked the best to cut odour and remove stains
  • Small broom & dustpan | essential for keeping your kitchen floor clean (it gets dirty FAST) since it’s such a small, high-traffic area); ours is from the Dollar Store, but this is another small option on Amazon
  • Cordless handheld vacuum | to supplement our sweeping efforts, we’ve also found our small cordless vacuum to be invaluable in keeping both the cab of the van and our home clean (Dan also loves to vacuum up bugs with this thing and it’s become a real passion project)
  • Laundry detergent + dryer sheets | buy a regular-sized detergent bottle and dryer sheet box to avoid paying more at the laundromat; after the detergent has been used a few times, it’s usually able to fit into a large gatorade bottle, which is infinitely easier to store under the sink

Shop these items & more from my Amazon store: cleaning essentials for vanlife

3 | Bedroom essentials for vanlife 

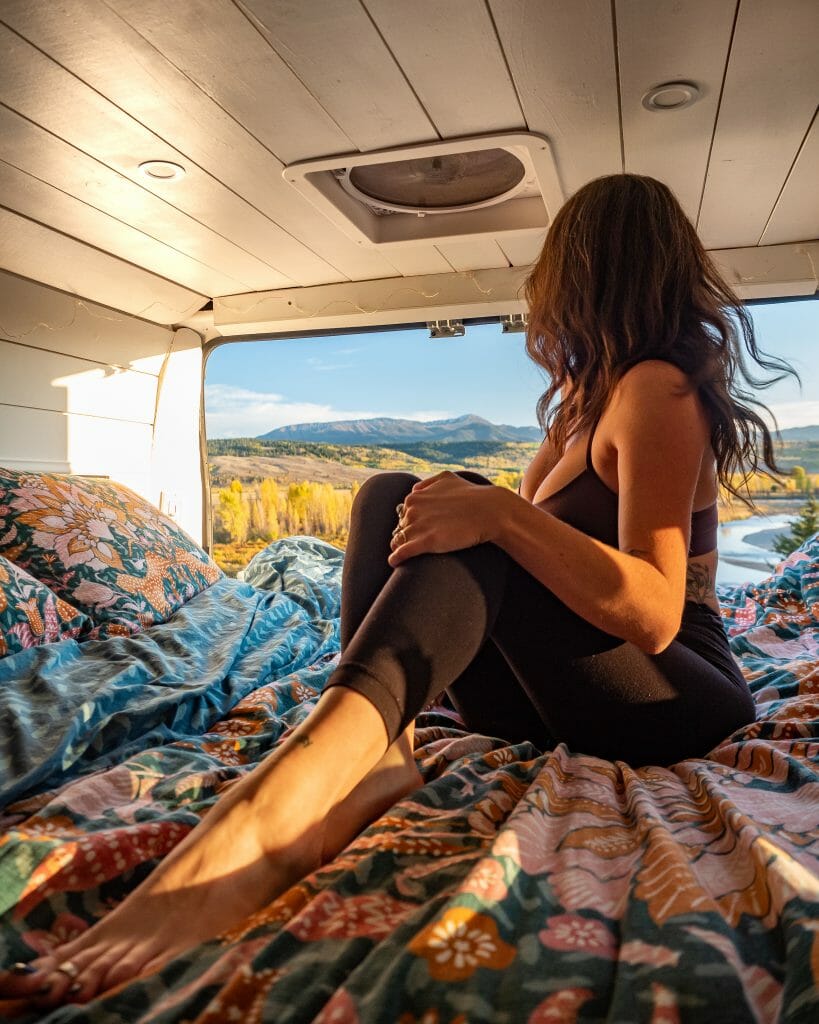
If the kitchen was my greatest concern, the bedroom was Dan’s— at 6ft tall & with some pretty significant sleep issues, our bedroom set-up had the ability to make or break vanlife for him.

Simply having a queen-size mattress assuaged the worst of our worries, but creating a comfortable, cozy space also enabled us to sleep as well in our van as we do in any house.

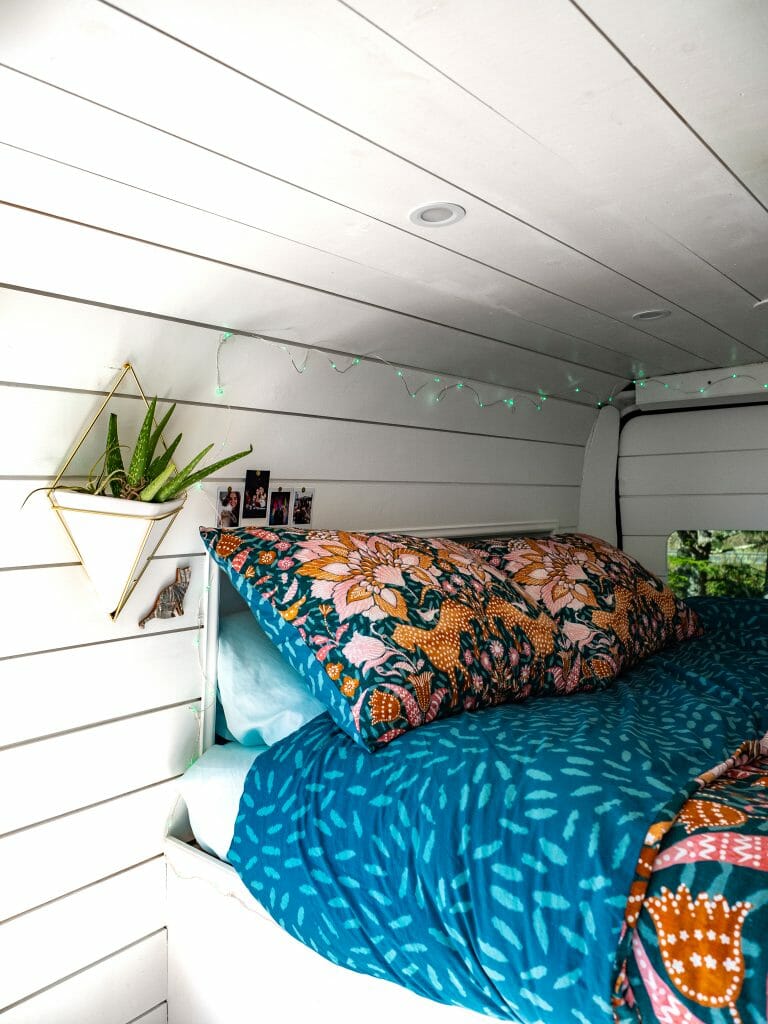
About our bedroom: Next to the kitchen, we have a platform bed that rises about 3.5ft off the ground. Our memory foam mattress is a standard queen (60″ x 80″), but our van is only 76″ wide including the 3.5″-deep cut-outs at the head and foot, so it feels somewhere between an RV queen and a proper queen bed when you’re really in it.

We also have a single sliding window (~ 33″ x 10″) in the cut-out at our feet and 2 windows on the rear doors, the latter of which we keep covered 100% of the time with sunshades for privacy and insulation.

  • RV sheets | although our mattress is technically a queen, it’s crammed into a slightly smaller space (as explained above) and therefore we find that RV-queen sheets, which are made to be a few inches shorter than a standard queen, are absolutely perfect; these sheets from Amazon are incredibly comfortable and we love that they have elastic strips at the corners to help the fitted sheet stay on
Vanlife
  • Blankets & duvet | we keep several blankets and a thick duvet on our bed throughout most of the year, just because we both prefer the feeling of being super snug in bed; our duvet cover is from Anthropologie and, although expensive, it hasn’t shown a single speck of dirt or sign of wear
  • Pillows | since you’ll likely be using your bed for more than just sleeping (e.g. reading, researching places to go, watching Netflix, and often as additional seating when hanging out), I’d recommend a minimum of 4 pillows; we have these Sealy memory foam pillows for sleeping and this firmer set of shredded memory foam pillows are great for propping yourself up in bed and getting comfy
A cozy throw blanket is essential for cold climates!
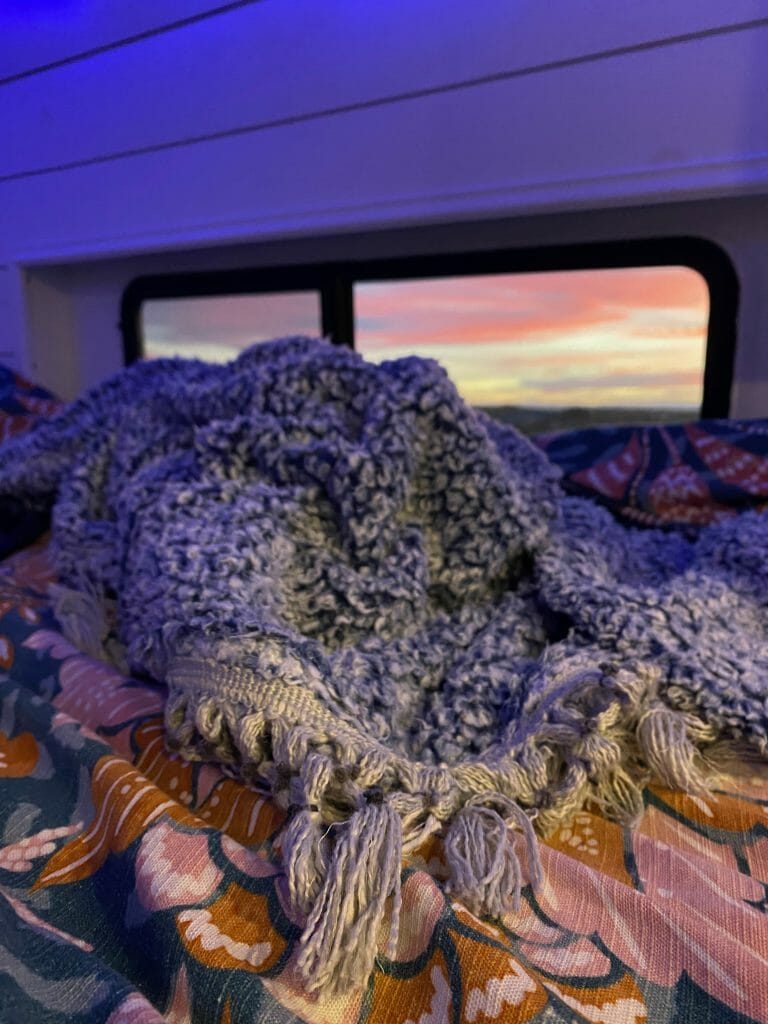
  • Throw blanket | I can’t get properly cozy in the winter without a fuzzy blanket, which I use on our bench seat while working, outside while watching the sunset, and even as an extra layer on super cold nights
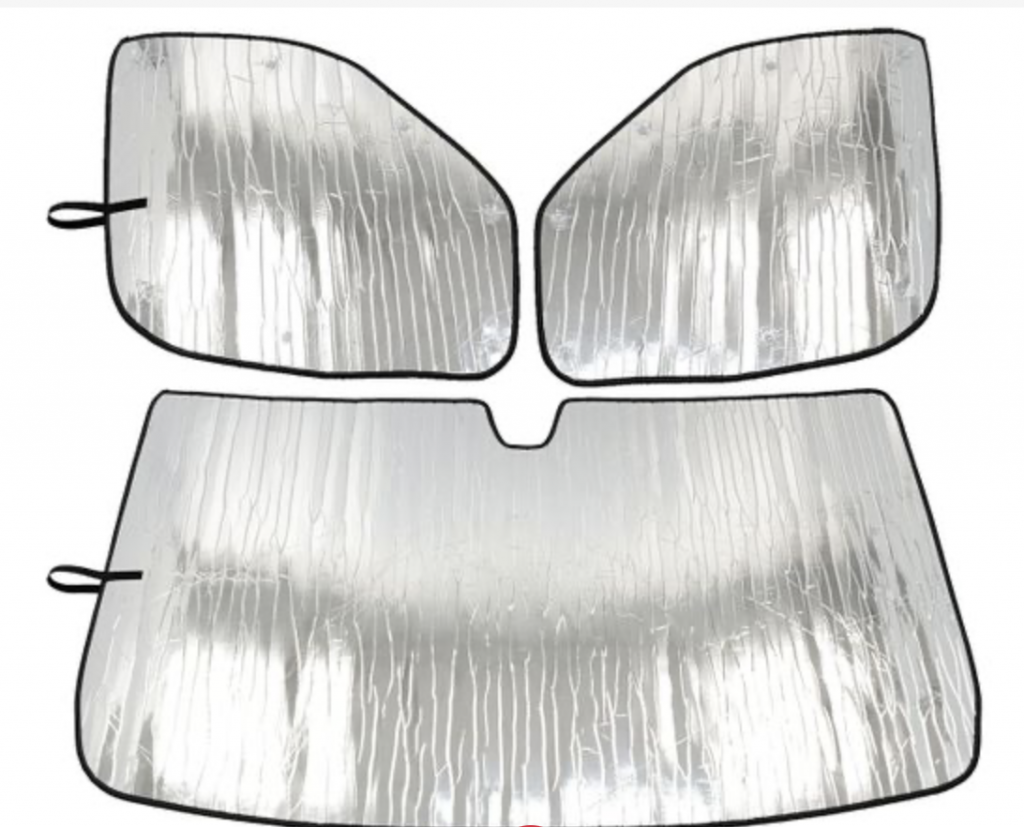
  • Window covers | not limited just to the windows in our “bedroom”, we use these sunshades from the Heatshield Store on our dash, passenger windows, and rear-door windows for privacy, to block out light, and to insulate against cold or hot temps outside; a few suction cups popped off after a year of constant rolling and un-rolling (since we store the shades in the cubby space above our van’s cab when not in use), but the company replaced them all for free!
  • Blackout curtain | we have a curtain rod and thick blackout/noise-deadening curtains that separate the cab from our living space, and in our opinion, this is one of the most essential items for bedroom comfort. We really like being able to pass between the cab and “our house” freely, but the curtain makes it feel as if we’re entirely closed off from the front of the vehicle, which is awesome for privacy, and it’s not uncommon for the front of the cab to be as much as 20-degrees cooler or hotter than the rest of the van (that’s how well these things insulate!)
  • Mini blackout curtain | just recently, we installed blackout curtain valances (typically 12-18″ decorative drapery used above full-length curtains for aesthetics) to cover the small sliding window at the foot of our bed for additional privacy; these are awesome because they are already the perfect size and can be hung on a tension-rod (an awesome no-drill curtain rod solution for small windows)
  • Bluetooth speaker | no home is complete without a kick-ass stereo system and this tiny Marshall Stockwell II speaker easily outperforms larger speakers; I’ve been a die-hard Marshall fan for the last decade, so I was pretty excited to get a smaller version of the speaker I already owned for our van!
  • Extra-long USB cables| depending on your van set-up, you may want to invest in an extra-long USB cable to reach from the charging point to the far corners of the bed; these Charge Cord cables for iPhone & Android are incredibly robust and also super cute
Zero Breeze
Zero Breeze AC unit below our bed in the garage
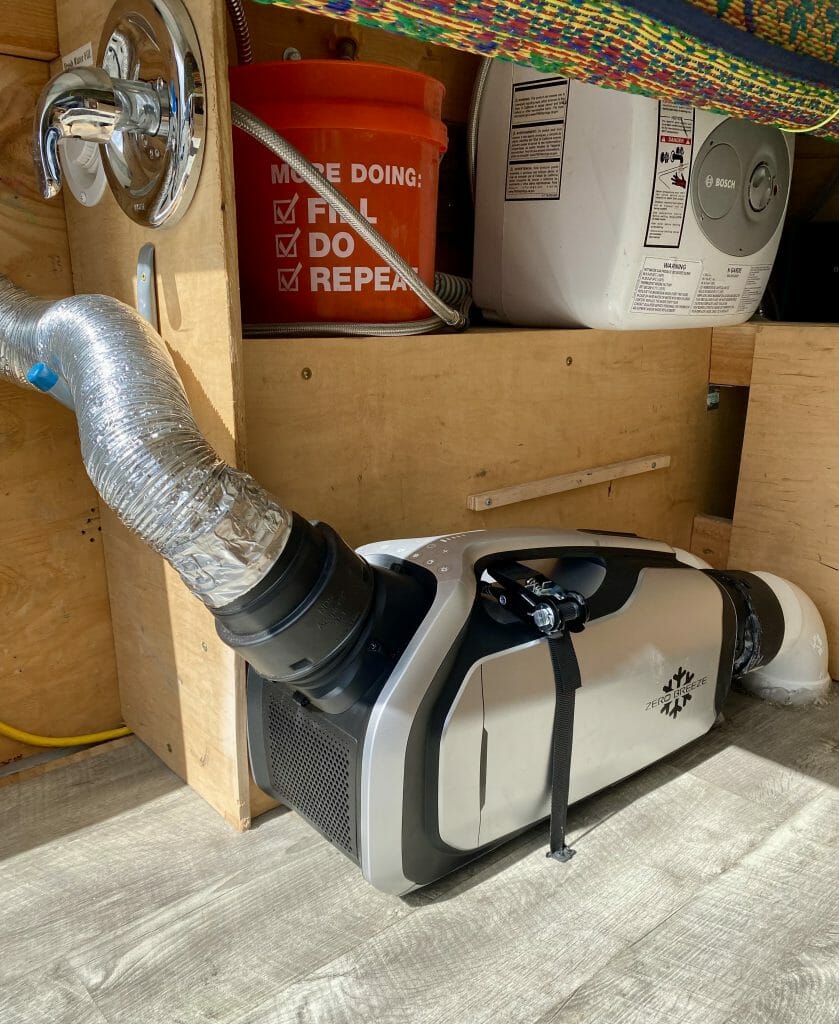
  • Zero Breeze AC unit | with the aid of an electrician, we installed a ZeroBreeze Mark II AC unit in our garage by drilling circular holes into the floor of our van for the intake air & heat exhaust and then piping the cold output through a side panel towards the top of the bed. This is the smallest, most energy-efficient AC unit available and costs a fraction of a rooftop AC unit (which also compromises your stealth factor for urban camping), and coupled with our MaxxAir fan above the bed and the window at our feet, we are cool even in the hottest, most humid weather!

Shop these items & more from my Amazon store: bedroom essentials & clothing storage for vanlife

vanlife

4 | Clothing organisation & closet essentials for vanlife

Whether you have a closet, cabinets, or even just a few shelves for your clothing storage, baskets and bins are absolutely essential for keeping things neat and organised. We’ve also come up with some pretty crafty solutions for storing things like bulky jackets and nice hats!

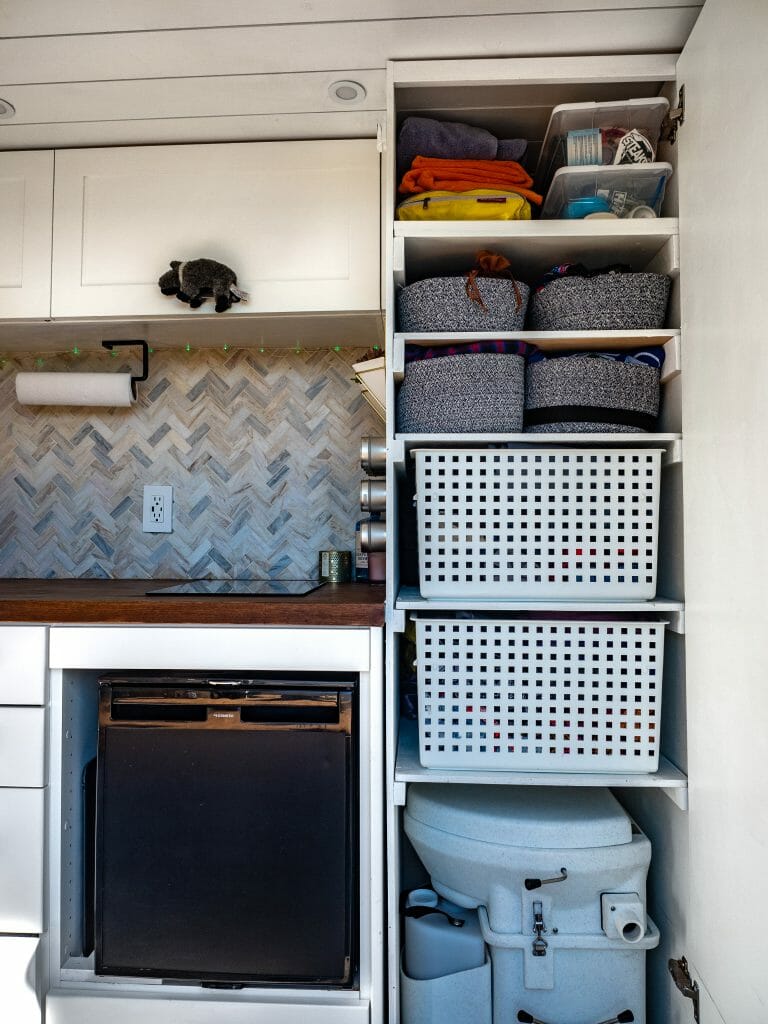
About our closet: To the right of our kitchen, we have a closet with 2 large shelves (11″ tall) & 2 small shelves (7″ tall) that we use for our clothes. Above this, there’s a large shelf (1ft tall) that holds our hygiene kits, first aid supplies, and towels, and at the very base of the closet is our toilet.

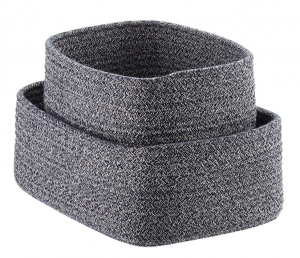
  • Small clothing storage bins | we have several of these beautiful fabric storage baskets from The Container Store (4x small for me, 2x medium for Dan), and I use my bins for underwear/socks; bras/swimsuits; tank-tops; and t-shirts
  • Large clothing storage bins | we each have 1 large plastic bin approximately 16″ x 23″ x 11″, which I use to store my shorts/skirts/dresses/pants & jumpers/jackets; we already owned these bins, but here’s something similar from Amazon!
S-hooks are perfect for hanging hats on jackets on a curtain rod!
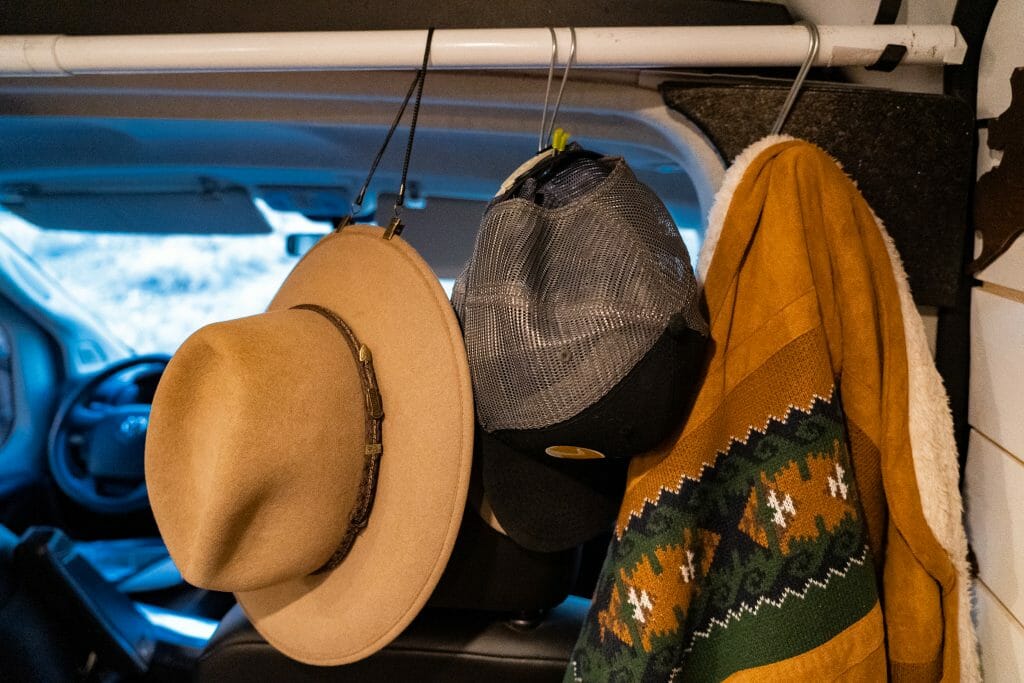
  • Jacket & hat hooks | I bought 4 cheap metal S-hooks and capped them with plastic tubing from the hardware store, which we hang on the end of our curtain rod as jacket hooks for our bulkier outerwear (down jackets, etc) and for hats; here are similar s-hooks from Amazon that already have plastic caps (which help protect your jackets from being punctured)
Vanlife essentials packing list
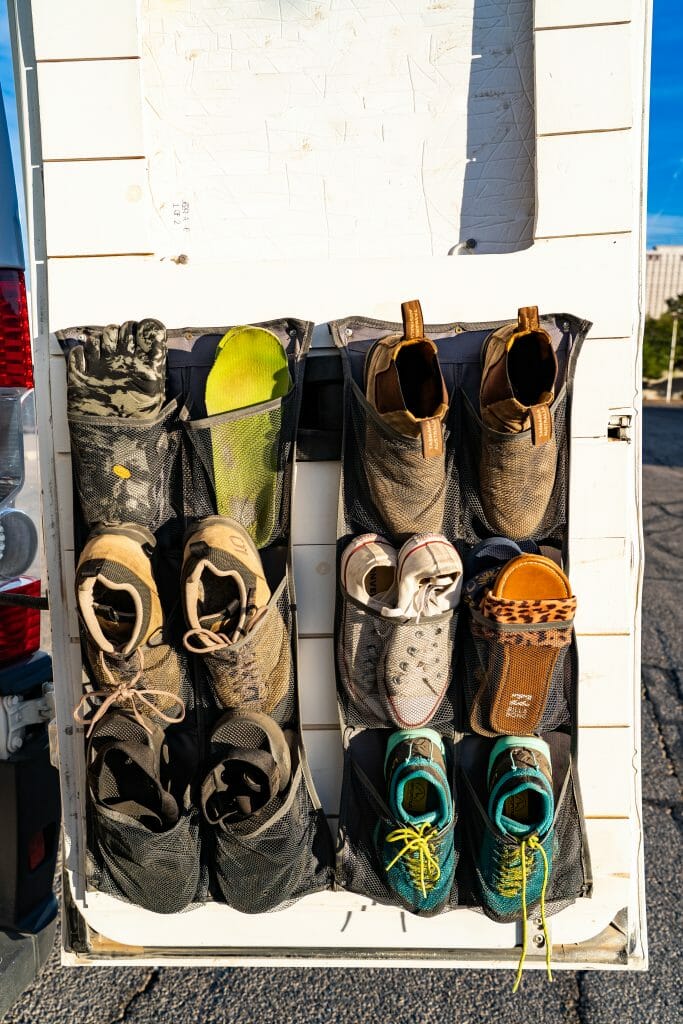
  • Hanging shoe rack | we nailed 2 of these hanging shoe racks from Amazon onto one of our van’s rear doors and it works amazingly well for storing all of our shoes (our mountaineering boots & hiking boots are stored just in front of our storage bins since they’re too heavy/large for the rack, but everything else fits perfectly)
  • Laundry sack | we use a large sleeping bag sack for our laundry (durable, very large & inexpensive!) and store it under our bench seat, fully sealed, to prevent odour from stinky hiking clothes

Shop these items & more from my Amazon store: bedroom essentials & clothing storage for vanlife

vanlife bedroom bathroom mirror
I love this crescent moon mirror on our closet!

5 | Bathroom & shower essentials for vanlife 

Almost as important as a functional kitchen and comfortable bedroom is a well-organised space for getting ready in the morning/cleaning up in the evening! Wherever your van’s “bathroom” may be, here are all the essentials to consider.

About our bathroom & shower: Although we don’t have a designated bathroom space in our van like some of the larger models can accommodate, we do have a Nature’s Head Composting Toilet that slides out from under the base of our closet (this is piped to the outside of our van with a low-energy fan constantly running to prevent smell). It is quite honestly the best composting toilet ever (we use 1.5 bricks of this coconut coir to 2.5L of water every 3 weeks) and worth every single cent to have a clean place to pee in the middle of a sub-zero night camped in the mountains.

We also have a hot-water shower out the back of our van; the showerhead clips into our door and we can swivel this around to wash without getting the contents of our garage wet.

  • Nature’s Head Composting Toilet | we have nothing but love for this AMAZING composting toilet, which we use for all bathroom situations (need to empty liquids every 1-3 days & solids every 3 weeks, directly into the trash or into a hole in the ground since it’s entirely composted!). If $1000 seems pricey for a toilet, just know it’s genuinely the best of its kind, their customer service is excellent, and you’ll be happy every single day that you have this.
  • Coconut coir | for your composting toilet to break down solid waste, you’ll need to fill the base with peat moss or coconut coir (and some water); we’ve tried several brands and proportions, and finally determined that THIS is the absolute best coconut coir for our toilet at the exact ratio of 1.5 bricks to 2.5L of water
  • Wipes & TP | stay extra hygienic in the van with flushable wipes (although, I definitely wouldn’t recommend putting these in your composting toilet)
  • Hygiene kits | we each store all of our personal hygiene items like toothpaste, lotion, contacts & vitamins in a small 6qt plastic bin and we love how easy it is to transport from the van into various campground showers or hot spring bathrooms for our intermittent deep-clean; plus, our exact bins are only $1.50 at Target!
  • Small mirror | our mirror from Urban Outfitters is no longer available, but this is a similarly sized mirror on Amazon that can be hung from Command strips so you have a small mirror for getting ready in the morning
vanlife shower promaster
I always enjoy a shower out the back of our van!
  • Microfibre towels | we each have a microfibre towel for showering out the back of the van or in campground bathrooms
  • Hand towels | when weather/time/water conservation doesn’t allow us to shower out the back of the van & we aren’t near an indoor shower, we use thick handtowels to “sponge bathe” inside the van; we each have one of these for our face/body, as well as one of these smaller towels to use on dirty areas like our feet
  • Bamboo shower mat | when showering out the back of our van, we stand on this bamboo shower mat to keep our feet clean
  • Dr Bronner’s soap | we use the same biodegradable Dr Bronner’s soap from the kitchen as a body wash when showering outside our van, since this is environmentally-friendly (in biologically sensitive areas with lots of plants and wildlife, though, we don’t use soap at all and just wash with hot water out the back of the van); you can get a massive container of this stuff and store it in the back to refill both your personal soap bottle and the soap dispenser in the kitchen
  • Shampoo bar | when I do have the luxury of showering indoors (and can use non-biodegradable products), I love these Lush shampoo bars and have been using them for years on all my travels; not only are they packaging-free and super compact (very van-friendly!), they also last FOREVER and leave my hair super soft!
  • Dry shampoo | keep your hair fresh between showers (while still conserving water!)

Shop these items & more from my Amazon store: bathroom & shower essentials for vanlife

vanlife

6 | Functional décor for vanlife

Putting up decorative touches around the van is a major part of making the space feel like home, but it’s also a lot more challenging than styling a traditional home, since you’ll need to account for all the shaking and bumping that happens on rougher roads (which are everywhere, you’d be surprised!).

Here are some awesome solutions we’ve found for decorating your van & then adhering all those decorations firmly to the wall/counter to prevent damage in transit.

  • Museum Putty | originally used by art museums to protect fragile pieces during earthquakes or even from the wayward elbow of a tourist, Museum Putty is amazing for sticking candles, vases, baskets, organisers, literally anything to your kitchen counter or even in your drawers to prevent movement while driving; we’ve had several glass items tacked onto the bench since we moved in and they haven’t budged so much as a single centimetre all year!
  • Command strips & hooks | we used Command hooks in our kitchen to hang the dish towel and trash & recycling bags (in the cabinet under our sink); above our bed to hang fairy lights; to mount our mirror to the closet; and tons of things in between; these are absolutely invaluable and we like to keep several sizes on hand for emergency repairs (grab this variety pack from Amazon)
  • Fairy lights | after testing no fewer than 3 brands of cheap fairy lights from Amazon, we agree these USB-powered, remote-control, multi-coloured fairy lights are the absolute best; we used these clear Command hooks to string them around our bed
Vanlife essentials packing list
This hanging planter is perfect for our agave plant
  • Hanging planters | we have 2 small hanging planters above the spice rack in our kitchen and a large plant holder of the same shape on the opposite wall; the best way to attach these safely for plants is to use a metal hook at the top and a flat bracket for the horizontal metal bar in the middle, but make sure to choose hardy succulents or cacti that can withstand the constant shaking on bumpy roads (our Queen Victoria Agave is the only remaining member of our plant family after both succulents were rattled beyond recovery on Utah’s dirt roads)
  • Instax Mini Link printer | we used this little Instax printer from Fujifilm to decorate the perimeter of our bed with polaroids of our travels
Vanlife essentials packing list
Beautiful entry mat with custom artwork from Society6
  • Entrance mat | to minimise dirt being tracked into your van, it helps to have a durable mat at the door; we absolutely love our desert rug from Society6, but there are literally thousands of designs offered for the same rug (by different local artists) from this cool online art store

Shop these items & more from my Amazon store: functional decor ideas for vanlife

vanlife

7 | Garage & outdoor camp essentials for vanlife

Most vans feature additional storage space accessible from the back doors (under the bed), which is commonly used like a garage to store gear from bikes to backpacks, as well as outdoor camp equipment like chairs and tables. Although your exact storage needs will likely vary, here are a few key items to invest in!

About our garage: The entire space under our platform bed (roughly 6.5ft wide, 5ft deep & 3.5ft tall) constitutes our garage, and this is where our 45gal fresh water tank, 3x Li-ion batteries, solar inverter & DC to DC charger are housed.

Even with all this equipment, we have a massive amount of storage space remaining, which we use to store 4x Rubbermaid bins with all of our hiking & climbing gear and overflow for van consumables (e.g. large bottles of soap that we use to refill our smaller bottles, spare toilet paper, etc), as well as our folding chairs, table, outdoor rug & more.

Vanlife essentials packing list
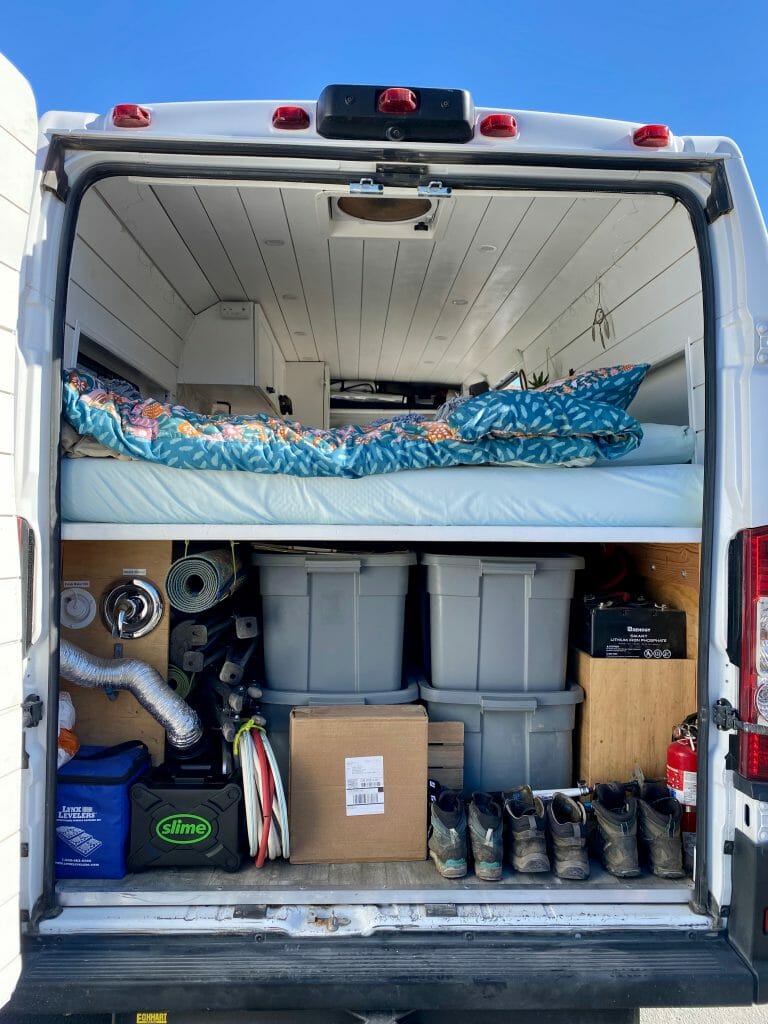
  • Roughneck storage bins | we use 4 of these heavy-duty 31Gal Roughneck storage bins from Rubbermaid in our garage, as mentioned above (they are massively overpriced on Amazon, so be sure to get them from Target); we actually broke the handle on one of these bins because it was so heavy and Rubbermaid customer service replaced it for free as part of their warranty program
  • Tarp | it’s smart to keep a tarp handy in the back of the van for a range of uses, including something clean to set our storage bins on when you’re organising or searching for something in the garage
  • Leveling blocks | Dan is obsessed with leveling our van in any campsite, so we use this pack of 10 plastic leveling blocks to get our van perfectly situated; these are super sturdy, but even if you do manage to break one, there’s a warranty program through the manufacturer that will replace it for free!
  • Water hose + filter | we use a 40ft hose with this RV water filter to fill our fresh water tank; in a pinch, this inexpensive Water Bandit also adapts our hose to fit smaller spigots so we can refill anywhere
  • Outdoor plastic rug | we LOVE our outdoor rug from Mad Mats, which is made out of recycled plastic and can just be hosed off or dunked in the river to clean; originally, we purchased the 4×6′, but returned it for the larger 5×8′ rug and are very pleased we did
  • Camp chairs | the GCI Kickback Rocker (available from Amazon or REI) is by far the best camp chair I’ve ever owned and it folds even smaller than some standard camp chairs
  • Roll-top camp table | we love our roll-top camp table from REI (and this similar option from Coleman), since it packs to the size of a chair yet offers a sturdy enough space to use as a dinner table or desk outside
  • Awning | rather than spend $800 on a Promaster awning, Dan assembled a simple DIY awning for under $100; to make something similar, you’ll need to purchase paracord, a tarp, and telescoping poles (these are the exact items we ordered from Amazon to build our awning)

Shop these items & more from my Amazon store: garage & outdoor camp essentials for vanlife

Great Sand Dunes National Park Colorado

8 | Maintenance & safety items for vanlife 

No vanlife packing list would be complete without maintenance and safety items, some of which we use regularly and others that we hope never to need (but are prepared for, just in case).

  • Tire inflator | we travelled through the entire American West without ever using this tire inflator, but know from speaking to other vanlifers that it’s essential for sandy beach camping (and can often be the difference between getting stuck on a rough road/puncturing a tire and making it out the other side); we have it in our van primarily for Baja, but if you intend to push your van on back roads and camp on the beach regularly, this Slime tire inflator is considered to be the best (it’s what we own, but have yet to use)
  • Shovel | if you do get stuck in sand (which happened to us in Utah!), you’ll absolutely want a shovel to dig out the tires; we have a collapsible shovel just like this that takes up minimal room in the garage of our van
  • Tire patch kit | these kits (we own this one from Slime) are incredibly inexpensive and worthwhile to have on-hand in case of a flat tire in a remote area
  • Tire jack | most vans come with a tire jack and everything you need to change a flat tire, but it’s worth confirming that yours is strong enough to lift the van WITH a heavy conversion and all your personal items (for reference, the tire jack in the 2019 Promaster is stored under the passenger seat)
  • Tow strap | the time we did get stuck in Utah, a friendly local had to winch us out of the sand using a tow strap; we bought 2 of these 10,000lb tow straps to make sure that any rescue effort wouldn’t be impeded by a tow strap that broke under the weight of our van
  • Jump starter power bank | this is one of the items that we hope never to use but keep within the van in case of emergency (since our DC to DC charger can drain our van battery if accidentally left on when we aren’t driving). Essentially, this allows us to jump start our own van from a small power bank without any other cars or cables; we bought ours from Costco when we first moved into the van, but this is the exact same power bank from Amazon
  • DIY windscreen repair kit | repair small cracks in your windscreen using the Rain-X repair kit as soon as they happen to avoid further damage
  • Tool kit | we have a toolkit just like this one that lays flat and stores easily in the cubby space above the cab of our van, stocked with a hammer, screwdrivers, various pliers, a wrench, exacto-knife, measuring tape, etc; this is crucial for DIY repairs on the road!
  • DIY supplies | to attend to vanlife’s many small calamities, we also keep a small plastic container in the van with super glue, spare Command hooks, rubberbands, wire, velcro, needle & thread, Museum Putty (the BEST way to stick things onto your benchtop), and all variety of tape… this stuff has gotten us out of a pinch more than once!
Make sure you have a well-stocked first aid kit in the van!
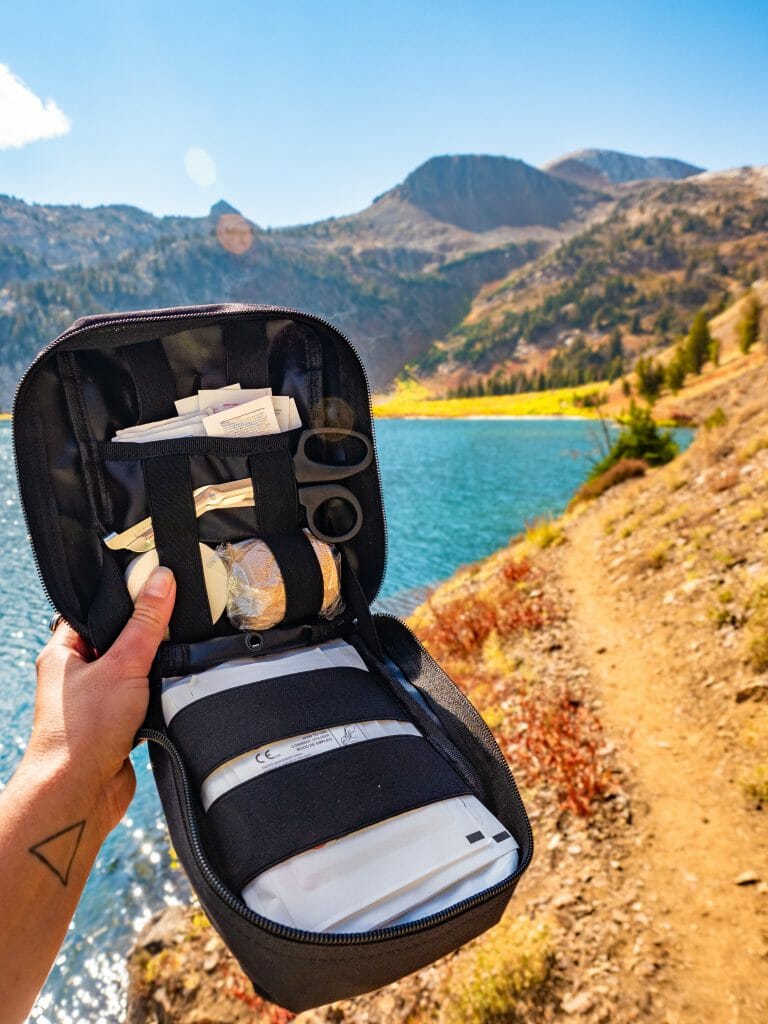
  • First-aid kit | there’s absolutely no substitute for a well-stocked first aid kit, especially when you’re spending time off the grid in remote areas! Individual needs will vary, but we keep ours stocked with bandaids & antiseptic; gauze & bandages; KT tape (great for everything from ankle sprains to blisters); and a variety of medications (expectorant, anti-histamines, cold medicine, NSAIDs, gas relief, pain-killers). If you don’t have a first aid kit and want to buy one ready to go, we also own this Adventure Medical Kit from REI and it’s an excellent place to start!
  • Garmin In-Reach Mini | I always recommend this PLB (emergency beacon) to hikers and mountaineers, as it’s accounted for both my dad and stepmum being rescued after serious injury in the backcountry, but it’s equally valuable for vanlife, where you’re routinely out of service, in the middle of no where, by yourself. For everything from texting friends letting them know you’ll be late meeting up (we’ve done this quite a few times!) to actually calling for help if you’re injured/broken down a remote area (think about the travellers who recently died in Death Valley after their car broke down in extreme heat), a PLB is 100% essential. The device itself is a few hundred dollars and then you’ll need to have an active subscription to use it (we pay $10/month for the cheapest plan, which we can toggle on and off as needed)– but it works all over the world and, when SOS is activated, Garmin will patch you through to the relevant local authority (Coast Guard, SAR, police, sheriff, ranger, etc) for help. Considering it could literally save your life, the cost is more than worth it (P.S. I like the Mini better, since it’s smaller and cheaper, but it’s more challenging to actually type on, so make sure you download the Garmin Earthmate app that allows you to type on your phone and transmit the message via Bluetooth).
  • Mouse traps | as much as it pains me to say this, you’ll need to have mousetraps available in the van for certain areas & campsites; we’ve had about 12 mice in our van over the course of the year, never when we expect to, and we’re incredibly paranoid about them getting into our engine or insulation— both of which would result in catastrophic levels of damage to a van. It’s sad, but it’s not worth ripping up your entire build when a family of mice moves into your wall and chews through your wiring.

Shop these items & more from my Amazon store: maintenance & safety essentials for vanlife

Grand Teton National Park Wyoming Granite Hot Springs vanlife camping
Chill time at our camp near Granite Hot Springs

9 | Travel essentials for vanlife

⚠️ This section is a work in progress, so check back soon for more posts on all my favourite travel essentials & hiking gear, as well as location-specific vanlife packing lists to make sure you’re prepared in every country!

  • Baja packing list COMING SOON

Read more about vanlife

START HERE: Vanlife resources, guides & more

MORE COMING SOON

TAGS:packing listsvanlifevanlife guidesvanlife USA
0 Comments
Share
brooke brisbine

I've spent the last decade exploring the world— everything from solo trekking in the Andes to overlanding in Zambia, all while completing a PhD in Biomechanics, teaching at a university & securing permanent residency in Australia. In 2020, I finally fulfilled my dream of becoming a full-time nomad! Whether it’s vanlife in Mexico, scuba diving in the Galápagos, ticking off incredible US National Parks, or climbing in the Dolomites, I hope this blog will inspire your future adventures & help you find wonder in every corner of the globe. xx bb

Leave a Comment Cancel Comment

You May Also Like

May 24, 2021

Everything you need to know about hiking the Subway (bottom up) in Zion National Park

August 3, 2021

15 best hikes in the Sawtooth National Forest (+ an extensive guide to Stanley, Idaho)

October 28, 2021

Vanlife diaries #33: Black Canyon of the Gunnison & Great Sand Dunes National Parks

hi, I’m brooke!

I've spent the last decade exploring the world— everything from solo trekking in the Andes to overlanding in Zambia, all while completing a PhD in Biomechanics. In 2020, I finally fulfilled my dream of becoming a full-time nomad! Whether it’s vanlife in Mexico, scuba diving in the Galápagos, ticking off incredible US National Parks, or climbing in the Dolomites, I hope this blog will inspire your future adventures & help you find wonder in every corner of the globe. xx bb

read my story
currently exploring

currently exploring

mexico

img

travel resources

flights ✈️ Skyscanner

hotels 🏨 booking.com

adventure gear 🥾 REI

travel essentials 📸 Amazon

travel guides

hiking guides

vanlife resources

moving to australia

trip itineraries

recent posts

  • Alta Via 4 Italian Dolomites hiking via ferrata guide

    Alta Via 4 (day 0): San Candido to Rifugio Tre Scarperi

    December 28, 2022
  • Alta Via 2 Italian Dolomites hiking via ferrata guide

    Alta Via 2 (day 13): Rifugio Boz to Croce d’Aune

    October 11, 2022
  • Alta Via 2 Italian Dolomites hiking via ferrata guide

    Alta Via 2 (day 12): Passo Cereda to Rifugio Boz

    October 11, 2022
  • Alta Via 2 Italian Dolomites hiking via ferrata guide

    Alta Via 2 (day 11): Rifugio Treviso to Passo Cereda + Via Ferrata Canalone

    October 11, 2022
  • Alta Via 2 Italian Dolomites hiking via ferrata guide

    Alta Via 2 (day 10): Rifugio Pradidali to Rifugio Treviso + Via Ferrata Porton & Nico Gusella

    October 3, 2022

@brookebeyond_
BB ON INSTAGRAM

@brookebeyond_

  • One of the most unique cenotes experiences you can have anywhere— kayaking in a cave, around a small circular island, surrounded by fish & turtles.
  • A GUIDE TO RUTA PUUC (UXMAL & BEYOND) 🛕🗿✨

Just 80km (1hr) from Mérida, the Puuc Route is a string of 5 impeccably preserved & staggeringly ornate archaeological sites that are among my favourite in all of Mexico! The best part: you’re likely to be the only one at some of these off-the-beaten-path ruins. 

Dive into 1500+ years of history on Ruta Puuc ↯

UXMAL
✨ highlights: the rounded Pirámide del Adivino (Pyramid of the Sorcerer) dominates as you enter the site, but the extravagantly adorned Governor’s Palace is equally impressive, as is the well-preserved Mayan Ball Court
⌛️ recommended time: 2hrs
💸 entrance fee: 499p (409 + 90 INAH)

KABÁH
✨ highlights: the impossibly striking Palacio de los Máscaras is decorated with 300 masks of the Mayan rain god, Chaac
⌛️ recommended time: 45min
💸 entrance fee: 75p

SAYIL
✨highlights: El Gran Palacio (also called the North Palace) is a breathtaking spectacle of columns & Puuc-style bas-reliefs 
⌛️ recommended time: 1hr
💸 entrance fee: 70p

XLAPAK
✨highlights: beautifully decorated El Palacio (though admittedly the least exciting of all the stops)
⌛️ recommended time: 30min
💸 entrance fee: 70p

LABNÁ
✨highlights: El Arco, a lavishly decorative arch in flawless condition & surrounded by jungle
⌛️ recommended time: 45min
💸 entrance fee: 70p

⚠️ OTHER TIPS FOR RUTA PUUC
- aim to arrive to Uxmal near opening at 8am for a super quiet experience (& to beat the afternoon heat as you continue to other sites!)
- allow ~9hrs from Mérida to drive the entire route, visit all 5 archaeological sites & then return to Mérida (+2hrs if you want to stop at a cenote on the way back, which I’d recommend!)
- it’s about 20min from Uxmal to Kabah, but the subsequent ruins get closer & closer together until you’re driving <5min from Xlapak to Labná
- there is extremely limited Telcel service once you’re at the ruins, so it’s not a bad idea to download offline Google Maps on your phone
  • If it can’t be the mountains, then it better be the ocean! Where do you feel the most free? 🤩

🚁: @cal_field 
.
.
.
.
.
.
.
.
.
#mexico #travelmexico #vivamexico #exploremexico #mexicoroadtrip #mexicomagico #mexicolindo #roamtheplanet #roadtrip #yucatanpeninsula #allaboutadventures #adventureculture #travelblog #adventurebabes #girlsgoneglobal #girlslovetravel #sheisnotlost #wearetravelgirls #beachbum #quintanaroo #quintanaroomexico #holbox #islaholbox #holbox mexico #foryou #fyp #travelreel
  • FAVOURITE CENOTES NEAR VALLADOLID [PART 2] 🌈🇲🇽✨

💎 Cenote Sac Aua 💎
incredibly unique semi-open cenote with a small, tree-covered island surrounded by a vividly blue ring of water (look out for the resident turtle!). Entry is 150p entry; for an additional 100p, hire a kayak for 35min. Only locals here when we visited on a Saturday afternoon!
~ best for: kayaking in a unique cenote

💎 Cenote Chukum 💎
my favourite cave cenote in Yucatán, this is a built-up yet blissfully uncrowded adventure park 18m below the ground with jump platforms, a tandem flying fox & spectacular light beams. Entry is 200p entry; life jacket is mandatory and included in cost. There’s also a restaurant onsite. 
~ best for: adventure activities in a beautiful setting 

💎 Cenote Toh 💎 
seemingly located in someone’s backyard, this cenote was recommended by a local & indeed we were the only ones there (1-3pm on a Friday during busy season). A long spiral staircase descends into a massive cave illuminated by a single light hanging from the ceiling. Entry is 150p; I’d recommend bringing your own floatie, some beers, and a speaker! 
~ best for: complete solitude 

💎 Cenote Xcanche 💎 
located just 2km from El Balam, either drive your own car, walk, or catch a tuk tuk. Entry is 170p & includes access to jump platforms & a rope swing; additional 150p for rappelling into the cenote, 150p to zipline, or 100p for the flying fox. Busy because of proximity to the ruins, but worth the visit!
~ best for: cooling off after Ek Balam

💎 Cenote Lol-Ha 💎
after visiting Chichén Itza, skip crowded Ik-Kil & instead venture 30min south to this beautiful open cenote— you can expect to be the only ones here! Entry is 100p & there are no amenities, but it’s worth it for the solitude.
~ best for: a quiet dip after Chichén Itzá
  • FAVOURITE CENOTES NEAR VALLADOLID [PART 1] 🌈🇲🇽✨

💎 Cenote Oxmán 💎
beautiful open cenote beneath towering limestone walls covered in verdant foliage. Entry is 150p or 300p for entry plus a 250p-coupon to spend at the pool-front restaurant! Life jackets required. 
~ best for: swimming & then grabbing lunch

💎 Cenote Suytun 💎
this instafamous cenote features a stunning stone walkway into the middle of the cave and is absolutely crawling with people, BUT if you stay in the cabañas on-site for 900p, you’ll get the 200p/person entry for free AND easily be the first ones inside when it opens at 9am. 
~ best for: photography 

💎 Cenote Secretó Maya 💎
incredible open cenote dripping in vines and ringed by agave, with a whopping 54m depth. Several jump platforms & an epic rope swing, plus an on-site restaurant, cabañas for rent & even massages. Entry is 200p or 300p with a cave tour; life jacket available but not required. 
~ best for: off-the-beaten-path adventures

💎 Cenote Palomitas 💎
quiet & lesser visited cave cenote with amazing stalactites. Entry is 170p with optional life jacket/tube or 270p with delicious lunch buffet (great value!).
~ best for: amazing stalactites 

💎 Cenote Agua Dulce 💎
in the same complex as Palomitas but with a separate entrance fee (170p), this is another amazing cave cenote with a floating dock and few people. 
~ best for: a quiet cave cenote
  • VALLADOLID TRAVEL GUIDE 🌈🇲🇽✨

From its colonial streets & sparkling central park to the centuries-old Mayan ruins & otherworldly cenotes that surround it, this colourful pueblo mágico in central Yucatán is not to be missed!

WHAT TO DO
🌴 Parque Principal Francisco Cantón Rosado: this bustling central plaza is the lifeblood of Valladolid, hosting vendors, live music & beautiful views of Templo de San Servacio
🌈 La Calzada de los Frailes: this colourful street is my favourite spot for a stroll past artisan boutiques & trendy restaurants
🥃 Mayapán Agave Distillery: it’s only “tequila” if it’s made in Tequila, Jalisco & a few surrounding municipalities, but this distillery in Valladolid produces the only blue agave spirit in Yucatán & it’s pretty delicious! (100p for 15min tour & 5 samples)
💎 Cenotes: some of Mexico’s best cenotes are located within easy driving distance of Valladolid [stay tuned for a future post with specific recommendations]
🛕 Chichén Itzá: one of the 7 Wonders of the World, this Mayan archaeological site is just 1hr from Valladolid (576p entry)
🗿 Ek Balam: 1500-year-old+ Mayan archaeological site with one of the few pyramids you can still climb (499p entry)

WHERE TO EAT
🥩 Conato: phenomenal restaurant offering a modern interpretation of traditional Yucatecan food and full-to-the-brim mezcal cocktails 
🐖 Taquería Rosario: fantastic cochinito pibil (15p tacos, 30p tortas)
🌮 El Tigrillo: roadside taco stand bustling with locals, serving up excellent cochinita pibil (20p tacos)
🥞 Marquesitas Los 3 Reyes: you might not imagine gouda, nutella & a cream cheese to be a good crepe combo, but you’d be wrong. Try delicious marquesitas (traditional Yucateca dessert) from 4-9pm daily in Parque Principal, just in front of the church (30-40p)
🐆 Ix Cat Ik Tradicional Mayan Comida: touristy restaurant with prices to match, but excellent food and a great atmosphere for trying traditional Mayan fare
  • EK BALAM: THE BLACK JAGUAR 🐆 

One of the most impressive archaeological sites in Yucatán is Ek Balam, whose name means “the black jaguar”— a representation of bravery & power, a symbol of the fearless warrior. In Mayan mythology, the jaguar was also one of the rulers of Xibalbá, the underworld, and therefore a symbol of the night sun & darkness 🌙 

Built in 100BCE & still inhabited when the Spanish invaded in the 1500s, Ek Balam was the centre of a flourishing Mayan kingdom. Only a fraction of the city was excavated in the 90s, but it’s a fascinating look into the history of this storied region that absolutely should not be missed!

Here’s what you need to know ↯

🚗 GETTING HERE
Ek Balam is just 30km (30min) north of Valladolid & can be accessed by car, bus, or organised tour. Driving will give you the most flexibility & it’s a very straightforward journey!

💸 COST
Entry is steep at 499p, but it’s one of the few ruins where you are still permitted to climb the pyramids! You can also hire a guide at the entrance for an additional 600p. 

⌛️ RECOMMENDED TIME
Allow at least 2hrs to explore the sprawling complex of Ek Balam, read all the informational plaques, and climb the Acropolis & other nearby structures. 

🤩 DON’T MISS
The incredible carved reliefs on display at the top of the Acropolis are among the best preserved examples of ancient art in all of Mesoamérica!

💎 NEARBY
Visit Cenote Xcanché for a refreshing dip after a hot afternoon at Ek Balam— it’s located 2km from the ruins, so either drive your car, walk, or hop in a tuk tuk. Entry is 170p. 

Have you been to Ek Balam?
  • IZAMAL TRAVEL GUIDE 💛🍋✨

Painted entirely in bright yellow & overflowing with small-town charm, this sunny pueblo mágico between Valladolid & Mérida is an enchanting stop on any Yucatán road trip! Here’s what you need to know about Mexico’s “Yellow Town” ↯

WHAT TO DO
🍋 Wander through the colourful streets: perhaps the best thing to do in Izamal is simply wander through the cobbled streets & admire the bright yellow buildings
✝️ Convento de San Antonio de Padua: striking 16th century convent in the middle of town, don’t miss the chance to wander through the grounds!
🛕Pirámide Kinich Kakmó: dedicated to a Mayan god who descended each day as a fire macaw to collect sacrifices, this ancient pyramid is located right in the middle of town & you can climb to the top for beautiful views (free!)
💎 Anillo de Cenotes: within a 60-90min drive, explore the “Ring of Cenotes”, formed by the same asteroid that wiped out the dinosaurs 66mil years ago [stay tuned for specific cenote recommendations!]

WHERE TO EAT
🐖 Kinich: rated one of Mexico’s best restaurants, this beautifully decorated patio space serves up local Mayan delicacies like poc chuc, cochinita pibil, sikil pak & empanadas de chaya
🌱 La Casona de Izamal: trendy cafe located behind a boutique, offering a mix of Mayan & Mexican cuisine
🌮 taco stands surrounding the main plaza 

WHERE TO STAY
@hotelquintaizamal
  • An absolute dream 💎
follow @brookebeyond_

travel beyond the ordinary

Explore my travel guides, custom itineraries & blog posts with an interactive world map ✨

all destinations

  • One of the most unique cenotes experiences you can have anywhere— kayaking in a cave, around a small circular island, surrounded by fish & turtles.
  • A GUIDE TO RUTA PUUC (UXMAL & BEYOND) 🛕🗿✨

Just 80km (1hr) from Mérida, the Puuc Route is a string of 5 impeccably preserved & staggeringly ornate archaeological sites that are among my favourite in all of Mexico! The best part: you’re likely to be the only one at some of these off-the-beaten-path ruins. 

Dive into 1500+ years of history on Ruta Puuc ↯

UXMAL
✨ highlights: the rounded Pirámide del Adivino (Pyramid of the Sorcerer) dominates as you enter the site, but the extravagantly adorned Governor’s Palace is equally impressive, as is the well-preserved Mayan Ball Court
⌛️ recommended time: 2hrs
💸 entrance fee: 499p (409 + 90 INAH)

KABÁH
✨ highlights: the impossibly striking Palacio de los Máscaras is decorated with 300 masks of the Mayan rain god, Chaac
⌛️ recommended time: 45min
💸 entrance fee: 75p

SAYIL
✨highlights: El Gran Palacio (also called the North Palace) is a breathtaking spectacle of columns & Puuc-style bas-reliefs 
⌛️ recommended time: 1hr
💸 entrance fee: 70p

XLAPAK
✨highlights: beautifully decorated El Palacio (though admittedly the least exciting of all the stops)
⌛️ recommended time: 30min
💸 entrance fee: 70p

LABNÁ
✨highlights: El Arco, a lavishly decorative arch in flawless condition & surrounded by jungle
⌛️ recommended time: 45min
💸 entrance fee: 70p

⚠️ OTHER TIPS FOR RUTA PUUC
- aim to arrive to Uxmal near opening at 8am for a super quiet experience (& to beat the afternoon heat as you continue to other sites!)
- allow ~9hrs from Mérida to drive the entire route, visit all 5 archaeological sites & then return to Mérida (+2hrs if you want to stop at a cenote on the way back, which I’d recommend!)
- it’s about 20min from Uxmal to Kabah, but the subsequent ruins get closer & closer together until you’re driving <5min from Xlapak to Labná
- there is extremely limited Telcel service once you’re at the ruins, so it’s not a bad idea to download offline Google Maps on your phone
  • If it can’t be the mountains, then it better be the ocean! Where do you feel the most free? 🤩

🚁: @cal_field 
.
.
.
.
.
.
.
.
.
#mexico #travelmexico #vivamexico #exploremexico #mexicoroadtrip #mexicomagico #mexicolindo #roamtheplanet #roadtrip #yucatanpeninsula #allaboutadventures #adventureculture #travelblog #adventurebabes #girlsgoneglobal #girlslovetravel #sheisnotlost #wearetravelgirls #beachbum #quintanaroo #quintanaroomexico #holbox #islaholbox #holbox mexico #foryou #fyp #travelreel
  • FAVOURITE CENOTES NEAR VALLADOLID [PART 2] 🌈🇲🇽✨

💎 Cenote Sac Aua 💎
incredibly unique semi-open cenote with a small, tree-covered island surrounded by a vividly blue ring of water (look out for the resident turtle!). Entry is 150p entry; for an additional 100p, hire a kayak for 35min. Only locals here when we visited on a Saturday afternoon!
~ best for: kayaking in a unique cenote

💎 Cenote Chukum 💎
my favourite cave cenote in Yucatán, this is a built-up yet blissfully uncrowded adventure park 18m below the ground with jump platforms, a tandem flying fox & spectacular light beams. Entry is 200p entry; life jacket is mandatory and included in cost. There’s also a restaurant onsite. 
~ best for: adventure activities in a beautiful setting 

💎 Cenote Toh 💎 
seemingly located in someone’s backyard, this cenote was recommended by a local & indeed we were the only ones there (1-3pm on a Friday during busy season). A long spiral staircase descends into a massive cave illuminated by a single light hanging from the ceiling. Entry is 150p; I’d recommend bringing your own floatie, some beers, and a speaker! 
~ best for: complete solitude 

💎 Cenote Xcanche 💎 
located just 2km from El Balam, either drive your own car, walk, or catch a tuk tuk. Entry is 170p & includes access to jump platforms & a rope swing; additional 150p for rappelling into the cenote, 150p to zipline, or 100p for the flying fox. Busy because of proximity to the ruins, but worth the visit!
~ best for: cooling off after Ek Balam

💎 Cenote Lol-Ha 💎
after visiting Chichén Itza, skip crowded Ik-Kil & instead venture 30min south to this beautiful open cenote— you can expect to be the only ones here! Entry is 100p & there are no amenities, but it’s worth it for the solitude.
~ best for: a quiet dip after Chichén Itzá
  • FAVOURITE CENOTES NEAR VALLADOLID [PART 1] 🌈🇲🇽✨

💎 Cenote Oxmán 💎
beautiful open cenote beneath towering limestone walls covered in verdant foliage. Entry is 150p or 300p for entry plus a 250p-coupon to spend at the pool-front restaurant! Life jackets required. 
~ best for: swimming & then grabbing lunch

💎 Cenote Suytun 💎
this instafamous cenote features a stunning stone walkway into the middle of the cave and is absolutely crawling with people, BUT if you stay in the cabañas on-site for 900p, you’ll get the 200p/person entry for free AND easily be the first ones inside when it opens at 9am. 
~ best for: photography 

💎 Cenote Secretó Maya 💎
incredible open cenote dripping in vines and ringed by agave, with a whopping 54m depth. Several jump platforms & an epic rope swing, plus an on-site restaurant, cabañas for rent & even massages. Entry is 200p or 300p with a cave tour; life jacket available but not required. 
~ best for: off-the-beaten-path adventures

💎 Cenote Palomitas 💎
quiet & lesser visited cave cenote with amazing stalactites. Entry is 170p with optional life jacket/tube or 270p with delicious lunch buffet (great value!).
~ best for: amazing stalactites 

💎 Cenote Agua Dulce 💎
in the same complex as Palomitas but with a separate entrance fee (170p), this is another amazing cave cenote with a floating dock and few people. 
~ best for: a quiet cave cenote
One of the most unique cenotes experiences you can have anywhere— kayaking in a cave, around a small circular island, surrounded by fish & turtles.
@brookebeyond_
@brookebeyond_
•
Follow
One of the most unique cenotes experiences you can have anywhere— kayaking in a cave, around a small circular island, surrounded by fish & turtles.
4 days ago
View on Instagram |
1/5
A GUIDE TO RUTA PUUC (UXMAL & BEYOND) 🛕🗿✨

Just 80km (1hr) from Mérida, the Puuc Route is a string of 5 impeccably preserved & staggeringly ornate archaeological sites that are among my favourite in all of Mexico! The best part: you’re likely to be the only one at some of these off-the-beaten-path ruins. 

Dive into 1500+ years of history on Ruta Puuc ↯

UXMAL
✨ highlights: the rounded Pirámide del Adivino (Pyramid of the Sorcerer) dominates as you enter the site, but the extravagantly adorned Governor’s Palace is equally impressive, as is the well-preserved Mayan Ball Court
⌛️ recommended time: 2hrs
💸 entrance fee: 499p (409 + 90 INAH)

KABÁH
✨ highlights: the impossibly striking Palacio de los Máscaras is decorated with 300 masks of the Mayan rain god, Chaac
⌛️ recommended time: 45min
💸 entrance fee: 75p

SAYIL
✨highlights: El Gran Palacio (also called the North Palace) is a breathtaking spectacle of columns & Puuc-style bas-reliefs 
⌛️ recommended time: 1hr
💸 entrance fee: 70p

XLAPAK
✨highlights: beautifully decorated El Palacio (though admittedly the least exciting of all the stops)
⌛️ recommended time: 30min
💸 entrance fee: 70p

LABNÁ
✨highlights: El Arco, a lavishly decorative arch in flawless condition & surrounded by jungle
⌛️ recommended time: 45min
💸 entrance fee: 70p

⚠️ OTHER TIPS FOR RUTA PUUC
- aim to arrive to Uxmal near opening at 8am for a super quiet experience (& to beat the afternoon heat as you continue to other sites!)
- allow ~9hrs from Mérida to drive the entire route, visit all 5 archaeological sites & then return to Mérida (+2hrs if you want to stop at a cenote on the way back, which I’d recommend!)
- it’s about 20min from Uxmal to Kabah, but the subsequent ruins get closer & closer together until you’re driving <5min from Xlapak to Labná
- there is extremely limited Telcel service once you’re at the ruins, so it’s not a bad idea to download offline Google Maps on your phone
@brookebeyond_
@brookebeyond_
•
Follow
A GUIDE TO RUTA PUUC (UXMAL & BEYOND) 🛕🗿✨ Just 80km (1hr) from Mérida, the Puuc Route is a string of 5 impeccably preserved & staggeringly ornate archaeological sites that are among my favourite in all of Mexico! The best part: you’re likely to be the only one at some of these off-the-beaten-path ruins. Dive into 1500+ years of history on Ruta Puuc ↯ UXMAL ✨ highlights: the rounded Pirámide del Adivino (Pyramid of the Sorcerer) dominates as you enter the site, but the extravagantly adorned Governor’s Palace is equally impressive, as is the well-preserved Mayan Ball Court ⌛️ recommended time: 2hrs 💸 entrance fee: 499p (409 + 90 INAH) KABÁH ✨ highlights: the impossibly striking Palacio de los Máscaras is decorated with 300 masks of the Mayan rain god, Chaac ⌛️ recommended time: 45min 💸 entrance fee: 75p SAYIL ✨highlights: El Gran Palacio (also called the North Palace) is a breathtaking spectacle of columns & Puuc-style bas-reliefs ⌛️ recommended time: 1hr 💸 entrance fee: 70p XLAPAK ✨highlights: beautifully decorated El Palacio (though admittedly the least exciting of all the stops) ⌛️ recommended time: 30min 💸 entrance fee: 70p LABNÁ ✨highlights: El Arco, a lavishly decorative arch in flawless condition & surrounded by jungle ⌛️ recommended time: 45min 💸 entrance fee: 70p ⚠️ OTHER TIPS FOR RUTA PUUC - aim to arrive to Uxmal near opening at 8am for a super quiet experience (& to beat the afternoon heat as you continue to other sites!) - allow ~9hrs from Mérida to drive the entire route, visit all 5 archaeological sites & then return to Mérida (+2hrs if you want to stop at a cenote on the way back, which I’d recommend!) - it’s about 20min from Uxmal to Kabah, but the subsequent ruins get closer & closer together until you’re driving <5min from Xlapak to Labná - there is extremely limited Telcel service once you’re at the ruins, so it’s not a bad idea to download offline Google Maps on your phone
6 days ago
View on Instagram |
2/5
@brookebeyond_
@brookebeyond_
•
Follow
If it can’t be the mountains, then it better be the ocean! Where do you feel the most free? 🤩 🚁: @cal_field . . . . . . . . . #mexico #travelmexico #vivamexico #exploremexico #mexicoroadtrip #mexicomagico #mexicolindo #roamtheplanet #roadtrip #yucatanpeninsula #allaboutadventures #adventureculture #travelblog #adventurebabes #girlsgoneglobal #girlslovetravel #sheisnotlost #wearetravelgirls #beachbum #quintanaroo #quintanaroomexico #holbox #islaholbox #holbox mexico #foryou #fyp #travelreel
6 days ago
View on Instagram |
3/5
FAVOURITE CENOTES NEAR VALLADOLID [PART 2] 🌈🇲🇽✨

💎 Cenote Sac Aua 💎
incredibly unique semi-open cenote with a small, tree-covered island surrounded by a vividly blue ring of water (look out for the resident turtle!). Entry is 150p entry; for an additional 100p, hire a kayak for 35min. Only locals here when we visited on a Saturday afternoon!
~ best for: kayaking in a unique cenote

💎 Cenote Chukum 💎
my favourite cave cenote in Yucatán, this is a built-up yet blissfully uncrowded adventure park 18m below the ground with jump platforms, a tandem flying fox & spectacular light beams. Entry is 200p entry; life jacket is mandatory and included in cost. There’s also a restaurant onsite. 
~ best for: adventure activities in a beautiful setting 

💎 Cenote Toh 💎 
seemingly located in someone’s backyard, this cenote was recommended by a local & indeed we were the only ones there (1-3pm on a Friday during busy season). A long spiral staircase descends into a massive cave illuminated by a single light hanging from the ceiling. Entry is 150p; I’d recommend bringing your own floatie, some beers, and a speaker! 
~ best for: complete solitude 

💎 Cenote Xcanche 💎 
located just 2km from El Balam, either drive your own car, walk, or catch a tuk tuk. Entry is 170p & includes access to jump platforms & a rope swing; additional 150p for rappelling into the cenote, 150p to zipline, or 100p for the flying fox. Busy because of proximity to the ruins, but worth the visit!
~ best for: cooling off after Ek Balam

💎 Cenote Lol-Ha 💎
after visiting Chichén Itza, skip crowded Ik-Kil & instead venture 30min south to this beautiful open cenote— you can expect to be the only ones here! Entry is 100p & there are no amenities, but it’s worth it for the solitude.
~ best for: a quiet dip after Chichén Itzá
@brookebeyond_
@brookebeyond_
•
Follow
FAVOURITE CENOTES NEAR VALLADOLID [PART 2] 🌈🇲🇽✨ 💎 Cenote Sac Aua 💎 incredibly unique semi-open cenote with a small, tree-covered island surrounded by a vividly blue ring of water (look out for the resident turtle!). Entry is 150p entry; for an additional 100p, hire a kayak for 35min. Only locals here when we visited on a Saturday afternoon! ~ best for: kayaking in a unique cenote 💎 Cenote Chukum 💎 my favourite cave cenote in Yucatán, this is a built-up yet blissfully uncrowded adventure park 18m below the ground with jump platforms, a tandem flying fox & spectacular light beams. Entry is 200p entry; life jacket is mandatory and included in cost. There’s also a restaurant onsite. ~ best for: adventure activities in a beautiful setting 💎 Cenote Toh 💎 seemingly located in someone’s backyard, this cenote was recommended by a local & indeed we were the only ones there (1-3pm on a Friday during busy season). A long spiral staircase descends into a massive cave illuminated by a single light hanging from the ceiling. Entry is 150p; I’d recommend bringing your own floatie, some beers, and a speaker! ~ best for: complete solitude 💎 Cenote Xcanche 💎 located just 2km from El Balam, either drive your own car, walk, or catch a tuk tuk. Entry is 170p & includes access to jump platforms & a rope swing; additional 150p for rappelling into the cenote, 150p to zipline, or 100p for the flying fox. Busy because of proximity to the ruins, but worth the visit! ~ best for: cooling off after Ek Balam 💎 Cenote Lol-Ha 💎 after visiting Chichén Itza, skip crowded Ik-Kil & instead venture 30min south to this beautiful open cenote— you can expect to be the only ones here! Entry is 100p & there are no amenities, but it’s worth it for the solitude. ~ best for: a quiet dip after Chichén Itzá
1 week ago
View on Instagram |
4/5
FAVOURITE CENOTES NEAR VALLADOLID [PART 1] 🌈🇲🇽✨

💎 Cenote Oxmán 💎
beautiful open cenote beneath towering limestone walls covered in verdant foliage. Entry is 150p or 300p for entry plus a 250p-coupon to spend at the pool-front restaurant! Life jackets required. 
~ best for: swimming & then grabbing lunch

💎 Cenote Suytun 💎
this instafamous cenote features a stunning stone walkway into the middle of the cave and is absolutely crawling with people, BUT if you stay in the cabañas on-site for 900p, you’ll get the 200p/person entry for free AND easily be the first ones inside when it opens at 9am. 
~ best for: photography 

💎 Cenote Secretó Maya 💎
incredible open cenote dripping in vines and ringed by agave, with a whopping 54m depth. Several jump platforms & an epic rope swing, plus an on-site restaurant, cabañas for rent & even massages. Entry is 200p or 300p with a cave tour; life jacket available but not required. 
~ best for: off-the-beaten-path adventures

💎 Cenote Palomitas 💎
quiet & lesser visited cave cenote with amazing stalactites. Entry is 170p with optional life jacket/tube or 270p with delicious lunch buffet (great value!).
~ best for: amazing stalactites 

💎 Cenote Agua Dulce 💎
in the same complex as Palomitas but with a separate entrance fee (170p), this is another amazing cave cenote with a floating dock and few people. 
~ best for: a quiet cave cenote
@brookebeyond_
@brookebeyond_
•
Follow
FAVOURITE CENOTES NEAR VALLADOLID [PART 1] 🌈🇲🇽✨ 💎 Cenote Oxmán 💎 beautiful open cenote beneath towering limestone walls covered in verdant foliage. Entry is 150p or 300p for entry plus a 250p-coupon to spend at the pool-front restaurant! Life jackets required. ~ best for: swimming & then grabbing lunch 💎 Cenote Suytun 💎 this instafamous cenote features a stunning stone walkway into the middle of the cave and is absolutely crawling with people, BUT if you stay in the cabañas on-site for 900p, you’ll get the 200p/person entry for free AND easily be the first ones inside when it opens at 9am. ~ best for: photography 💎 Cenote Secretó Maya 💎 incredible open cenote dripping in vines and ringed by agave, with a whopping 54m depth. Several jump platforms & an epic rope swing, plus an on-site restaurant, cabañas for rent & even massages. Entry is 200p or 300p with a cave tour; life jacket available but not required. ~ best for: off-the-beaten-path adventures 💎 Cenote Palomitas 💎 quiet & lesser visited cave cenote with amazing stalactites. Entry is 170p with optional life jacket/tube or 270p with delicious lunch buffet (great value!). ~ best for: amazing stalactites 💎 Cenote Agua Dulce 💎 in the same complex as Palomitas but with a separate entrance fee (170p), this is another amazing cave cenote with a floating dock and few people. ~ best for: a quiet cave cenote
1 week ago
View on Instagram |
5/5

  • home
  • about me
  • latest
  • destinations
  • hiking guides
  • moving to Australia
  • vanlife resources
  • contact

COPYRIGHT © 2022 BROOKE BEYOND. TRAVEL BEYOND THE ORDINARY. Site Powered by Pix & Hue.