• start here
  • about
  • group trips
  • brooke beyond

  • hiking guides
  • outdoor gear
    • hiking boots
    • hiking backpacks
    • cold-weather layers
    • backpacking tent
    • outdoor sleep system
    • backcountry food
    • day-hike packing list
    • hut-to-hut packing list
    • via ferrata packing list
    • backpacking packing list
    • mountaineering packing list

brooke beyond

Aus + NZ / Australia / Tasmania

Complete Overland Track packing list: what to pack for Tasmania’s best multi-day hike

26 April 2025

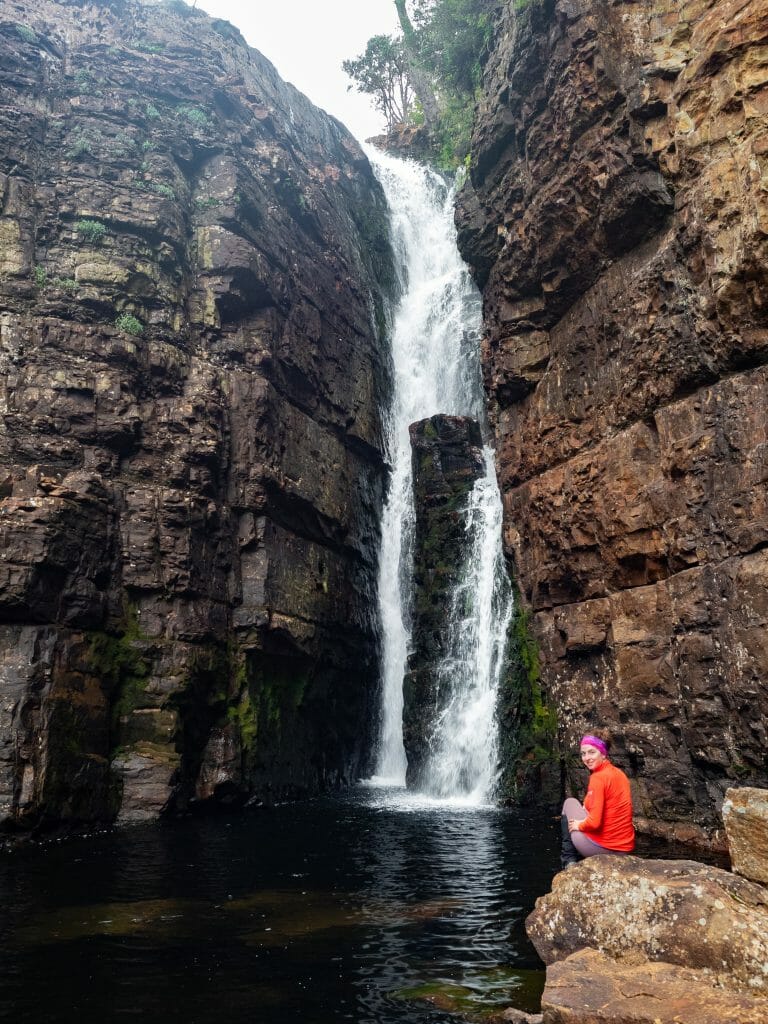
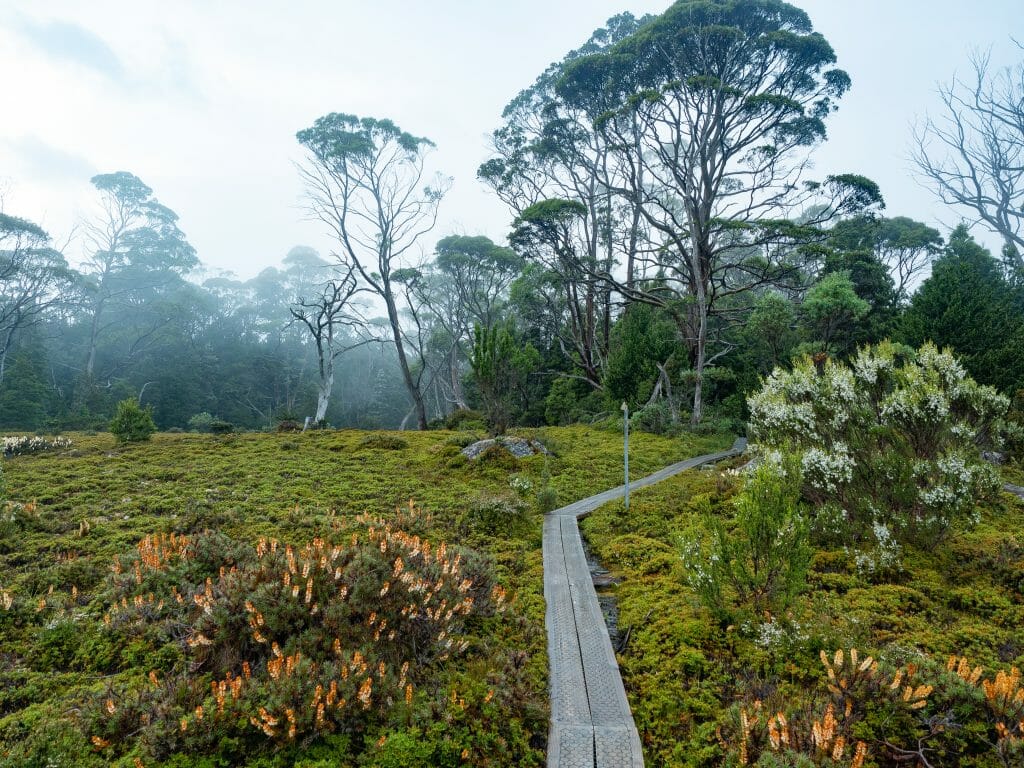
Tasmania’s Overland Track is a 6-day wilderness adventure through cradle-shaped mountains, misty rainforest, and button-grass plains, undoubtedly the best multi-day hike in Australia. The scenery is wildly diverse, and so is the weather— which means you’ll need gear that’s adaptable, weatherproof, and built to handle wet, muddy conditions.

I hiked the Overland Track in January 2019, camping every night and carrying all of my own food, shelter, and gear. This post details the exact packing list I used— plus what I’d add, remove, or swap next time— whether you’re setting out in summer or shoulder season, solo or with a group.

This post contains affiliate links, which means I may earn a small commission if you purchase something I recommend, at no extra cost to you. I ONLY recommend gear that I personally use (or that James uses) and that we genuinely LOVE— your support helps keep this site going and the adventures rolling!

What's in this guide

Toggle
  • Overland Track packing list
    • Trail essentials: backpack, boots & poles
    • Camping gear
    • Camp kitchen, water storage & food
    • Safety & navigation
    • Top + bottom layers
    • Head, hands & feet
    • Personal items

Check out my outdoor gear guides for the best:

hiking boots
hiking backpacks
cold-weather layers
backpacking tents
outdoor sleep system
backcountry food
camera gear

Overland Track packing list

Tasmania’s Overland Track is usually hiked between November and April, when conditions are warmest and most stable. But this is still alpine Tasmania, where four seasons in a day is standard— so your gear needs to handle cold rain, deep mud, intense sun, and sudden cold snaps even in the middle of summer.

Expect daytime temperatures between 10–20°C (50–68°F), with nights dipping to 2–8°C (36–46°F), and colder at elevation or during storms. Rain is common, trails can be flooded or icy depending on the day, and snake sightings are frequent in summer, so you’ll want to be vigilant, especially in grassy or exposed areas.

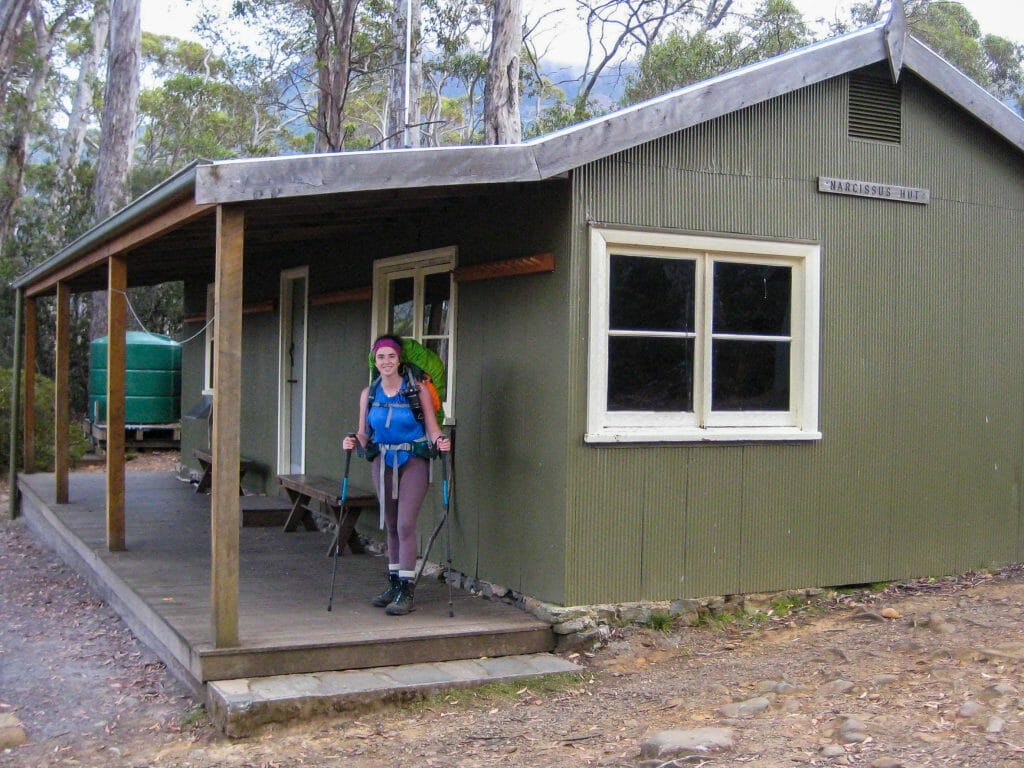
There are basic public huts along the Overland, but they are first-come, first-serve and space is limited. While it may be tempting to rely on the huts, it’s strongly advised to carry your own camping gear in case no bunks are available! Huts are unserviced and offer no food, so you’ll also need to carry a full backcountry kitchen setup and all meals. This list is written for camping the full route, with gear that kept me warm, dry, and safe across Tasmania’s spectacular but wildly unpredictable terrain.

⛰️ Check out my Overland Track Guide for a detailed daily route description, trip logistics & real-world tips on tackling Tasmania’s best multi-day hike!

TRAIL ESSENTIALS
⭐️ backpack (50-75L): Osprey Aura AG 50 (Women’s) / Atmos AG 50 (Men’s)
⭐️ raincover: REI Co-op Duck’s Back Pack Rain Cover
⭐️ summit pack: REI Co-op Flash 18
⭐️ hiking boots: Salomon Quest 4 GTX Hiking Boots (women’s) / (men’s)
⭐️ trekking poles: Black Diamond Trail Trekking Poles

CAMPING GEAR
⭐️ backpacking tent: Nemo Dragonfly OSMO 3P
⭐️ sleeping bag: Sea to Summit Spark 0
⭐️ sleeping pad: Therm-a-Rest NeoAir XLite NXT Sleeping Pad
⭐️ camp pillow: Sea to Summit Aeros Premium

CAMP KITCHEN, WATER STORAGE & FOOD
⭐️ camp stove (+ fuel): Jetboil Zip
⭐️ mess kit + cutlery: Sea to Summit Frontier Ultralight Collapsible 4-Piece Dinnerware Set
⭐️ water filter: Katadyn BeFree 1.0L Water Filter
⭐️ water reservoir: HydraPak Seeker 2L
⭐️ water bottle: Nalgene Wide Mouth
⭐️ electrolytes: Liquid IV
⭐️ freeze-dried meals + snacks: see my complete guide to backcountry food

SAFETY & NAVIGATION
⭐️ PLB/SOS: Garmin InReach Mini 2
⭐️ GPS: CalTopo app on mobile & Garmin fenix 7X Pro Watch
⭐️ First Aid Kit: Adventure Medical Kits Backpacker
⭐️ headlamp: Black Diamond Spot 400-R
⭐️ powerbank: VRURC Portable Charger with Built-in Cables, 10000mAh
⭐️ solar charger: BigBlue 28W Solar Charger

TOP + BOTTOM LAYERS
⭐️ sports bra + underwear
⭐️ hiking shirt: Arc’teryx Taema Crew Shirt (women’s) / Cormac Crew Shirt (men’s)
⭐️ sun shirt: Arc’teryx Taema Hoody (women’s) / Cormac Hoody (men’s)
⭐️ wool base layer: Smartwool Classic Thermal Base Layer Top (women’s) / (men’s)
⭐️ lightweight fleece mid-layer: Arc’teryx Rho LT Hoody (women’s) / (men’s)
⭐️ synthetic insulation: Arc’teryx Atom Hoody (women’s) / (men’s)
⭐️ down jacket: Arc’teryx Cerium Hoody (women’s) / (men’s)
⭐️ shell jacket: Arc’teryx Beta SL Jacket (women’s) / (men’s)
⭐️ hiking shorts: Lululemon Align shorts
⭐️ fleece mid-layer bottoms: Arc’teryx Kyanite Base Layer Bottoms (women’s) / (men’s)

HEAD, HANDS & FEET
⭐️ sun hat: Arc’teryx Gamma 5-Panel Cap
⭐️ sunglasses: Julbo Vermont
⭐️ neck gaiter: Buff Original
⭐️ beanie: Arc’teryx Mallow Toque
⭐️ lightweight hiking gloves: Outdoor Research Trail Mix Gloves (women’s) / (men’s)
⭐️ waterproof shell mittens: Black Diamond Waterproof Overmitts
⭐️ liner socks: Injinji Liner Crew
⭐️ boot socks: Darn Tough Hiker Micro Crew Cushion Socks (women’s) / (men’s)
⭐️ camp shoes: Teva Original

PERSONAL ITEMS
⭐️ toiletries + bathroom bits
⭐️ Kula Cloth (for women)
⭐️ sun safety
⭐️ camera: Fujifilm x100vi

Marions Lookout

Trail essentials: backpack, boots & poles

Tasmania’s Overland Track throws a bit of everything at you— mud, roots, rainforest humidity, alpine winds— and a solid kit is key to keeping you comfortable through it all. These trail essentials helped me move efficiently, stay dry, and enjoy every muddy step of the adventure.


backpack (50-75L): Osprey Aura AG 50 (women’s) / Atmos AG 65 (men’s)

This is my absolute favourite backpack and I recommend it to everyone— 50L is great for 6 days, but some people may be more comfortable with the 65L version.

👉🏼 Need more advice on choosing a backpack? Check out this post: How to choose the best hiking backpack for every outdoor adventure


raincover: REI Co-op Duck’s Back Pack Rain Cover

Protects your gear from sudden downpours— some packs come with one built-in, but if not, make sure to pack a lightweight rain cover that fits over your bag (REI’s size medium or large should work best, depending on your pack capacity).


summit pack: REI Co-op Flash 18

If you plan to get off the main Overland Track and enjoy any side summits or viewpoints, a lightweight summit pack is a great addition to avoid carrying your full pack everywhere. This should roll up and stow easily!


hiking boots

I personally used Salomon Quest 4 GTX boots and they worked beautifully on the Overland Track, but I’ve since swapped over to a lighter hiking boot that still offers excellent ankle support and waterproofing. This is what I’d wear if I did the Overland again!

👉🏼 Need more advice on choosing the right boot? Read my outdoor footwear guide


Alta Via 1 2 4 Packing List- Italian Dolomites

trekking poles: Black Diamond Trail Trekking Poles

Trekking poles saved my knees on steep descents, provided balance across slippery roots and boardwalks, and made bog crossings way less sketchy.
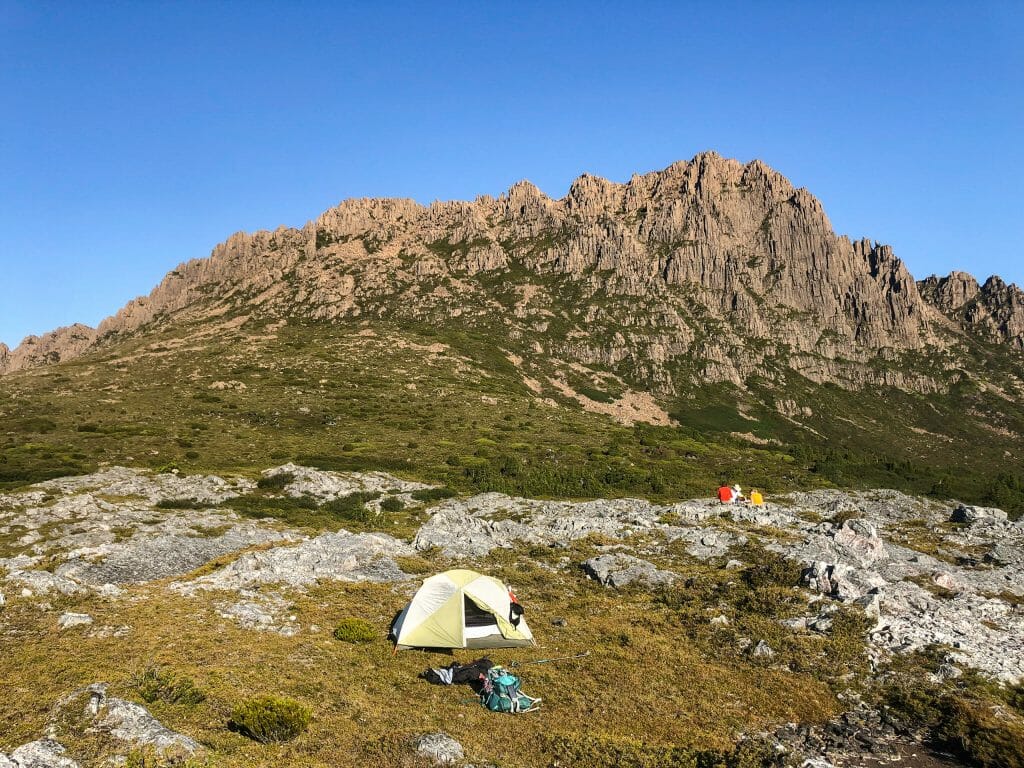

Camping beneath Cradle Mountain

Camping gear

While there are basic huts along the Overland Track, they’re first-come, first-served, and camping gear is a mandatory backup. Expect wet ground, cold nights, and the need for fast setup in unpredictable Tassie weather!

I wrote two super detailed guides to help you choose the best backcountry camping setup based on a decade of international, multi-day backpacking experience everywhere from Patagonia to the Peruvian Andes to the Australian coast.

👉🏼 How to choose the best backpacking tent for your next adventure

👉🏼 How to choose the best outdoor sleep system: sleeping bags, sleeping pads & camp pillows


backpacking tent: Big Agnes Tiger Wall UL2 (solo hikers) or Nemo Dragonfly OSMO 3P (for 2 sharing)

I used an old 2-person Quarter Dome on the TMB, but tent materials have gotten a lot better since 2019, so I’d definitely recommend the Big Agnes Tiger Wall UL2 for solo hikers or couple who don’t mind getting super close! For upgraded interior space, James and I love our Nemo Dragonfly OSMO 3P for 2 people.


sleeping bag: Sea to Summit Spark 0

Temps can swing wildly, and having a zero-degree bag meant I never worried about being underprepared when the wind howled all night.


sleeping pad: Therm-a-Rest NeoAir XLite NXT Sleeping Pad

My favourite ultra-lightweight pad that’s still comfortable enough for a full 8hr sleep on the trail!


camp pillow: Sea to Summit Aeros Premium

A luxury I’ll never hike without! Lightweight, compact, and so worth the space for better sleep in the tent.


Narcissus Hut

Camp kitchen, water storage & food

Huts provide shelter but no kitchen facilities or meals, so you’ll need to carry all your own food and full cooking gear for the entire trek.


camp stove (+ fuel): Jetboil Zip

A compact canister stove is ideal for making simple meals— crazy fast, fuel-efficient, and effective in heavy wind.

A conservative estimate for fuel is one 230g canister per 3 days per person, but I find this is way more than I use. Two people should be able to share a canister for the entire trek if you’re conservative with boiling.


mess kit + cutlery: Sea to Summit Frontier Ultralight Collapsible 4-Piece Dinnerware Set

At the very minimum, your mess kit should contain a spoon and cup; at most, it might extend to a bowl and fork.


water filter: Katadyn BeFree 1.oL Water Filter

There are heaps of creeks, tarns, and hut tanks along the trail, so it’s easy to find water sources to refill your bottles from. Carry a filter to be cautious.


water reservoir: HydraPak Seeker 2L

On top of your filter and your water bottle, backpacking trips call for a water reservoir— a lightweight, collapsible container used to haul dirty water from a stream or lake back to camp. Use it to fill pots for dinner or filter into bottles without crouching over a creek for 10 minutes! Lightweight, packable, and seriously practical when you’re dry camping or need to filter for multiple people.


2x water bottles: Nalgene Wide Mouth

I personally don’t like bladders on overnight trips since they can be especially challenging to fill when you’re filtering water (and the consequences of leakage can be catastrophic if it soaks your sleeping bag), so instead I pack 1-2 standard Nalgene bottles. As you like it!


electrolytes: Liquid IV

With constant sun exposure during the Aussie summer, I’d recommend drinking a minimum of 1 bottle of electrolyte-enriched water per day!


freeze-dried meals + snacks

Pack whatever you need for 6 days on the trail without any restocks.

👉🏼 Check out this post for a breakdown on how I pack backcountry food for alpine expeditions


Garmin In-Reach communication for soloing Aconcagua
Garmin In-Reach communication & emergency device–essential!!

Safety & navigation

Even though the Overland Track is well-travelled, Tasmania’s weather and remoteness mean you need to be completely self-sufficient. Heavy fog, rain, and even summer snowstorms are not unusual, and some sections are extremely isolated.


Alta Via 1 2 4 Packing List- Italian Dolomites

PLB/SOS: Garmin InReach Mini 2

A Personal Locator Beacon (PLB) is your lifeline in the outdoors and I NEVER go hiking without my Garmin InReach Mini 2, which allows me to send messages, get weather updates, track location, and place an SOS call in an emergency, even without phone service. It does require a subscription (starting at $12/month), but it’s worth every cent and has literally saved both of my parents’ lives in the backcountry!


Alta Via 1 2 4 Packing List- Italian Dolomites

GPS: CalTopo app on mobile

The absolute best GPS resource is the smartphone you already own, paired with a reliable, low-cost GPS mapping app that allows you to access detailed offline Topo maps and navigate via GPS satellites, even without mobile service.

My go-to is CalTopo, which costs just $20/year and is by far the most feature-rich, affordable, and accurate mapping tool out there.


First Aid Kit: Adventure Medical Kits Backpacker

All the usual essentials:
• a mix of NSAIDs (ibuprofen, naproxen)
• antihistamines (Claritin for allergies, Benadryl for bites/stings)
• a small selection of stomach meds (like Imodium or Pepto tabs)
• a roll of KT tape (insanely versatile for everything from blisters to rolled ankles)
• alcohol wipes, antiseptic, a few large gauze pads, and blister plasters like Compeed


Alta Via 1 2 4 Packing List- Italian Dolomites

headlamp: Black Diamond Spot 400-R

A bright, rechargeable headlamp is essential for evenings around camp and (hopefully not) late nights on the trail. Lightweight and easy to stash in a top pocket for quick access!


Alta Via 1 2 4 Packing List- Italian Dolomites

powerbank: VRURC Portable Charger with Built-in Cables, 10000mAh

I used my phone constantly for navigation and photos, plus needed power for my inReach and headlamp. I carried a 10,000mAh powerbank and a solar charger, which was just enough to stay topped up on the Overland.


solar charger: BigBlue 28W Solar Charger

On multi-day trips with no access to power, a lightweight solar charger can be a great alternative to carrying multiple powerbanks. I definitely recommend one on the Overland to top up your phone, inReach, and headlamp during sunny lunch breaks— just enough to stay comfortably powered without the extra weight.


Hartnett Falls

Top + bottom layers

Tasmania’s Overland Track dishes up classic “four seasons in a day” weather— you might start in misty rain, hike under blazing sun, and arrive at camp in a freezing gale. A smart, flexible layering system is the only way to stay dry, warm, and comfortable from start to finish.

👉🏼 Need help building a layering system that actually works? Read my outdoor layering guide for tips on choosing base layers, insulation, and outer shells.


sports bras + underwear

I’m not going to tell you what undergarments to pack, but just consider you’ll have 6 days on the trail and it’s very nice to have clean underwear every day!


hiking shirt: Arc’teryx Taema Crew Shirt (women’s) / Cormac Crew Shirt (men’s)

I’d suggest bringing just one shirt and washing it in a river partway through the trek to keep things ultra-light.


sun shirt for approach: Arc’teryx Taema Hoody (women’s) / Cormac Hoody (men’s)

Breathable, quick-drying, and UPF-rated to protect from the intense Australian sun. This is a great daily layer on the Overland!


wool base layer: Smartwool Classic Thermal Base Layer Top (women’s) / (men’s)

I used this as a camp base-layer (and didn’t wear it for any hiking) in an attempt to keep it as clean as possible. Warm, breathable, and perfect for multi-day wear without smelling awful.


lightweight fleece mid-layer: Arc’teryx Rho LT Hoody (women’s) / (men’s)

For hiking, this was the first layer I’d pull on over my t-shirt— lightweight, breathable, and just the right amount of warmth for long climbs or breezy afternoons without overheating. The hood adds a nice bit of extra insulation.


synthetic insulation: Arc’teryx Atom Hoody (women’s) / (men’s)

The Atom Hoody was my go-to insulation layer for contending with that variable Tassie weather.


down jacket: Arc’teryx Cerium Hoody (women’s) / (men’s)

The Arc’teryx Cerium Hoody came out at camp and for extra-cold mornings. Lightweight, packable warmth that felt amazing after a long, wet day on trail.


shell jacket: Arc’teryx Beta SL Jacket (women’s) / (men’s)

You’ll use this as much for wind protection as for actual rain in Tassie— a shell puts in long hours on the Overland, thanks to the wild fluctuations in weather!


hiking shorts: Lululemon Align shorts

Whatever your hiking short preference, I’d recommend 1-2 pairs for this 6-day route. I personally brought 1 pair of long tights and 1 pair of shorts.


fleece mid-layer bottoms: Arc’teryx Kyanite Base Layer Bottoms (women’s) / (men’s)

The perfect lightweight yet super warm sleep tights— great for hanging out around camp and staying cozy in your sleeping bag!


On top of the world (Cradle Mountain)

Head, hands & feet

Tasmania’s rapidly shifting weather means you’ll need to protect your extremities from sun, cold, rain, and wind— sometimes all on the same day. These pieces kept me warm, dry, and moving through the wild Tasmanian alpine.


sun hat: Arc’teryx Gamma 5-Panel Cap

I wore a light hat every day for sun protection. Breathable and easy to shove into a pocket when not needed!


Alta Via 1 2 4 Packing List- Italian Dolomites

sunglasses: Julbo Vermont

From glacier travel to rocky scrambles, these are my favourite outdoor sunglasses.


Buff

neck gaiter: Buff Original

Lightweight and versatile, a Buff is essential for protecting against daily sun, sweat, dust, and wind.


Alta Via 1 2 4 Packing List- Italian Dolomites

beanie: Arc’teryx Mallow Toque

A small beanie is an easy add to your camp outfit to stay warm as nighttime temps approach freezing.


Outdoor Research Trail Mix gloves

lightweight hiking gloves: Outdoor Research Trail Mix Gloves (women’s) / (men’s)

Nice to have for chilly mornings or setting up camp in the wind. These were thin, breathable, and just warm enough without overheating my hands during movement.


waterproof shell mittens: Black Diamond Waterproof Overmitts

There’s always a chance of rain in Tassie, so bring a lightweight pair of waterproof shell mittens to layer over your fleece gloves for extra warmth and full weather protection.


Alta Via 1 2 4 Packing List- Italian Dolomites

2x liner socks: Injinji Liner Crew + REI Co-op Silk Liner Crew Socks

I wore my favourite toe-sock liners under my boot socks to reduce friction and prevent blisters throughout the trail.


Alta Via 1 2 4 Packing List- Italian Dolomites

2x boot socks: Darn Tough Hiker Micro Crew Cushion Socks (women’s) / (men’s)

My go-to socks for backpacking— durable, padded, and still comfy after multiple days of trail grime. I’d recommend 2 pairs of socks for this 6-day route.


camp shoes: Teva Original

Easy to slip on after hiking boots, great for giving feet a breather, and worked well for setting up camp and short bathroom walks.


Foggy morning landscape

Personal items

A few lightweight essentials that made a huge difference for trail hygiene, sun protection, and overall sanity during 6 days in the Tasmanian wilderness.


toiletries + bathroom bits

Toothbrush, toothpaste, hairbrush, deodorant, medications, contact solution… whatever you need to stay clean and comfortable for multiple days on the trail!

For the wilderness bathroom, pack toilet paper, hand sanitiser, and a ziplock bag to pack out used items if needed.


Kula Cloth (for women)

This reusable antimicrobial pee cloth is designed specifically for backcountry female hygiene— it’s absorbent on one side, waterproof on the other, and treated with silver ions to resist bacteria growth and odour.

It’s easy to wash, dries fast, snaps shut for discretion, and clips onto the outside of your pack so it’s always accessible. Not only is it way more hygienic than carrying used toilet paper in a ziplock, but it also seriously reduces your trail waste, making it a no-brainer for sustainable hiking and women’s health on the go.


sun safety

Sun exposure builds quickly when you’re spending hours outside every day, especially in Australia (that ozone hole is no joke). Pack SPF 50+ sunscreen, SPF lip balm, and whatever else you need to stay sun-safe on the trail!


camera: Fujifilm x100vi

👉🏼 For a complete run-down of ALL the camera gear we are currently using & loving, check out this post: Camera gear for travel photography: what we use as full-time travellers


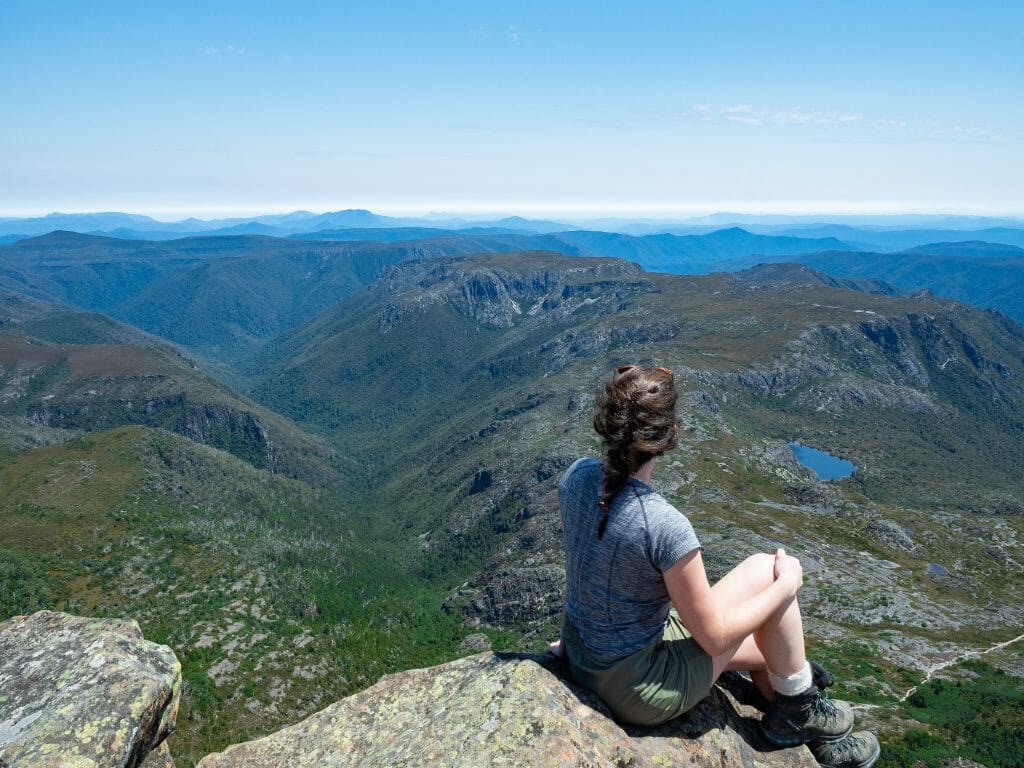
Trekking Tasmania’s Overland Track was a true highlight of my time on Australia’s island state— lush, rugged, remote, and full of unexpected beauty. This packing list helped me stay comfortable and prepared through all the weather and all the mud, and I hope it does the same for you.

⛰️ Still planning your hike? Don’t miss my Overland Track Guide for a detailed daily route description, trip logistics & real-world tips on tackling Tasmania’s best multi-day hike. And if you have any questions about gear, drop them in the comments, I’m always happy to help!

TAGS:outdoor packing liststrip-specific packing lists
0 Comments
Share
brooke beyond

Hey, I'm Brooke and I'm obsessed with getting off the beaten path, exploring backcountry gems & travelling beyond the ordinary! I left Australia 5 years ago after finishing a PhD in Biomechanics & have been travelling the world full-time ever since (joined by my life/climbing partner, James). Whether it’s road-tripping through Mexico, climbing alpine peaks in the Andes, scuba diving in the Red Sea, or tackling epic via ferrata in the Dolomites, I hope this blog will inspire your future adventures & help you find wonder in every corner of the globe. xx bb

Leave a Comment Cancel Comment

You May Also Like

15 April 2016

A Quick Hike Up Mt. Oberon

7 July 2020

Great Ocean Walk (day 3): Cape Otway to Johanna Beach via Aire River

9 August 2018

The great Humpback migration: Whale watching in Sydney

hi, I’m brooke!

I'm obsessed with getting off the beaten path, exploring backcountry gems & travelling beyond the ordinary! I left Australia 5 years ago after finishing a PhD in Biomechanics & have been travelling the world full-time ever since (now joined by my life/climbing partner, James). I hope this blog will inspire your future adventures & help you find wonder in every corner of the globe. xx bb

read my story
currently exploring

currently exploring

mexico

read our gear guides

🥾 hiking boots

🎒 hiking backpacks

🌨️ cold-weather layers

⛺️ backpacking & alpine tents

🛌 sleeping bag & pads

🍪 backcountry food

📸 travel camera gear

✈️ travel clothing

trail guides

summit guides

itineraries

outdoor gear

GPS maps

recent posts

  • Climbing Iztaccíhuatl volcano

    2-week Mexico volcanoes itinerary: climbing Pico de Orizaba, Izta, Malinche & Toluca

    3 June 2025
  • Mexico City: the perfect 5-day itinerary for CDMX

    31 May 2025
  • Climbing Iztaccíhuatl volcano

    Driving in Mexico: essential road trip guide for foreigners

    28 May 2025
  • 10-day Rwanda road trip itinerary: gorillas, volcanoes & Lake Kivu

    25 May 2025
  • 2-week Patagonia itinerary: best of Torres del Paine & Los Glaciares/El Chaltén

    22 May 2025

@brookebeyond_
brooke ✨travel & mountain gal

@brookebeyond_

  • We took our own engagement photos in the Swiss Alps this summer and here’s how it went 👉🏼

(#8 might just be my personal fave 😂)

ALSO this post is for anyone who’s gotten the (woefully mistaken) impression that I am “naturally photogenic”
  • absolutely one of the most amazing little hikes we did in Switzerlnad this summer (& the competition was stiff) 🤩🏔️🌞🌸

📍Saxer Lücke

GETTING THERE: catch the Frümsen gondola to Staubernkanzel

HIKE: 1hr (2.5km, 250m gain) to this amazing viewpoint

WHEN TO GO: the best lighting is in the afternoon, these photos were taken around 4pm and it just kept getting better!
.
.
.
.
.
#swissalps #switzerland #saxerlücke #swisssummer #alpstein
  • the BEST easy hike in Zermatt 🏔️🥾✨

For spectacular views of the Matterhorn, the enormous Monte Rosa massif, and the Gorner Glacier (as well as 29 peaks over 4,000m!), there’s no better EASY hike than Riffelberg to Gornergrat, accessible via the Gornergrat Railway in Zermatt. 

The hike only takes about 2hrs at a leisurely pace (I did it 7 weeks after knee surgery!), so it’s suitable for families and non-hikers with even a basic level of fitness 🏃🏻‍♀️

🇨🇭 START FROM ZERMATT
- purchase tickets (day-of is fine) from Gornergrat Railway, right across from Zermatt train station

🚞 GORNERGRAT RAILWAY
- tickets from Zermatt to Riffelberg cost 42CHF ($50USD)— there’s no discount for return, so keep it flexible by purchasing one-way
- the train takes the about 25min, sit on the right side for best views!
- when you finish the hike at Gornergrat, buy a one-way ticket back to Zermatt for 66CHF ($80USD)
- save 50% on tickets with the Swiss Half Fare Card— the pass costs 120CHF ($150USD) and lasts for a whole month, it’s almost always worth it!) 

🥾 HIKE DETAILS: RIFFELSEE TO GORNERGRAT
- the route is 5km with 560m elevation gain (entirely uphill)
- the best views of the Matterhorn are around Riffelsee, where several small lakes offer perfect reflections
- near Rotenboden (the train station in between Riffelberg & Gornergrat), there are excellent rocky viewpoints of both Matterhorn and Monta Rosa— it’s easy to find quiet views if you hike around a bit!
- as you get closer to Gornergrat, Monte Rosa and the Gorner Glacier are right in your face
- almost everyone does this hike in reverse (Gornergrat to Riffelberg), I just personally hate hiking downhill— but you can swap if you’d rather descend the entire way!
  • 2 months after knee surgery and barely a week after I stopped walking with a knee brace and cane, I was honestly so proud to be able to do this (objectively very easy) 5km hike with 250m gain— it may not seem like much, but for me, this was a HUGE step forward 🥹

📍 Saxer Lücke, Switzerland 

it’s been an extremely challenging recovery, both physically and mentally… but the milestone moments always fill me with hope that things are indeed getting better ❤️‍🩹

special shoutout to my fiancé/hiking partner/personal cheering squad @slatojc for slowing down with me on the trail and always offering a hand down slippery rocks before I even have to ask
  • it’s another “if it wasn’t so stupid beautiful, I’d never set foot in this country again because it’s bleeding me dry” kinda summer 🇨🇭🌸☀️🏔️🦋✨

(hands up if you feel personally victimised by Swiss prices but you can’t stay away because MOUNTAINS 😭😭)
  • magical summer sunsets in Switzerland ✨
.
.
.
.
#swissalps #stoosridge #swisssummer #sunset
  • BEST EASY HIKES IN SWITZERLAND 🇨🇭❤️‍🩹

just 2 months after knee surgery, I found myself travelling through Switzerland— in search of easy hikes that were actually accessible post-op 🩼 

luckily, there’s hardly a better place in the world for easy hiking than the Swiss Alps!!

so whether you’re recovering from an injury, hiking with older parents/young children, or just a non-hiker who loves an epic view, this short list of HIGH VALUE viewpoints & hikes offer the most spectacular mountain scenery with minimal challenge

💸 BUDGET TIP: buy the Swiss Half Fare Card to save 50% all these gondolas and trains, which can seriously add up!!

- Stoos Ridge: take the Stoosbahn to the little village of Stoos + walk about 15min to the chairlift that can take you all the way up to Fronalpstock— you can walk as little or as much as you want up here, the views are amazing right away
- Riffelsee: take the Gornergrat Railway from Zermatt to Riffelsee + hike 20min to the 2 beautiful alpine lakes (then either hike 1hr up to Gornergrat or catch the train)
- Saxer Lücke: catch a gondola + hike 1hr (2.5km, 250m gain) to this amazing viewpoint— hardest on this list and not suitable for those with extremely limited mobility 
- Kleine Scheidegg: take the train or the gondola from Grindelwald + hike about 20min uphill to the lake
- Jungfraujoch: from Kleine Scheidegg, take the gondola to Jungfraujoch + walk around the viewing platforms
- Trockener Steg: take the gondola from Zermatt + walk 10min from the top of the cable car to the lake for incredible Matterhorn views
- Oeschinensee: 20min walk from the top of the Kandersteg cable car to the lake (bus also available), then you can walk as little or as much as you want around the lake or on the famous Panorama Trail
.
.
.
.
.
#easyhikes #swissalps #matterhorn #jungfraujoch #oeschinensee #stoos #switzerland
  • This is my 2nd summer back in Zermatt to climb the Matterhorn— and my 2nd summer NOT climbing the Matterhorn 😑

In 2023, a wicked snow storm blew through the night before my planned ascent and grounded all climbing parties… and then I had knee surgery less than 2 months before our repeat trip to Zermatt this year. I won’t lie, it’s been extremely disappointing to spend nearly 2 weeks in one of the most expensive places in the world, and STILL not do the thing I came here to do 😅

But alas, here we are in Zermatt again! (and apparently not for the last time)

Even though we are slowly going bankrupt, it’s a gorgeous place to be in the summer with no shortage of amazing trails!

Can’t wait to share some of what we’ve been up to— my first little hikes since surgery 🤩
  • we’ve spent the last several weeks in Switzerland and, in many ways, I couldn’t have chosen a better destination for post-knee-surgery recovery— where else in the world can you get views like THIS with 1hr of easy hiking?!

I’m not sure I’ll ever truly prefer the accessibility of the Alps to true backcountry… but there’s no denying that I couldn’t be outside any other way right now and it’s given me a whole new appreciation for the hundreds of gondolas, funiculars, and trains that connect non-hikers or mobility-impaired enthusiasts like myself to otherwise unreachable heights!

I’m enormously grateful for the opportunity to rehab my knee under legendary peaks rather than fluorescent indoor lights, so THANK YOU Switzerland 😍
follow @brookebeyond_

travel beyond the ordinary

Explore my travel guides, custom itineraries & blog posts with an interactive world map ✨

all destinations

  • We took our own engagement photos in the Swiss Alps this summer and here’s how it went 👉🏼

(#8 might just be my personal fave 😂)

ALSO this post is for anyone who’s gotten the (woefully mistaken) impression that I am “naturally photogenic”
  • absolutely one of the most amazing little hikes we did in Switzerlnad this summer (& the competition was stiff) 🤩🏔️🌞🌸

📍Saxer Lücke

GETTING THERE: catch the Frümsen gondola to Staubernkanzel

HIKE: 1hr (2.5km, 250m gain) to this amazing viewpoint

WHEN TO GO: the best lighting is in the afternoon, these photos were taken around 4pm and it just kept getting better!
.
.
.
.
.
#swissalps #switzerland #saxerlücke #swisssummer #alpstein
  • the BEST easy hike in Zermatt 🏔️🥾✨

For spectacular views of the Matterhorn, the enormous Monte Rosa massif, and the Gorner Glacier (as well as 29 peaks over 4,000m!), there’s no better EASY hike than Riffelberg to Gornergrat, accessible via the Gornergrat Railway in Zermatt. 

The hike only takes about 2hrs at a leisurely pace (I did it 7 weeks after knee surgery!), so it’s suitable for families and non-hikers with even a basic level of fitness 🏃🏻‍♀️

🇨🇭 START FROM ZERMATT
- purchase tickets (day-of is fine) from Gornergrat Railway, right across from Zermatt train station

🚞 GORNERGRAT RAILWAY
- tickets from Zermatt to Riffelberg cost 42CHF ($50USD)— there’s no discount for return, so keep it flexible by purchasing one-way
- the train takes the about 25min, sit on the right side for best views!
- when you finish the hike at Gornergrat, buy a one-way ticket back to Zermatt for 66CHF ($80USD)
- save 50% on tickets with the Swiss Half Fare Card— the pass costs 120CHF ($150USD) and lasts for a whole month, it’s almost always worth it!) 

🥾 HIKE DETAILS: RIFFELSEE TO GORNERGRAT
- the route is 5km with 560m elevation gain (entirely uphill)
- the best views of the Matterhorn are around Riffelsee, where several small lakes offer perfect reflections
- near Rotenboden (the train station in between Riffelberg & Gornergrat), there are excellent rocky viewpoints of both Matterhorn and Monta Rosa— it’s easy to find quiet views if you hike around a bit!
- as you get closer to Gornergrat, Monte Rosa and the Gorner Glacier are right in your face
- almost everyone does this hike in reverse (Gornergrat to Riffelberg), I just personally hate hiking downhill— but you can swap if you’d rather descend the entire way!
  • 2 months after knee surgery and barely a week after I stopped walking with a knee brace and cane, I was honestly so proud to be able to do this (objectively very easy) 5km hike with 250m gain— it may not seem like much, but for me, this was a HUGE step forward 🥹

📍 Saxer Lücke, Switzerland 

it’s been an extremely challenging recovery, both physically and mentally… but the milestone moments always fill me with hope that things are indeed getting better ❤️‍🩹

special shoutout to my fiancé/hiking partner/personal cheering squad @slatojc for slowing down with me on the trail and always offering a hand down slippery rocks before I even have to ask
  • it’s another “if it wasn’t so stupid beautiful, I’d never set foot in this country again because it’s bleeding me dry” kinda summer 🇨🇭🌸☀️🏔️🦋✨

(hands up if you feel personally victimised by Swiss prices but you can’t stay away because MOUNTAINS 😭😭)
We took our own engagement photos in the Swiss Alps this summer and here’s how it went 👉🏼

(#8 might just be my personal fave 😂)

ALSO this post is for anyone who’s gotten the (woefully mistaken) impression that I am “naturally photogenic”
We took our own engagement photos in the Swiss Alps this summer and here’s how it went 👉🏼

(#8 might just be my personal fave 😂)

ALSO this post is for anyone who’s gotten the (woefully mistaken) impression that I am “naturally photogenic”
We took our own engagement photos in the Swiss Alps this summer and here’s how it went 👉🏼

(#8 might just be my personal fave 😂)

ALSO this post is for anyone who’s gotten the (woefully mistaken) impression that I am “naturally photogenic”
We took our own engagement photos in the Swiss Alps this summer and here’s how it went 👉🏼

(#8 might just be my personal fave 😂)

ALSO this post is for anyone who’s gotten the (woefully mistaken) impression that I am “naturally photogenic”
We took our own engagement photos in the Swiss Alps this summer and here’s how it went 👉🏼

(#8 might just be my personal fave 😂)

ALSO this post is for anyone who’s gotten the (woefully mistaken) impression that I am “naturally photogenic”
We took our own engagement photos in the Swiss Alps this summer and here’s how it went 👉🏼

(#8 might just be my personal fave 😂)

ALSO this post is for anyone who’s gotten the (woefully mistaken) impression that I am “naturally photogenic”
We took our own engagement photos in the Swiss Alps this summer and here’s how it went 👉🏼

(#8 might just be my personal fave 😂)

ALSO this post is for anyone who’s gotten the (woefully mistaken) impression that I am “naturally photogenic”
We took our own engagement photos in the Swiss Alps this summer and here’s how it went 👉🏼

(#8 might just be my personal fave 😂)

ALSO this post is for anyone who’s gotten the (woefully mistaken) impression that I am “naturally photogenic”
We took our own engagement photos in the Swiss Alps this summer and here’s how it went 👉🏼

(#8 might just be my personal fave 😂)

ALSO this post is for anyone who’s gotten the (woefully mistaken) impression that I am “naturally photogenic”
We took our own engagement photos in the Swiss Alps this summer and here’s how it went 👉🏼

(#8 might just be my personal fave 😂)

ALSO this post is for anyone who’s gotten the (woefully mistaken) impression that I am “naturally photogenic”
@brookebeyond_
@brookebeyond_
•
Follow
We took our own engagement photos in the Swiss Alps this summer and here’s how it went 👉🏼 (#8 might just be my personal fave 😂) ALSO this post is for anyone who’s gotten the (woefully mistaken) impression that I am “naturally photogenic”
2 days ago
View on Instagram |
1/5
@brookebeyond_
@brookebeyond_
•
Follow
absolutely one of the most amazing little hikes we did in Switzerlnad this summer (& the competition was stiff) 🤩🏔️🌞🌸 📍Saxer Lücke GETTING THERE: catch the Frümsen gondola to Staubernkanzel HIKE: 1hr (2.5km, 250m gain) to this amazing viewpoint WHEN TO GO: the best lighting is in the afternoon, these photos were taken around 4pm and it just kept getting better! . . . . . #swissalps #switzerland #saxerlücke #swisssummer #alpstein
3 days ago
View on Instagram |
2/5
the BEST easy hike in Zermatt 🏔️🥾✨

For spectacular views of the Matterhorn, the enormous Monte Rosa massif, and the Gorner Glacier (as well as 29 peaks over 4,000m!), there’s no better EASY hike than Riffelberg to Gornergrat, accessible via the Gornergrat Railway in Zermatt. 

The hike only takes about 2hrs at a leisurely pace (I did it 7 weeks after knee surgery!), so it’s suitable for families and non-hikers with even a basic level of fitness 🏃🏻‍♀️

🇨🇭 START FROM ZERMATT
- purchase tickets (day-of is fine) from Gornergrat Railway, right across from Zermatt train station

🚞 GORNERGRAT RAILWAY
- tickets from Zermatt to Riffelberg cost 42CHF ($50USD)— there’s no discount for return, so keep it flexible by purchasing one-way
- the train takes the about 25min, sit on the right side for best views!
- when you finish the hike at Gornergrat, buy a one-way ticket back to Zermatt for 66CHF ($80USD)
- save 50% on tickets with the Swiss Half Fare Card— the pass costs 120CHF ($150USD) and lasts for a whole month, it’s almost always worth it!) 

🥾 HIKE DETAILS: RIFFELSEE TO GORNERGRAT
- the route is 5km with 560m elevation gain (entirely uphill)
- the best views of the Matterhorn are around Riffelsee, where several small lakes offer perfect reflections
- near Rotenboden (the train station in between Riffelberg & Gornergrat), there are excellent rocky viewpoints of both Matterhorn and Monta Rosa— it’s easy to find quiet views if you hike around a bit!
- as you get closer to Gornergrat, Monte Rosa and the Gorner Glacier are right in your face
- almost everyone does this hike in reverse (Gornergrat to Riffelberg), I just personally hate hiking downhill— but you can swap if you’d rather descend the entire way!
@brookebeyond_
@brookebeyond_
•
Follow
the BEST easy hike in Zermatt 🏔️🥾✨ For spectacular views of the Matterhorn, the enormous Monte Rosa massif, and the Gorner Glacier (as well as 29 peaks over 4,000m!), there’s no better EASY hike than Riffelberg to Gornergrat, accessible via the Gornergrat Railway in Zermatt. The hike only takes about 2hrs at a leisurely pace (I did it 7 weeks after knee surgery!), so it’s suitable for families and non-hikers with even a basic level of fitness 🏃🏻‍♀️ 🇨🇭 START FROM ZERMATT - purchase tickets (day-of is fine) from Gornergrat Railway, right across from Zermatt train station 🚞 GORNERGRAT RAILWAY - tickets from Zermatt to Riffelberg cost 42CHF ($50USD)— there’s no discount for return, so keep it flexible by purchasing one-way - the train takes the about 25min, sit on the right side for best views! - when you finish the hike at Gornergrat, buy a one-way ticket back to Zermatt for 66CHF ($80USD) - save 50% on tickets with the Swiss Half Fare Card— the pass costs 120CHF ($150USD) and lasts for a whole month, it’s almost always worth it!) 🥾 HIKE DETAILS: RIFFELSEE TO GORNERGRAT - the route is 5km with 560m elevation gain (entirely uphill) - the best views of the Matterhorn are around Riffelsee, where several small lakes offer perfect reflections - near Rotenboden (the train station in between Riffelberg & Gornergrat), there are excellent rocky viewpoints of both Matterhorn and Monta Rosa— it’s easy to find quiet views if you hike around a bit! - as you get closer to Gornergrat, Monte Rosa and the Gorner Glacier are right in your face - almost everyone does this hike in reverse (Gornergrat to Riffelberg), I just personally hate hiking downhill— but you can swap if you’d rather descend the entire way!
1 week ago
View on Instagram |
3/5
2 months after knee surgery and barely a week after I stopped walking with a knee brace and cane, I was honestly so proud to be able to do this (objectively very easy) 5km hike with 250m gain— it may not seem like much, but for me, this was a HUGE step forward 🥹

📍 Saxer Lücke, Switzerland 

it’s been an extremely challenging recovery, both physically and mentally… but the milestone moments always fill me with hope that things are indeed getting better ❤️‍🩹

special shoutout to my fiancé/hiking partner/personal cheering squad @slatojc for slowing down with me on the trail and always offering a hand down slippery rocks before I even have to ask
@brookebeyond_
@brookebeyond_
•
Follow
2 months after knee surgery and barely a week after I stopped walking with a knee brace and cane, I was honestly so proud to be able to do this (objectively very easy) 5km hike with 250m gain— it may not seem like much, but for me, this was a HUGE step forward 🥹 📍 Saxer Lücke, Switzerland it’s been an extremely challenging recovery, both physically and mentally… but the milestone moments always fill me with hope that things are indeed getting better ❤️‍🩹 special shoutout to my fiancé/hiking partner/personal cheering squad @slatojc for slowing down with me on the trail and always offering a hand down slippery rocks before I even have to ask
3 weeks ago
View on Instagram |
4/5
@brookebeyond_
@brookebeyond_
•
Follow
it’s another “if it wasn’t so stupid beautiful, I’d never set foot in this country again because it’s bleeding me dry” kinda summer 🇨🇭🌸☀️🏔️🦋✨ (hands up if you feel personally victimised by Swiss prices but you can’t stay away because MOUNTAINS 😭😭)
3 weeks ago
View on Instagram |
5/5

  • start here
  • about
  • group trips
  • destinations
  • hiking guides
  • outdoor gear
  • custom GPS maps
  • privacy
  • contact

COPYRIGHT © 2025 BROOKE BEYOND. TRAVEL BEYOND THE ORDINARY. Site Powered by Pix & Hue.


Loading Comments...