
La Malinche (Matlalcuéyatl) hiking guide: best volcano climbs in Mexico
Last Updated on 9 July 2026
Straddling the border between Puebla and Tlaxcala in one of central Mexico’s most beautiful national parks, La Malinche is a dormant volcano named for the local Nahua woman who acted as interpreter to Hernán Cortés during the Spanish Conquest of the Aztec Empire. Although many view her as a traitor, history remembers her as a strong woman who did her best to survive during shifting times— and this soaring volcano is honoured by her name!
Through shaded forests, up dark volcanic slopes, and finally scrambling to the summit of Mexico’s 6th highest mountain, you’ll be treated to views of volcanos in every direction at a breezy 4,461m. This post describes everything you need to know about climbing La Malinche (Matlalcuéyatl) without a guide, including difficulty, entrance fees, a detailed route description, essential gear & more!
For a complete itinerary that includes Pico de Orizaba, Iztaccíhuatl, Nevado de Toluca & La Malinche (Mexico’s 1st, 3rd, 4th & 6th highest mountains), check out this post: 2-week Mexico volcanoes itinerary
La Malinche hiking stats
- Summit elevation: 4,461m (14,640ft)
- Estimated hike time: 6hrs
- Distance: 12km (7.5mi)
- Elevation gain: 1,300m (4,265ft)
- Difficulty: moderate


How hard is La Malinche?
Malinche is a moderate hike with only a few sections of Class 2-3 scrambling below the summit block. Compared to many of Mexico’s other volcanoes, this is a much more straightforward hike that, although steep and not without its challenges, doesn’t necessarily require a significant amount of off-trail experience.
Much of the route is on a well-defined path that eventually leads through scree and talus fields (which are nicely marked with cairns) up to the rocky summit. With good footwork, comfort on unstable terrain, and basic navigational skills, La Malinche is suitable for intermediate hikers.


La Malinche elevation
Starting at 3,100m and ascending all the way to 4,461m, La Malinche gains a fairly sizeable amount of elevation and it’s possible that you’ll start to feel the effects of altitude near the summit if you aren’t adequately acclimatised.
Regardless of your fitness, age, or previous experience with high-elevation climbing, there is absolutely no substitute for acclimatisation! Camping just below the trailhead at Centro Vacacional Malintzi (3,100m) prior to the climb is helpful, as are days spent just walking around Mexico City (2,240m) or ascending one of the region’s other volcanoes— I did the slightly higher and harder climb of Nevado de Toluca (4,680m) prior to Malinche and felt no symptoms on this hike!
I put my PhD to good use by writing a super detailed post about high-altitude mountaineering that will help you understand the difference between normal adaptations to altitude vs altitude sickness, ways you can prevent serious complications, and acclimatisation strategies: A climber’s guide to preventing & treating altitude sickness at high elevations
Practical information
When to hike La Malinche
Although somewhat counterintuitive, the main hiking and climbing season in central Mexico is during the winter, specifically November, December, January, or February — this is the dry season and the time of year most likely to have bright, clear days without precipitation.
The rocky summit of Malinche is not super safe after rain (which will quickly freeze into ice) or heavy snow, so be sure to check the weather on the mountain before setting off on the trail. The weather at 3,100m isn’t necessarily representative of the alpine conditions at 4,461m!
Getting to La Malinche
The Malinche trailhead is located within the state of Tlaxcala ~
- 3hrs (150km) from Mexico City
- 1.5hrs (40km) from Puebla City
- 30min (25km) from the charming Pueblo Mágico of Huamantla
The entirety of the drive to the trailhead (located within spitting distance of the campsite) is on well-maintained paved roads suitable for any vehicle. If you don’t camp, you’ll pay 100p for parking in a small dirt lot; those staying at Centro Vacacional Malintzi can park and walk uphill for 2min to the start of the hike.
Travelling without a car? There are a few public transport options to reach La Malinche. From Puebla or Mexico City, catch one of the frequent buses to Apizaco, from which you can either hop in a colectivo that will bring you to the IMSS Malintzi or share a taxi for about 300p. Another hassle-free option is to join a guided hike, with transport included from Mexico City or Puebla, making it an easy and fun day trip.
Entry fees for La Malinche
As of early 2024, entry to Parque Nacional La Malinche (La Malinche National Park) is 58MXN ($3.5USD) per person, payable in cash at the CONANP booth right before the trailhead. You do not need any advance reservations or permits to climb Malinche!
Camping at La Malinche
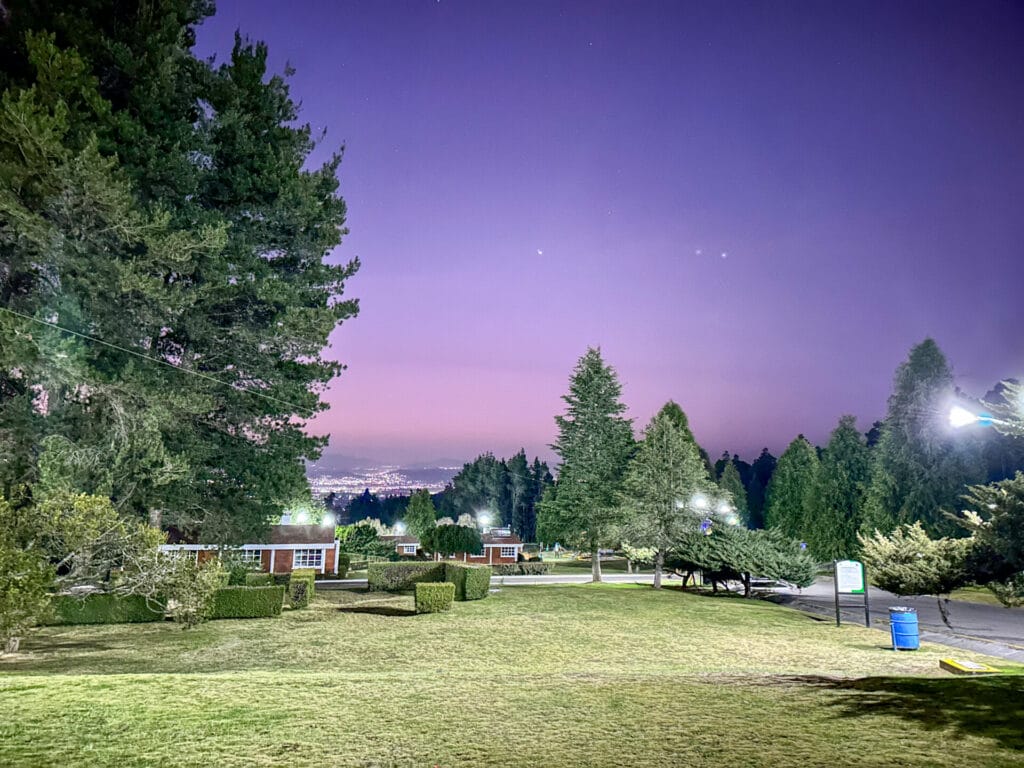
There is a truly phenomenal government-owned, resort-style campsite right below the trailhead called Centro Vacacional IMSS Malintzi. For a minuscule 95MXN ($5USD) per person, you’ll get access to fire pits, BBQs, cooking shelters, hot showers, clean bathrooms, and grassy campsites separated by neatly trimmed hedges. There’s even a tasty restaurant and a little market on-site selling firewood, cold drinks, and basic snacks.


Having camped fairly extensively around Mexico in a variety of locations and situations, I can say that this is among the best campsites I have ever seen— even by international standards. With plenty of time up our sleeves to drive to a neighbouring town, we still opted to spend the night before AND after the hike just because it was so nice!
*La Malinche: route description
From the fantastic Centro Vacacional IMSS Malintzi campground, it takes just a few minutes to walk uphill along the road to the carpark and trailhead for La Malinche. There’s a CONANP booth here where you can pay the modest national park fee and collect your bracelet before setting off into the trees.
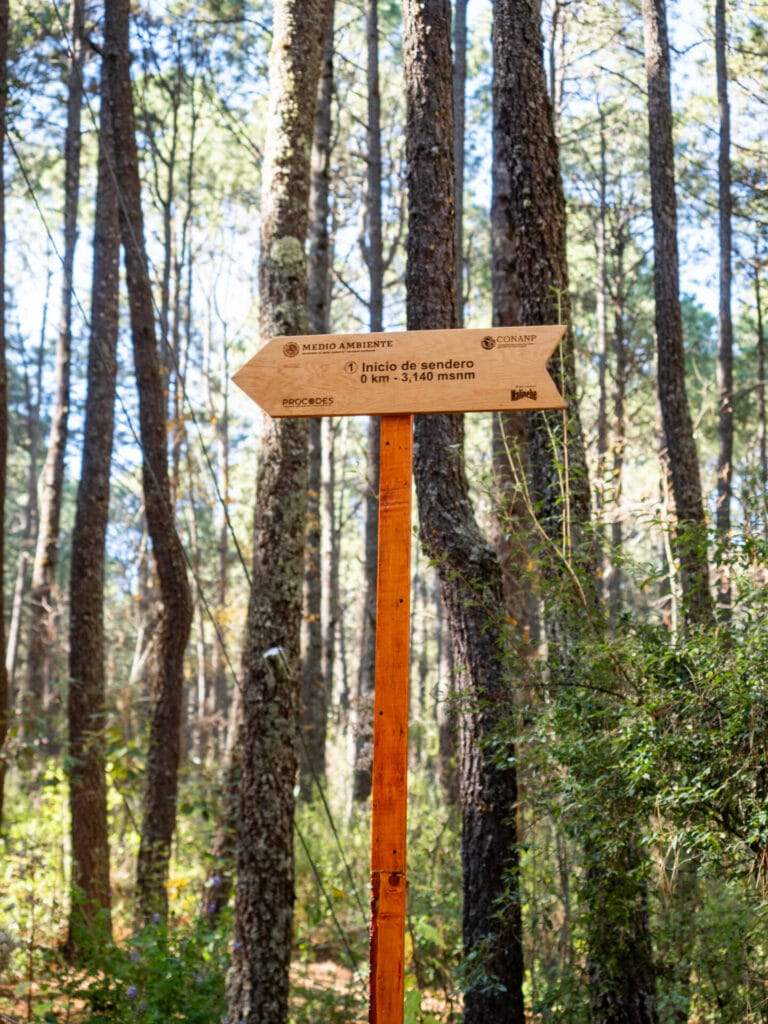


The first section of the hike follows an old access road, which you’ll ascend for a short distance (including some pavement) before a series of short-cuts lead you more directly uphill along a root-covered dirt trail. Frequent signs mark your progress and it’s easy to follow the shaded path uphill to connect with the official start to the route after about an hour.
Leaving the road behind, wind through a dense pine forest before popping out of the treeline about 1.5hrs from the trailhead to a direct view of La Malinche herself!
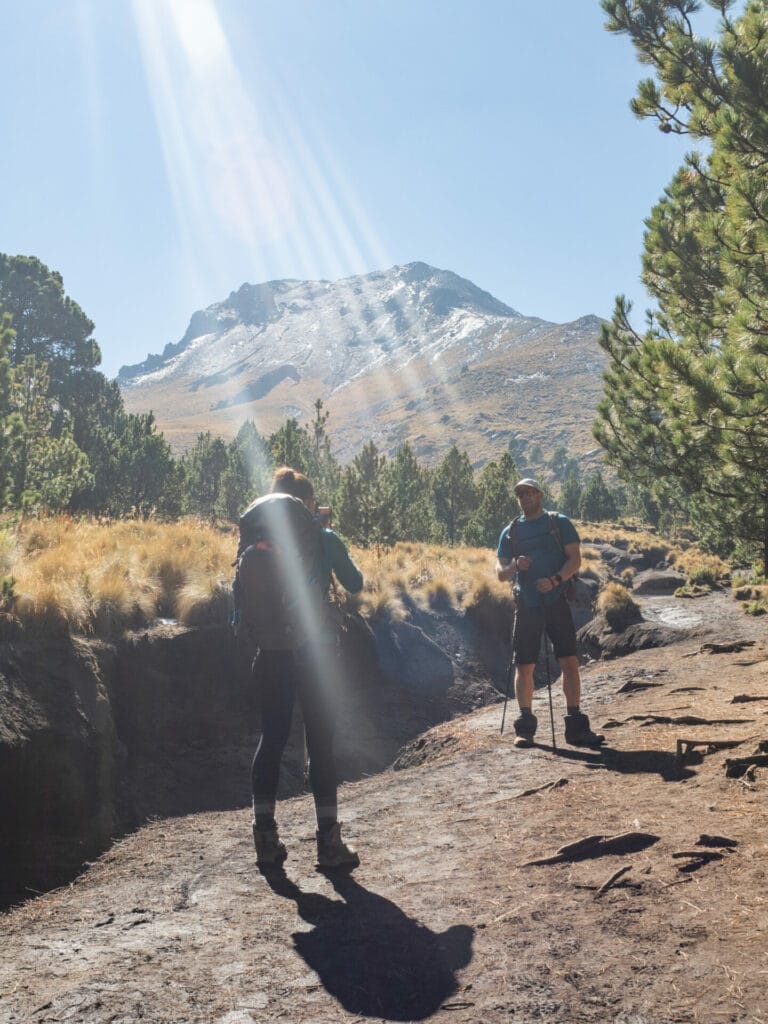
Once out of the forest, the terrain gradually steepens and becomes complicated by rocks and deep ruts, as well as slick mud, eventually giving way to a scree and talus slope that requires a bit of care to ascend. Trekking poles are super helpful on the entire ascent!
There is almost no route-finding on Malinche, with well-trodden trails cutting through the rocks and, where the path is overwhelmed by scree, cairns marking the ascent. It’s a fairly straightforward hike whose main challenge is the increasing elevation, which you’ll absolutely be feeling as you gain 1,300m from trailhead to summit.
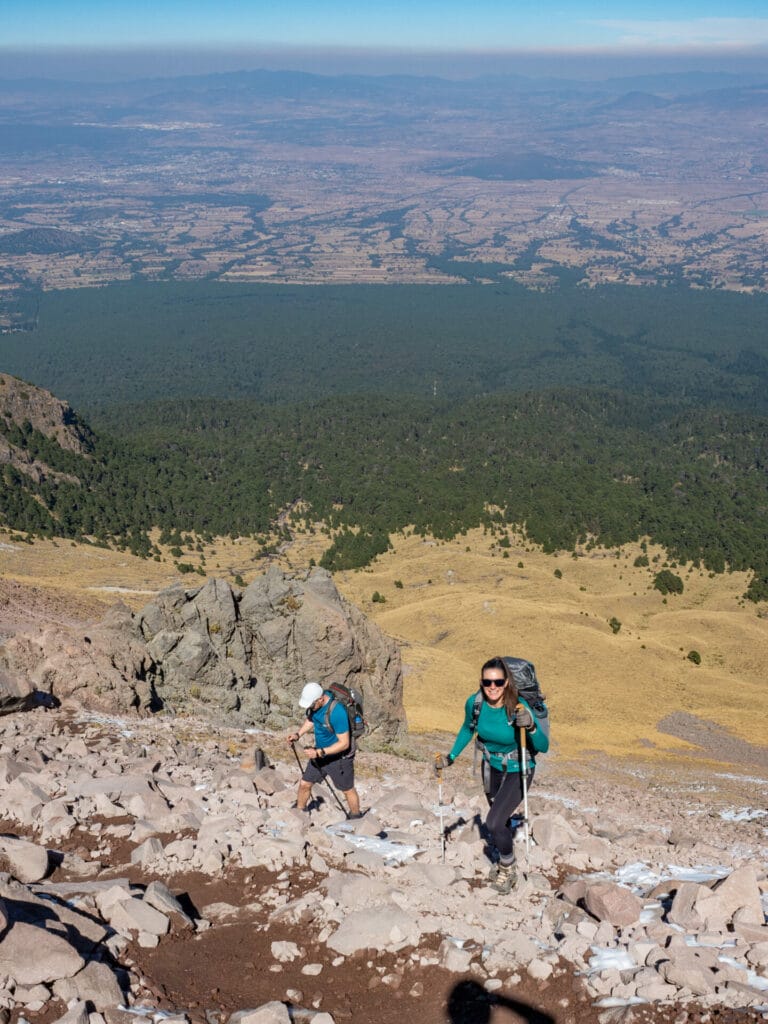


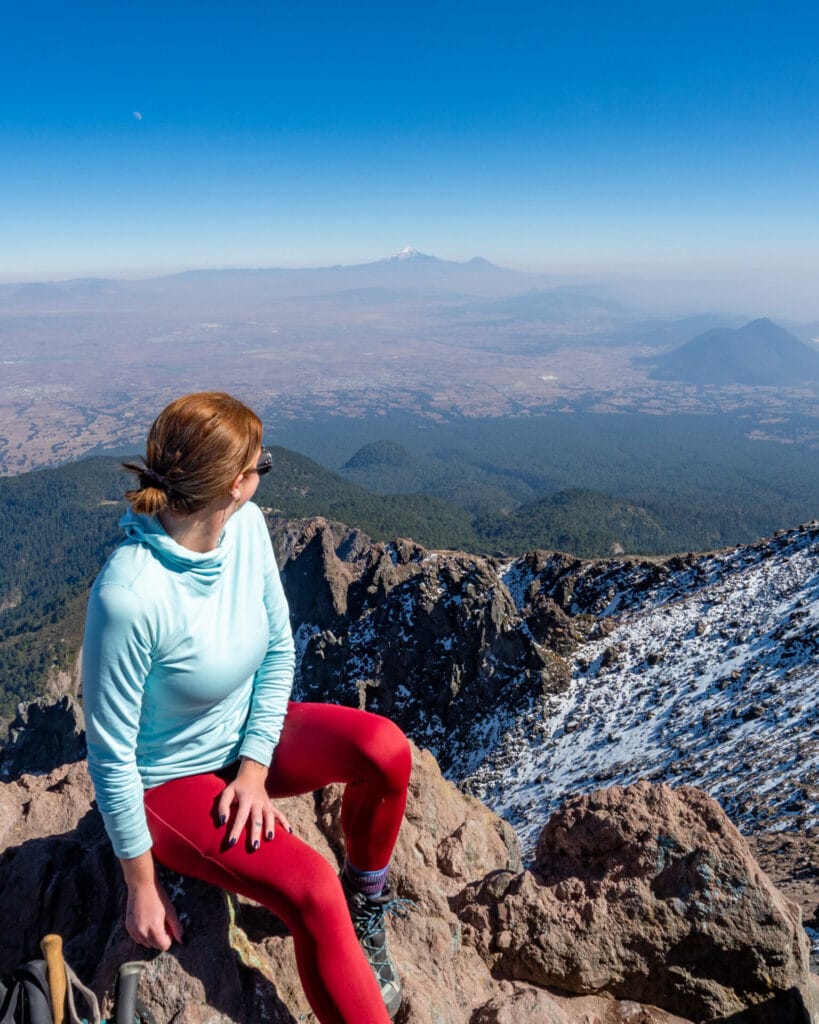
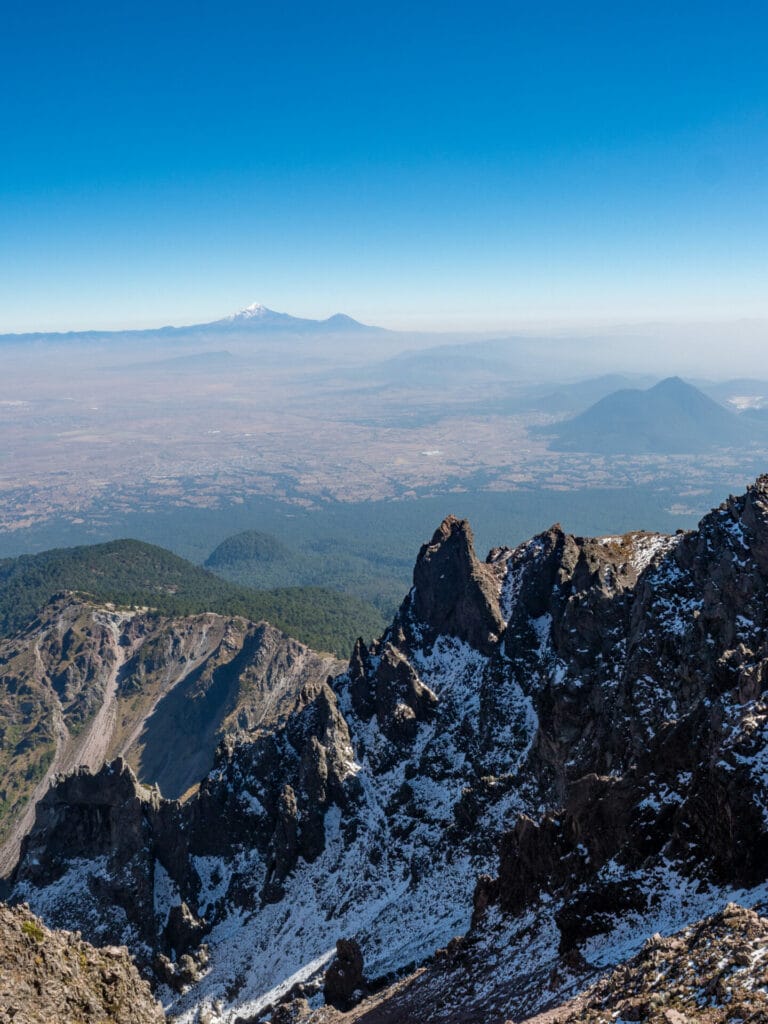
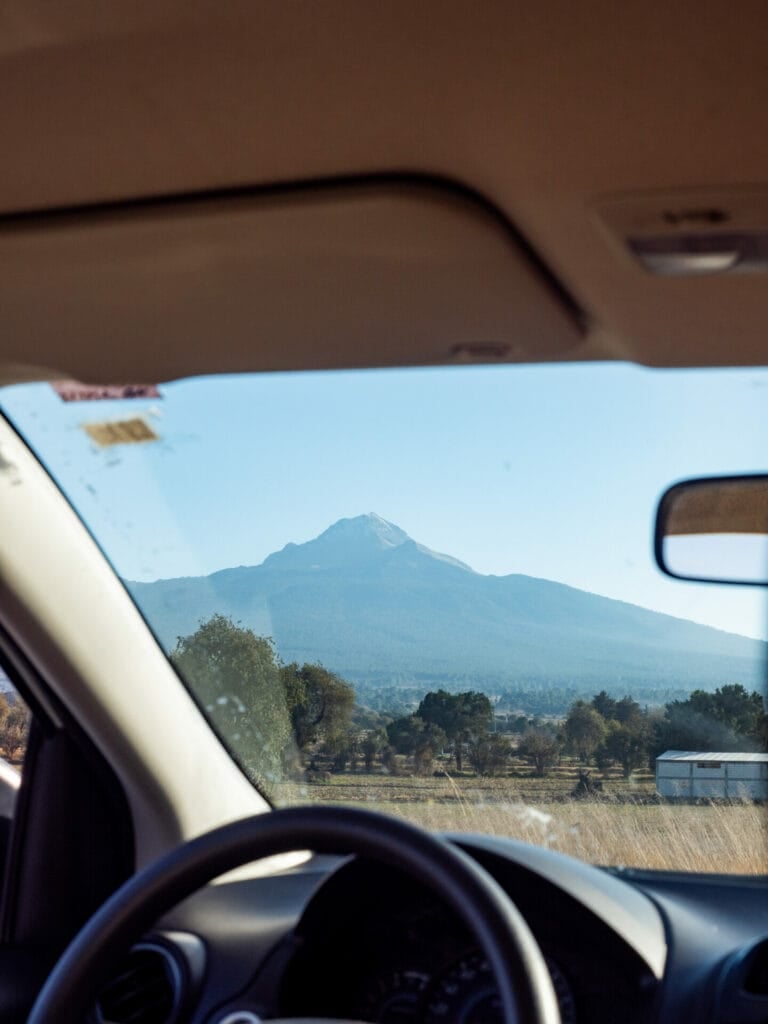
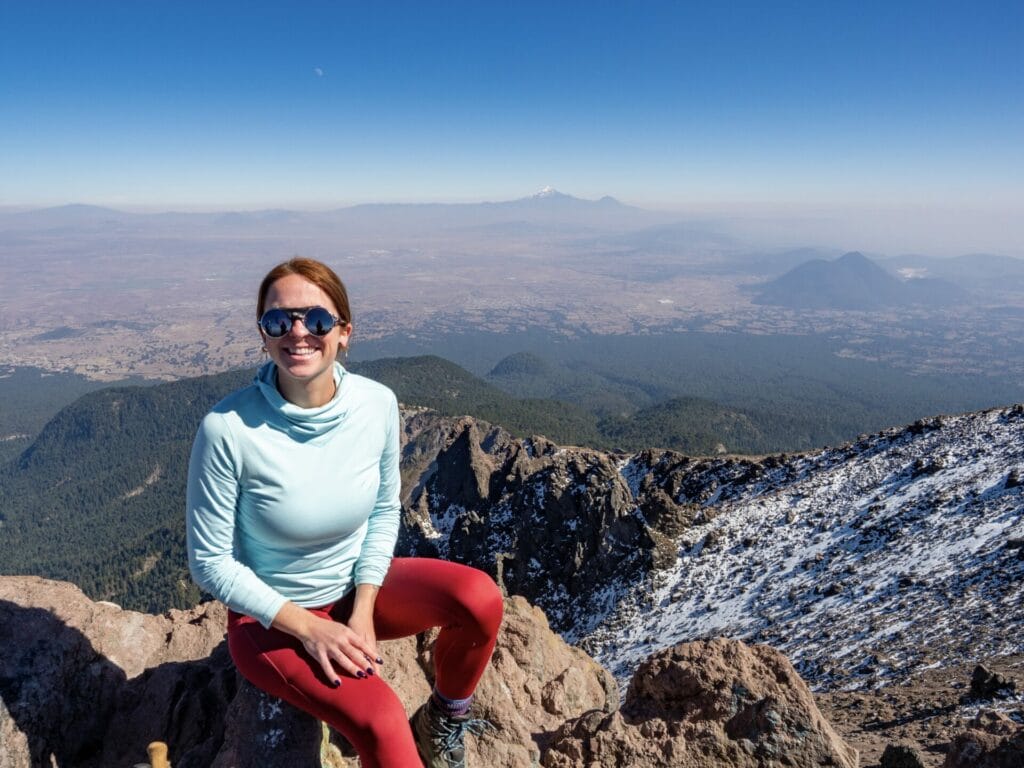
One of my favourite things about the hike up La Malinche is the views you’ll enjoy from the high scree slopes— Popocatépetl and Iztaccíhuatl to your right (Mexico’s 2nd and 3rd highest mountains surrounded by a beautiful local legend) and Pico de Orizaba to your left (Mexico’s highest mountain and the tallest volcano in all of North America). It’s amazing and uniquely inspiring to see the country’s most coveted summits from a single point!

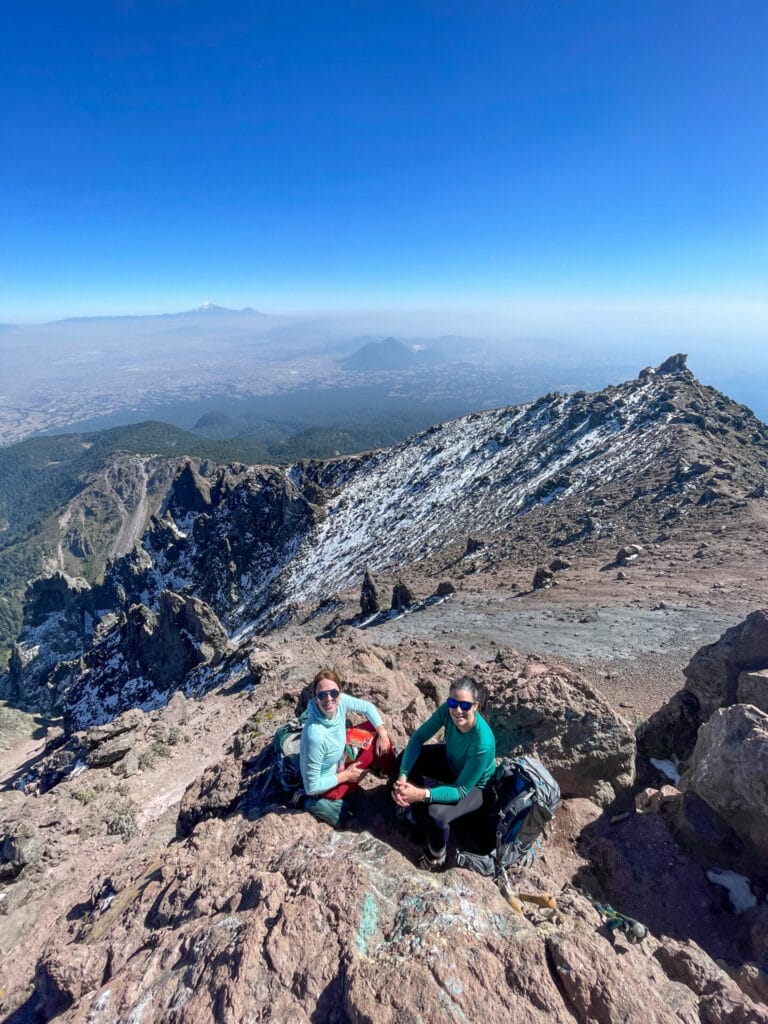
The most technical part of the ascent comes just below the summit block, where small sections of Class 2 scrambling lead up to the highpoint at 4,461m. If the views were great during the ascent, they are truly phenomenal from the summit of La Malinche, volcanoes visible in every direction on a clear day.
Including snack breaks and plenty of photo stops, our group took about 3.5hrs from trailhead to summit and under 2.5hrs to descend. Expect to be slowed down only slightly by the terrain, which is fairly easy to navigate for experienced hikers, but more significantly by the elevation, which is noticeable even after several days of acclimatisation. The reward is worth the occasionally breathless ascent, though!


Complete Mexico volcanoes itinerary
I recommend climbing Nevado de Toluca as part of a larger itinerary through central Mexico that also includes gradual acclimatisation on La Malinche and Iztaccíhuatl to climb the tallest volcano in North America, Pico de Orizaba.
🌋 Check out my complete 2-week Mexico volcanoes itinerary for trip logistics, driving direction, camping information, and other essential planning tips for climbing 4 of Mexico’s 6 tallest mountains!

Essential gear for La Malinche
Not including camping gear, here’s a quick packing list of essential items for hiking La Malinche!

daypack (25–35L): Osprey Tempest 30 (women’s) / Osprey Talon 33 (men’s)
For Malinche, I’d recommend something in the 25-35L range with sturdy hip belts, a good suspension system, and some back venting to keep cool on the sweaty ascent.

trekking poles: Black Diamond Trail Trekking Poles
For some of the rough terrain you’ll encounter on the upper sections of La Malinche, trekking poles are incredibly helpful and a lightweight addition to your kit.

lightweight fleece mid-layer: Arc’teryx Rho LT Hoody (women’s) / (men’s)
You’ll want a lightweight wool or brushed fleece layer that provides some warmth without considerable bulk for the sunny but chilly conditions you’re likely to encounter on La Malinche. I particularly like having a hood that can be worn (even under my helmet) for added warmth and/or sun protection.

down jacket: Arc’teryx Cerium Hoody (women’s) / (men’s)
For the windy summit, a down jacket is a great additional layer to slip on for added warmth. Make sure it’s large enough to wear as an outer layer over several other hoodies and jackets in the case of very cold weather.

shell jacket: Arc’teryx Beta SL Jacket (women’s) / (men’s)
Although it’s not recommended to climb if there’s any rain in the forecast, a shell jacket can still be an excellent barrier against the wind and add a lot of warmth without much weight.

soft shell pants: Arc’teryx Gamma Pants (women’s) / (men’s)
Tights or lightweight hiking pants are recommended for La Malinche. Even when sunny, the wind can be pretty cold at that elevation!

liner socks: Injinji Liner Crew
I swear by these toe socks as the ultimate blister prevention, worn under my wool socks as a sweat-wicking liner!

boot socks: Darn Tough Hiker Micro Crew Cushion Socks (women’s) / (men’s)
These are my personal favourite hiking socks— comfortable and super durable without being overly bulky.

mountaineering boots: La Sportiva Trango Tech Leather GTX Boots (women’s) / (men’s)
I absolutely love the support of lightweight mountaineering boots for scrambling and traversing snowy slopes. They are a little less comfortable than trail shoes when you’re walking on flat ground, but it’s worth the trade-off to be able to navigate icy rocks near the summit safely.

microspikes: Kahtoola
I saw extremely little snow around the summit of La Malinche in December, but that’s never a guarantee. Carrying a light pair of spikes is a great idea!

sun glasses: Julbo Vermont
From glacier travel to rocky scrambles, these are my favourite outdoor sunglasses.

beanie: Arc’teryx Mallow Toque
For windy days and added warmth at the summit, toss a beanie into your pack.

water bottle: Nalgene Wide-Mouth Water Bottle 32
For ease of filtering and filling up water, I find wide-mouth water bottles much easier to use than hydration bladders. Be sure to pack all the water you intend to drink on your hike, as there is no opportunity to fill up along the trail.

snack food
Pack enough snacks for 6-8hrs on the trail!

first aid kit: Adventure Medical Kits Mountain Series
A well-stocked first aid kit is absolutely essential on any hike; Adventure Medical Kits has conveniently assembled a range of bandages and common emergency medications into a compact kit that I use on all my adventures. I personally add KT tape (my go-to blister protection), Naproxen for joint swelling, and a pair of spare contacts; make your own personal additions!

Never hit ANY trail without a satellite communicator— whether you’re sending check-in messages back home, receiving weather updates, or communicating with emergency services, this small device can literally save your life.
Read more about climbing Mexico’s volcanoes
2-week Mexico volcanoes itinerary: climbing Pico de Orizaba, Izta, Malinche & Toluca
Mexico City: the perfect 5-day itinerary for CDMX
High-altitude: a climber’s guide to preventing & treating altitude sickness
The Comments
Tina
Brooke- Hello and thanks for your blog! Very informative. I just randomly came across online.
My boyfriend and I are going to Mexico City next month and we are interested in hiking but are very worried about safety. We are thinking of hiking in La Malinche, Deserto de los Liones and maybe Nevado de Toluca. We hiked last September in the Dolomites and it was awesome so we are quite capable. If we do hike these places we are thinkin it would be nice to stay in near-ish city. Like if we hike La Malinche, stay in Puebla. Any suggestions and what do you think about the whole safety aspect? Thank you so much for any information!
brooke beyond
TinaHi Tina, I’ve spent years travelling through Mexico and it’s much safer for tourists than the media would have you believe. Puebla in particular is a LOVELY city– one of my favourites! And I think you’d have a great time doing La Malinche from here. You should definitely consider Iztaccíhuatl, too– it’s a lot more challenging, but it’s truly gorgeous and a different experience than Malinche. You really need camping gear for this one OR you can go with a local guide, who can likely provide that gear for you.
Hope that helps!
xx bb
Brian Camilleri
Hi Ms brooke brisbine
Very informative article regarding Iztaccíhuatl!
You stated that “The road from Paso de Cortés to La Joya is only open from 9am-6pm and access is reservation-only on the weekends”. Does this mean that it is not possible to make a reservation for the weekdays?
Since I just wanted to visit as a day trip from Puebla and return back to Puebla on the same day (in the evening) would it be feaseable to do just the following trail i.e from La Joya to Rifugio del Grupo de los Cien?:
https://www.wikiloc.com/wikiloc/view.do?pic=hiking-trails&slug=iztaccihuatl&id=78570636&rd=en
Do you recommend any guides either in Mexico City or Puebla?
Do day provide/rent mountain equipment such as helmets and walking sticks?
Thanks and best regards
Brian
brooke brisbine
Brian CamilleriHi Brian, so glad you found this article helpful!
To clarify, reservations are not required on weekdays (but the road remains 9am-6pm access), so if you plan to do just a section of the trail, you certainly can, just be mindful to leave before it gets too late!
From La Joya to the Rifugio, you don’t really need any specialised gear and it should be fine to do without a guide if you have a GPS and are appropriately experienced. If you do still want a guide, though, I’d try contacting one in Puebla since it’s much closer– sorry, I don’t know any personally, but you should be able to find a few options online!
Happy trails,
xx bb