

Last Updated on 5 October 2026
For avid hikers, climbers, and the otherwise mountain-obsessed, there’s hardly a more exciting destination than the Italian Dolomites. This paradise of dramatic limestone spires, sparkling glacier lakes, and breathtaking peaks is criss-crossed by thousands of kilometres of hiking trails and more via ferrata than anywhere else in the world.
I’ve hiked quite a few routes through these mountains over the past few years, but Alta Via 4 still stands out— in as few as 5 days, it parades through some of the most coveted views in the Dolomites, enjoys near-daily summit opportunities, and offers more in the way of consistent excitement than just about any hike I’ve ever done. AV4 is so incredible that I hosted a group trip back here in 2024, and I’ve since helped hundreds of hikers plan their own adventure with my GPS maps!
This guide will tell you absolutely everything you need to know about planning and embarking on a truly epic adventure along AV4, from booking mountain huts and seeking out the best via ferrata to daily route descriptions and navigation essentials.
This post contains affiliate links, which means I may earn a small commission if you book something I recommend, at no extra cost to you. I ONLY recommend tours, rentals and places I’ve personally used (or would happily book again) — your support helps keep this site going and the adventures rolling!
About Alta Via 4
- Trailhead: San Candido/Innichen (ending in Pieve di Cadore)
- Time to complete: 5-7 days
- Distance: 84km (52mi)
- Elevation gain: 6,500m (21,300ft)
Extending from San Candido/Innichen in the north to Pieve di Cadore in the south, Alta Via 4 is a spectacular mid-distance hiking route that incorporates over 80km of scenic trail and fantastic scrambling as it wraps around dramatic limestone towers, cuts through wild glacial terrain, and conquers high mountain passes.
Although short in length, AV4 is the most technically challenging of the Alta Via routes that zig-zag across the Dolomites. Steep ascents/descents with breathless exposure are protected by long stretches of cable— even along the standard route, Alta Via 4 has unavoidable via ferrata nearly every day, and unlike AV2 where these are typically easy and may not even require clipping, AV4 includes several difficult via ferrata, so a head for heights, steady footwork, and appropriate gear is non-negotiable.


Annexed by Italy following WWI, the northern province of South Tyrol has retained much of its Austrian heritage throughout the last century— and since San Candido is just 8km from the Austrian border, you’ll feel that influence profoundly on the first day or two of AV4. Locals speak German as a first language (indignant correction: they speak Austrian!), food is a blend of mountain Italian/Austrian (less pasta and pizza, more sauerkraut and polenta), and the early via ferrata on AV4 have histories dating back to the Mountain War of 1915-18 between Italy and Austria-Hungary.
Tre Cime marks the border into the distinctly more Italian province of Belluno, and you’ll notice that the language, cuisine, and culture shift markedly. Remain curious and you’ll get a lot more out of AV4 than just incredible scenery!
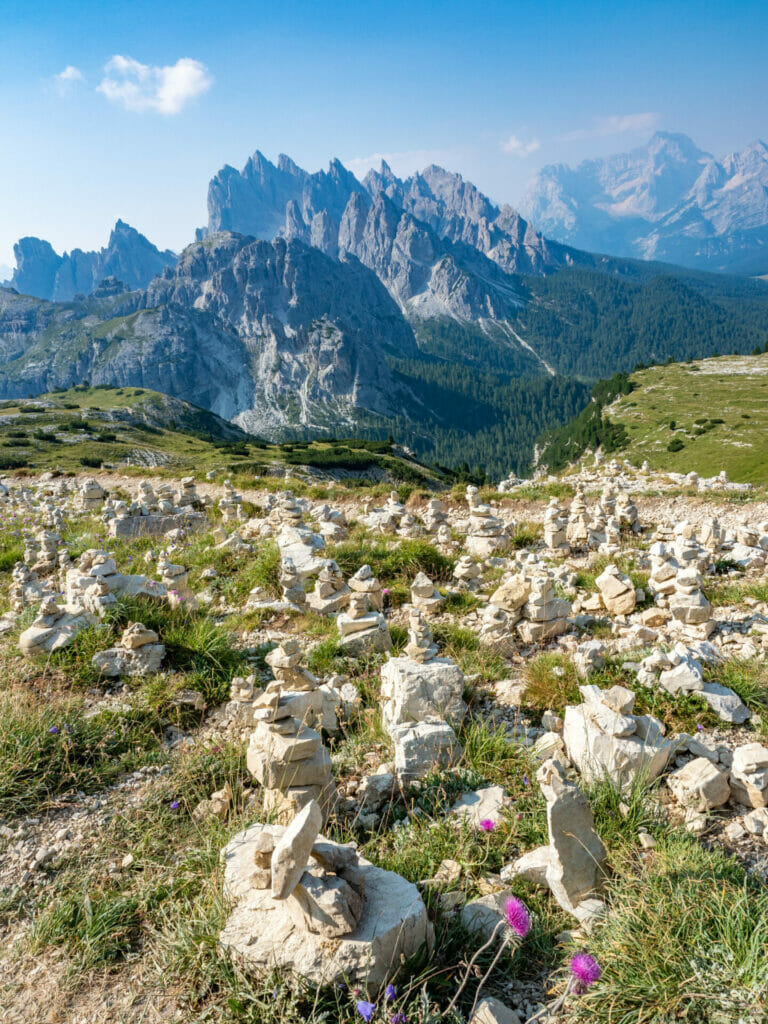
Alta Via 4: is it for you?
- You can hike up to 8hrs for 5-6 days in a row, often on very steep or uneven terrain
- You have previous experience climbing via ferrata, scrambling, or basic mountaineering, plus all the necessary via ferrata gear (AV2 is a better route for true beginners!)
- You are able to carry 10-15kg in your backpack for the entire duration of the trek
- You have basic navigational skills and know how to read a map and/or GPS
- You know what to do in the case of a medical emergency and you have a way to call for help (e.g. Garmin InReach Mini)
🧗🏻♂️ VIA FERRATA ON AV4
With frequent en-route via ferrata (including the challenging Giro di Sorapis), Alta Via 4 is far more than just a hike and shouldn’t be undertaken lightly. AV4 is the most technically demanding of Italy’s Alta Via and absolutely NOT recommended for someone who’s uncomfortable with heights, scrambling, loose terrain, or independent navigation. For the prepared, it’s one of the most breathtaking routes in all of the Alps, all the more exhilarating for its challenges!
>>> Read more about the relative difficulty of each via ferrata along AV4 below


Planning your Alta Via 4 hike
Best time to hike AV4
Most huts in the Italian Dolomites open for the season in mid-June and close again by mid-September, coinciding with the best weather window for AV4. Here’s a little bit of what you can expect during each month of summer in the Dolomites:
- JUNE: lingering spring snow keeps crowds very low & you may be able to get away without hut reservations; temps are lower & afternoon showers are common
- JULY: with the snow gone, trails & huts become busier; possibility of thunderstorms, but also the possibility of 30C bluebird days!
- AUGUST: the absolute busiest time to be in the Dolomites, as Italians flood the trails during their holiday period; hut bookings are essential, but weather also tends to be very stable
- SEPTEMBER: crowds wane, particularly later in the month; pack & prepare for possible snowfall, which adds difficulty but also a lot of beauty to the landscape!
The Dolomites are known to be somewhat wild when it comes to weather and it’s not uncommon to experience several seasons in a single day, even during July & August. Whatever your dates, prepare for sporadic and often unpredictable thunderstorms (by bringing rain gear and adequate layers)— if it rains in the morning, the afternoon tends to be clear and I never experienced more than a few hours of uninterrupted precipitation.
I solo hiked AV4 from 20-25 July 2022 (with flawless weather) and then hosted a group hiking trip from 1-6 July 2024 (with daily rain and heavy snow cover on high passes that required us to detour significantly). You never know what the mountains are going to do!

Maps & planning resources for AV4
My custom GPS route
Especially for those following my AV4 adventure route, the absolute BEST navigational resource is my custom AV4 GPS map— built from personal experience hiking the trail TWICE, packed with nearly 100 waypoints & crazy-detailed trail notes to help you navigate safely, on and off trail. UPDATED SEPT 2026 BASED ON USER FEEDBACK!
The map is available as a JSON & GPX download, and is compatible with all major GPS mapping devices/watches AND inexpensive GPS apps available on your smartphone, like CalTopo, Gaia GPS, and AllTrails. Let me help you plan & confidently navigate Alta Via 4!
My custom AV4 map includes:
- Complete daily tracks for the full AV4 route, with trail stats, elevation profiles & terrain insights
- 6 scenic side trips, from quick summits to epic via ferrata— each with a dedicated GPS track & trail notes
- 98 key waypoints, including daily tracks, mountain huts, side trips, via ferrata, cable/ladder sections & other key junctions to help you navigate


Tabacco maps
If you want to visualise AV4 on good old-fashioned paper maps, you’ll need 3 different maps to cover the complete route:
- Tabacco Map 010 (Dolomiti di Sesto)
- Tabacco Map 003 (Cortina d’Ampezzo)
- Tabacco Map 016 (Centro Cadore)
I used Tabacco maps rather extensively when building my itinerary, but unsurprisingly, they aren’t super useful for frequent on-trail navigation. I’d recommend combining with GPS for the best of both worlds!
Cicerone guide books
Cicerone published dedicated guide books for Alta Via 1 and Alta Via 2, but Alta Via 4 was relegated to a meagre 4-page outline within the appendix, so I wouldn’t recommend the purchase. Far more useful are the pair of via ferrata guides also published by Cicerone; all the routes along AV4 are within the first book, but both are excellent resources if you plan to do additional exploring around the Dolomites!
- Via Ferratas of the Italian Dolomites: Vol 1: 75 routes-North, Central and East Ranges by Graham Fletcher & John Smith
- Via Ferratas of the Italian Dolomites: Vol 2: Southern Dolomites, Brenta and Lake Garda by Graham Fletcher & John Smith
Via ferrata on Alta Via 4
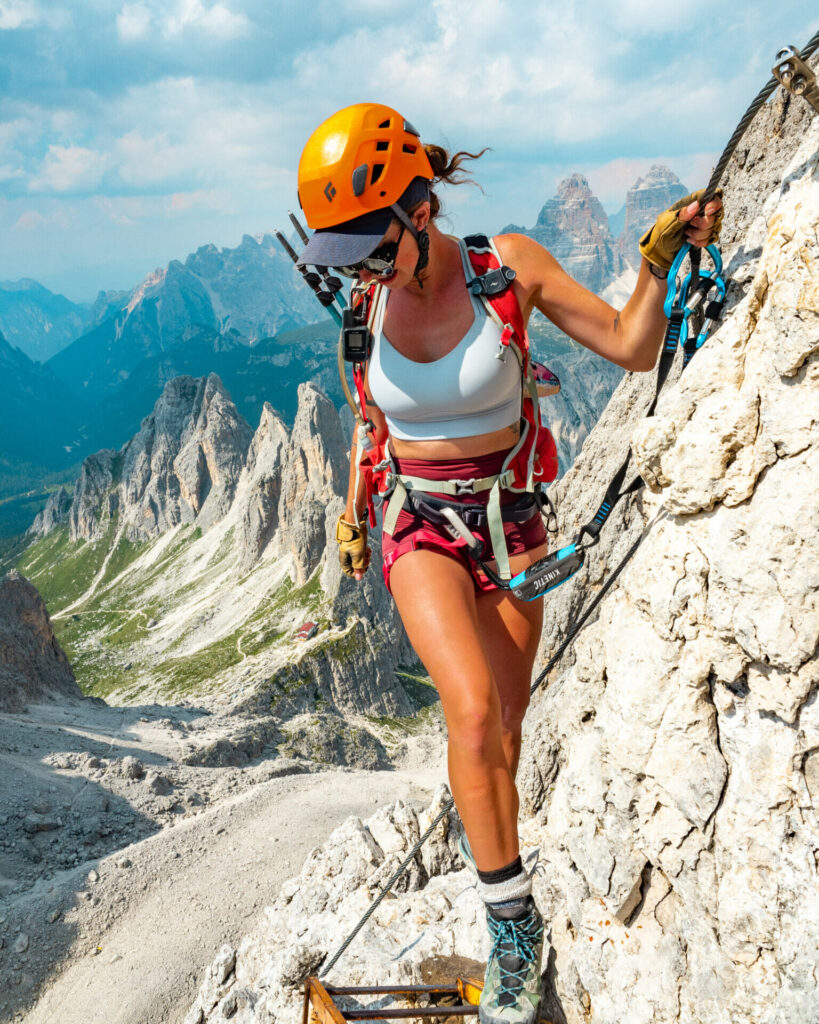
For those unfamiliar with via ferrata, this seems to be the element of AV4 that contributes to the most apprehension, but it’s also what makes the route so spectacular. Translating to “iron route” in Italian, via ferrata is a form of protected climbing that was invented during WWI as a means of getting soldiers up and over challenging peaks with minimal technical experience or equipment. Today, it’s an amazing form of recreation, with hundreds of via ferrata spread across the Italian Dolomites!
Clipped into a fixed cable for continuous protection, via ferrata routes (sometimes denoted as Klettersteig or EEA) ascend steep rock faces and traverse exposed ledges through the use of ladders, pegs, stemples, and even the occasional bridge, bringing those with limited climbing experience to incredible heights.


My adventure route of AV4 describes numerous side-trips that incorporate occasionally challenging and always exciting via ferrata, but it’s super important to note once again that Alta Via 4 has frequent, unavoidable sections of cable, meaning you will HAVE to do some via ferrata if you want to complete this route, even if you skip every side-trip.
Unlike AV2, the via ferrata along AV4 can be very challenging. There are long vertical ascents, steep exposed descents, and rough terrain in between, making it vital to have a good head for heights, navigational skills, proper gear, and knowledge of how to use it. See more details on each of AV4’s via ferrata immediately below.
To learn more about via ferrata in the Dolomites, check out this post: Introduction to via ferrata + complete via ferrata gear list
Here’s a quick look at the relative difficulty of all the via ferrata routes recommended in my itinerary:
- Via Ferrata Torre di Toblin (off route, Day 1)— challenging route departing from Rif. Locatelli, heaps of exposure on vertical ladders and really only suitable for experienced scramblers
- Via Ferrata De Luca/Innerkofler (off route, Day 1)— longer but easier and less exposed route also departing from Rif. Locatelli, recommended for beginners
- Sentiero Attrezzato Alberto Bonacossa (en route, Days 2 & 3)— intermittent cabling along the hiking trail to and from Rif. Fonda Savio, easy except for one slippery descent section shortly after the famous Flying Banana viewpoint
- Via Ferrata Merlone (off route, Day 2)— challenging vertical climb above Rif. Fonda Savio, only recommended for confident scramblers
- Giro di Sorapis: Via Ferrata Alfonso Vandelli (en route, Day 4)— the first section of this unavoidable via ferrata ascends several hundred metres on vertical ladders, for most this is the hardest section of the standard AV4 route
- Giro di Sorapis: Sentiero Carlo Minazio (en route, Day 4)— Via Ferrata Alfonso Vandelli transitions to this much easier and occasionally cabled exposed trail
- Via Ferrata del Ghiacciaio (en route, Day 5)— cabling up rock slabs just beyond Rif. Galassi and steeply down the other side of the pass, moderate and unavoidable on the standard route
*If you’re new to via ferrata or looking to improve your confidence on technical routes, Explore-Share connects you with experienced local guides in the Dolomites who can provide instruction and help you safely navigate the exposed sections of AV4.


Mountain huts on Alta Via 4
As wild camping is not permitted along Alta Via 4 (or anywhere in the Dolomites), you’ll have the distinct pleasure of sleeping in a warm bed every night as you hike from San Candido to Pieve di Cadore.
Mountain huts, or rifugi, are such a wonderful part of the Alta Via experience, typically offering a mix of dorms and private rooms for ~25-35€ and half-board (accommodation that includes a 3-course dinner and brekky) for ~50-75€. Be sure to check out my section on Alpine Club membership below for info about how you can save as much as 18€ per night on hut accommodation!
>> If you want to learn more about mountain huts in the Dolomites and what to expect during your stay, including details about food and facilities, be sure to check out this specific post: Everything you need to know about mountain huts (rifugi) in the Italian Dolomites


I collected heaps of specific details on all the mountain huts along AV4 and collated it in a table for easy reference; those included in my recommended itinerary are marked with a star 🌟. Follow links for each hut to find out more about their booking process.
| Hut | Room | Food | Showers | Connectivity | Alpine Club |
| Rifugio Tre Scarperi 🌟 | 33/42€ (dorm/double room) 73/82€ half board (dorm/double room) | A la carte (15€ for dishes, 25€ for 3-course dinner, 15€ for fantastic brekky) or half-board | 3€ for 5min | None | -10€ discount |
| Rifugio Locatelli 🌟 | 31/47€ (dorm/small room) 72/85€ half board (dorm/small room) | A la carte or half board (extensive menu, I definitely recommend a la carte here!) | 8€ for 5min but often out of water | None, but splash off in the large sink | -12€ discount (-13.5€ room only) |
| Rifugio Auronzo | *nearby alternative if Locatelli is booked | A la carte or half board | No | None | |
| Rifugio Fonda Savio 🌟 | 26/30€ (dorm/small room) 68/71€ half board (dorm/small room) | A la carte only for lunch (meals from 10€, beer 5€, great food) or half board | No | None, but there is a large sink! | -9€ discount (-12€ room only) |
| Rifugio Vandelli 🌟 | 28€ (small room) 65€ half board (small room) | A la carte (meals 10-15€, good lunch options) or half board, excellent food! | No | None | -10€ discount (-13.5€ room only) |
| Rifugio San Marco 🌟 | 30€ (small room) 68€ half board (small room) | Half board (simple but delicious dinner, very scant breakfast; beer and wine available for purchase) | Solar, outdoor | Strong mobile signal | -9€ discount (-14.5€ room only) |
| Rifugio Galassi | 30€ (small room) 69€ half board (small room) | A la carte or half board | 5€ for 5min | None | -14€ discount |
| Rifugio Antelao 🌟 | 29€ (dorm) 55€ half board (dorm) | A la carte (meals 10-15€) or half board | 5€ for 6min | Strong mobile signal | -8.5€ discount |
Booking mountain huts
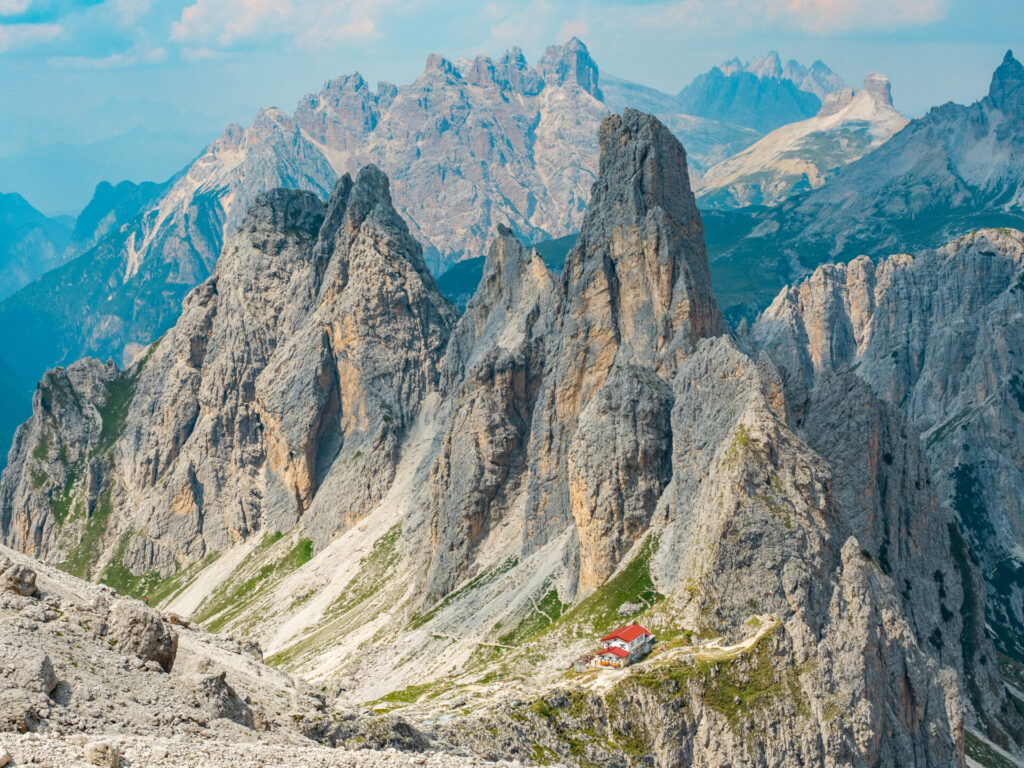
The process of booking these mountain huts is fairly simple once you decide where you want to stay— depending on the hut, you’ll either need to send an email request or fill out a contact form on their website with your dates and party size. Follow links for each hut in the table above to find out more about their booking process.
Things can become more complicated when the huts require a deposit, as several do, but my best advice is to use the app/website Wise for all of your international transfers! I’ve been using this for over 10 years (since I first moved to Australia) to send money overseas; it’s fast, reliable, and WAY cheaper than traditional wire transfers.


Do you need to reserve mountain huts in advance? With the absolutely booming popularity of this part of the Dolomites, you should reserve spots in mountain huts several months in advance to guarantee the itinerary you want.
I’d previously given the advice that solo hikers or small parties travelling during the early season might be able to arrive at a hut without an advance reservation, but this is almost impossible in 2026. Luckily, the busiest part of the trail (near Tre Cime/Rifugio Locatelli) has several viable options for accommodation (Rifugio Lavaredo & Auronzo), so I’d recommend looking into alternatives before scrapping your dates.
Alpine Club membership
The CAI (Club Alpino Italiano, or Italian Alpine Club) operates a staggering 433 mountain huts and 224 bivouacs throughout the Italian Alps, offering discounts to its members that range from approximately 10-18€ per night— but most European Clubs offer reciprocal discounts, so you can join any club to save money on hut bookings!
Staying at the huts I recommend in my AV4 itinerary, alpine club membership gets you discounts EVERY night and saves you a whopping 61.5€! These discounts and benefits extend all over the Alps— I recently used my membership for massive discounts in Slovenia’s Julian Alps, though thankfully haven’t had to access any emergency insurance yet. I’d highly, highly recommend this before embarking on any adventures in the Dolomites and beyond.
The best reason to become an Alpine Club member, though, is for the emergency medical insurance, valid anywhere in the WORLD (yes, you read that right). In the case of the Austrian Alpine Club, this includes 25,000€ in emergency rescue costs, 10,000€ in medical coverage, and unlimited repatriation, among other benefits.
I personally joined the Academic Section of the Austrian Alpine Club (Alpenverein Österreich, Akademische Sektion Innsbruck) because they were offering subsidised membership in 2022 for just 18€— annual dues have since increased to 69€ (+ add a partner for 53€), which is comparable to other clubs, but I find the Austrian website particularly easy to use and you can sign up entirely online, no need to visit an office!

Getting to & from the trailhead
Alta Via 4 begins just outside of San Candido, Italy (also written as Innichen). Due to its close proximity to Austria (just 8km from the border!), the quickest route to town is from the airport in Innsbruck, Austria; other good options are Venice, Italy and Munich, Germany.
For those travelling from another part of the Dolomites, you may be able to get a relatively simple bus transfer OR you may spend 1.5 days transiting through random mountain towns. Cortina d’Ampezzo is a major hub in the Dolomites and a great place to begin your adventure, with some direct buses to San Candido; for all routes, check this website.
Getting to San Candido/Innichen
From Innsbruck
- Train company: Deutsche Bahn
- Route: Innsbruck Hbf to Fortezza/Franzensfeste to San Candido/Innichen
- Time: 3hrs with 1 stop
- Cost: 17.90€
From Munich
- Train company: Deutsche Bahn
- Route: München Hbf to Fortezza/Franzensfeste to San Candido/Innichen
- Time: 4.5hrs with 1+ stops
- Cost: 44.90€
From Cortina d’Ampezzo
- Bus company: SAD
- Route: Cortina d’Ampezzo to San Candido/Innichen
- Time: 1hr direct
- Cost: 10€
From Venice
- Train company: Trenitalia
- Route: Venezia Mestre to Verona to Fortezza/Franzensfeste to San Candido/Innichen
- Time: 5.5hrs with 2 stops
- Cost: 43.25€
For mobile service in the Dolomites, I use Airalo, an amazing app that offers data eSIM packages for nearly every country in the world— you can activate the eSIM entirely from your phone, so you’ll have service as soon as you land in Italy without needing to track down a local mobile shop! Whether you’re a full-time traveller or casual explorer, this app is a game-changer.
Use code BROOKE2994 for $3 off your first eSIM with Airalo!
Where to stay in San Candido
I intentionally structured this itinerary to have a short Day 0: hiking just 90min to the first hut along Alta Via 4 (Rifugio Tre Scarperi), which provides FAR much cheaper accommodation than anything in town. This also sets you up perfectly for a long Day 1, incorporating 1-2 via ferrata!
Otherwise, search for the best deals in San Candido/Innichen through Booking.com below:
Getting from Pieve di Cadore to other destinations
AV4 officially ends in the small mountain town of Pieve di Cadore, about 20min on the road beyond Pozzale (sometimes listed as the end point).
If you’re travelling to Venice for an onwards train or flight, walk 15min further (this time on a nice footpath) to the neighbouring town of Tai di Cadore, where you can catch a Cortini Express bus direct to Venice Mestre Train Station in under 2hrs (tickets 22€; recommended to book online). Tai di Cadore is also a good place to connect with buses to other parts of the Dolomites!

Getting to the Alta Via 4 trailhead
The official start to AV4 is just outside of San Candido, behind the Alte Säge restaurant as you drive towards Sexto. You can walk here in about 45min from town, but it’s entirely on pavement and without a great footpath, so it’s preferable to just hop on a quick bus.
Bus 446 leaves every half hour just below the gondola station in San Candido and will deliver you within a few metres of the trailhead— get off after 2 stops (tickets 1.5€ payable on board).

*Detailed Alta Via 4 itinerary
Described below (and in great detail within daily posts) is my ultimate Alta Via 4 itinerary, incorporating as many side-trips and via ferrata into the route as possible over the course of 6.5 fantastic days:
- Day 0: San Candido to Rifugio Tre Scarperi (1.5hrs; 6km; 400m gain)
- Day 1: Rifugio Tre Scarperi to Rifugio Locatelli + Via Ferrata Torre di Toblin + Via Ferrata De Luca/Innerkofler (8hrs; 15km; 1770m gain)
- Day 2: Rifugio Locatelli to Rifugio Fonda Savio + Sentiero Attrezzato Alberto Bonacossa en route + Via Ferrata Merlone (6hrs; 11.5km; 1030m gain)
- Day 3: Rifugio Fonda Savio to Rifguio Vandelli (5.5hrs; 17km; 830m gain)
- Day 4: Rifguio Vandelli to Rifugio San Marco + Giro di Sorapis en route (6.5hrs; 11km; 1200m gain)
- Day 5: Rifugio San Marco to Rifugio Antelao + Via Ferrata del Ghiacciaio en route (5hrs; 13km; 1140m gain)
- Day 6: Rifugio Antelao to Pieve di Cadore (1.5hrs; 10km; 130m gain) ~possible to combine Days 5 & 6 for a condensed itinerary
*Trail times reflect the time we spent hiking, excluding extended breaks where we removed our backpacks to eat lunch, relax on the summit, or otherwise luxuriate along the trail. These figures are best used to understand realistic minimum hiking times between major waypoints, but we definitely recommend factoring in 1-2hrs of additional time every day to properly enjoy the route! This should give you a more realistic hut-to-hut hiking time for the day.

Day 0: San Candido to Rifugio Tre Scarperi
Begin AV4 with a relaxed afternoon hike through the tranquil Val Campo di Dentro, trading an overpriced hotel in San Candido for a memorable first night at Rifugio Tre Scarperi. It’s only a quick 90min hike to the hut, so there’s plenty of time to arrive by train from neighbouring towns, enjoy lunch in San Candido, and catch the bus to the trailhead all in the same day.
This is the perfect way to position yourself for an early start on tomorrow’s spectacular journey towards Tre Cime, allowing plenty of time to tackle 1-2 excellent via ferrata directly from Rifugio Locatelli. If you have no intention of climbing either via ferrata tomorrow, it makes more sense to combine Days 0 and 1 (4.5hrs total).
- Trail time: 1.5hrs (+45min if walking from San Candido)
- Distance: 6km
- Elevation gain & loss: 400m gain & 30m loss
- Huts: Rifugio Tre Scarperi

Day 1: Rifugio Tre Scarperi to Locatelli Tre Cime + Via Ferrata Torre di Toblin & Innerkofler
Following the traditional AV4 route, today is neither especially long nor difficult— but my recommended itinerary adds 1-2 spectacular via ferrata and a handful of small sidetrips within Parco Naturale Tre Cime! Fast, confident scramblers should be able to tackle both Via Ferrata Torre di Toblin and Via Ferrata De Luca/Innerkofler, but those moving at a more leisurely pace will likely want to choose one or consider spending a second night at Rifugio Locatelli.
It should also be noted that the area around Locatelli is among the busiest in the Dolomites, crowded from about 10am-3pm by eager day-trippers. The route I’ve recommended below gets you up and away from the crowds by climbing when most others are hiking, but even so, the views are worth the nuisance of several hundred tourists. Get an early start for a big day!
- Trail time: 8hrs (3hrs without 2x via ferrata)
- Distance: 15km (6.5km without 2x via ferrata)
- Elevation gain & loss: 1770m gain & 990m loss (850m gain & 70m loss without via ferrata)
- Side trips: Via Ferrata Torre di Toblin/delle Scalette (up & back; moderate-hard); Via Ferrata De Luca/Innerkofler (loop; moderate-easy); Via Ferrata delle Forcelle (down; easy)— refer to Tabacco Map 010 & Cicerone Vol.1 (routes 65, 64 & 63, respectively)
- Huts: Rifugio Locatelli, (Rifugio Lavaredo +30min; Rifugio Auronzo +1hr)
Day 2: Rifugio Locatelli Tre Cime to Rifugio Fonda Savio + Via Ferrata Merlone
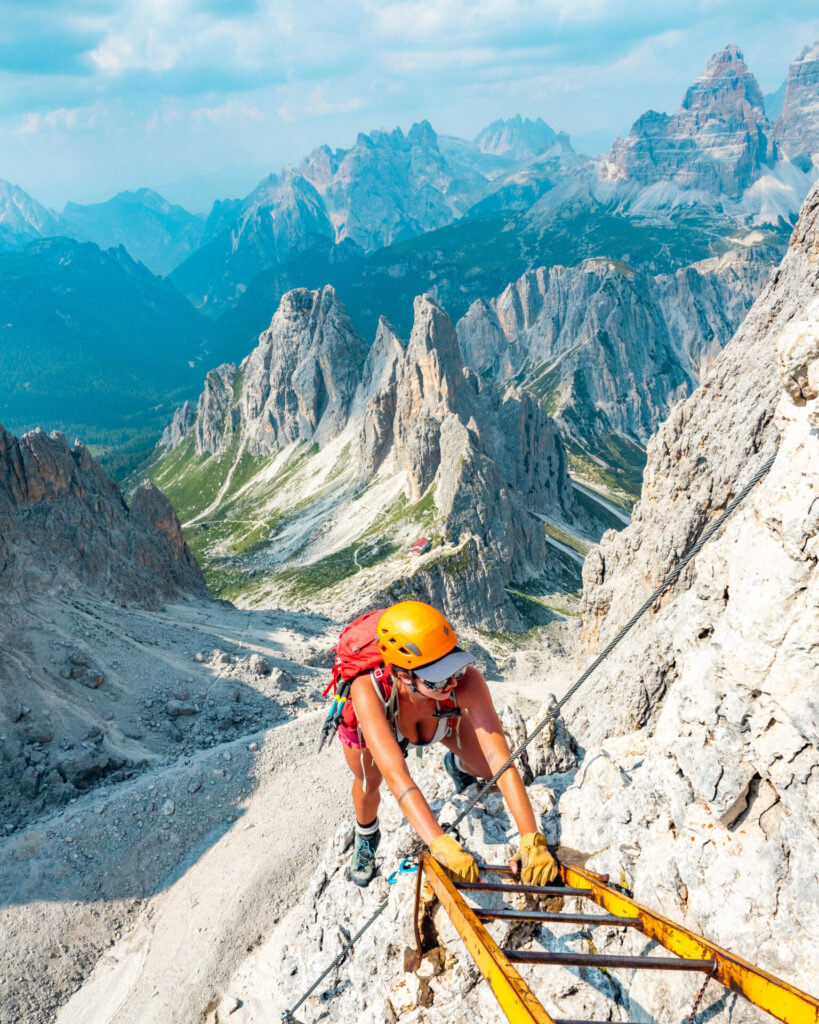
Today is the most visually spectacular day of AV4, parading around the iconic three towers of Tre Cime towards the serrated peaks of Cadini di Misurina. With breathtaking views around almost every corner, this is easily one of the most jaw-dropping sections of trail anywhere in the Dolomites (with the day-hiker crowds to prove it).
Once at the charming, family-run Rifugio Fonda Savio, don your gear and head out for the exhilarating Via Ferrata Merlone. Amidst a handful of strong contenders, this is still my favourite via ferrata along AV4, beginning with an airy scramble and culminating in a prolonged ascent up a series of vertical ladders to reach the lofty summit of Cima Cadin NE. The views down over the jagged Cadini massif are nothing short of incredible!
- trail time: 6hrs (3.5hrs without via ferrata)
- distance: 11.5km (9.5km without via ferrata)
- elevation gain & loss: 1030m gain & 1080m loss (630m gain & 680m loss without via ferrata)
- via ferrata en route: Sentiero Attrezzato Alberto Bonacossa (one-way; easy)— refer to Tabacco Map 010 & Cicerone Vol.1 (route 62)
- side trips: Via Ferrata Merlone (up & back; challenging)— refer to Tabacco Map 010 & Cicerone Vol.1 (route 61)
- huts: (Rifugio Auronzo), Rifugio Fonda Savio
Day 3: Rifugio Fonda Savio to Rifugio Vandelli
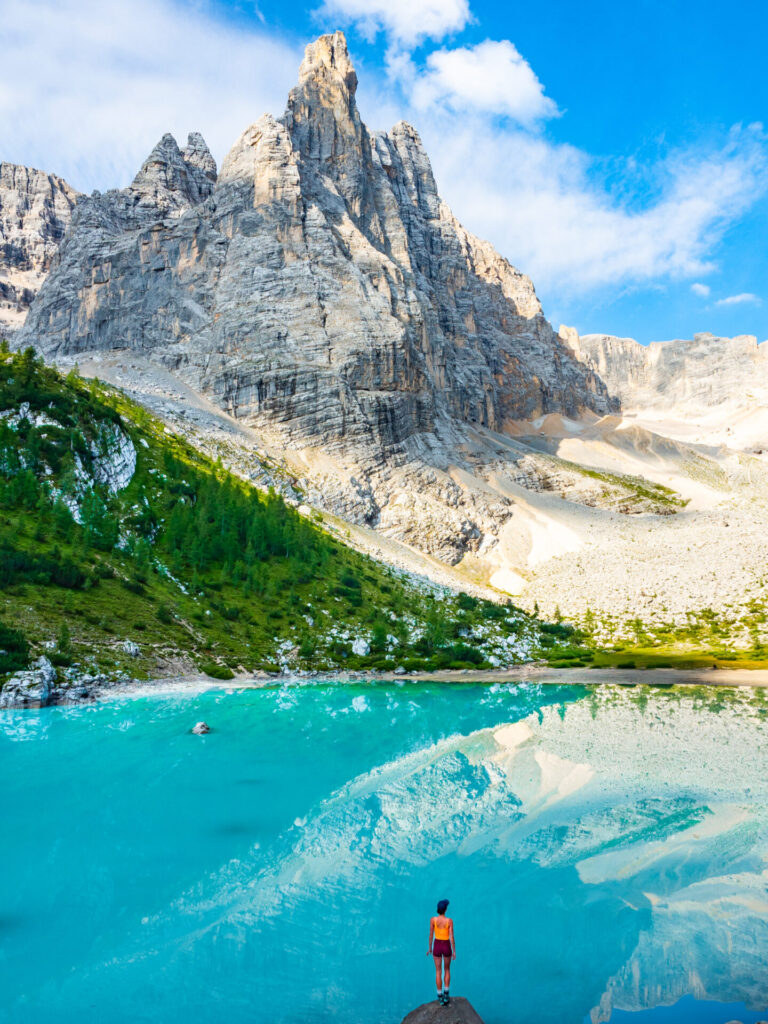
Day 3 of AV4 offers a respite from all the via ferrata, ascending on a beautiful trail over two scenic mountain passes to Rifugio Col de Varda before dropping into the bustling town of Misurina, a convenient place to restock supplies and access services. Rather than walking several kilometres on a busy road, I’d recommend catching a quick bus to Passo Tre Croci, where the trail climbs once again to Lago di Sorapis.
Sorapis is one of the most spectacular lakes in the Dolomites, its impossibly turquoise waters nestled beneath towering limestone cliffs and a striking peak of the same name. Expect it to be absolutely packed when you arrive, but spending the night at Rifugio Vandelli means you can experience this iconic landscape in the peaceful light of early morning on Day 4.
- trail time: 5.5hrs (save 1.5hrs by taking the bus from Misurina to Tre Croci)
- distance: 17km
- elevation gain & loss: 830m gain & 1260m loss
- via ferrata en route: Sentiero Attrezzato Alberto Bonacossa (one-way; easy)— refer to Tabacco Map 010 & Cicerone Vol.1 (route 62)
- huts: Rifugio Vandelli
Day 4: Rifugio Vandelli to Rifugio San Marco + Via Ferrata Giro di Sorapis
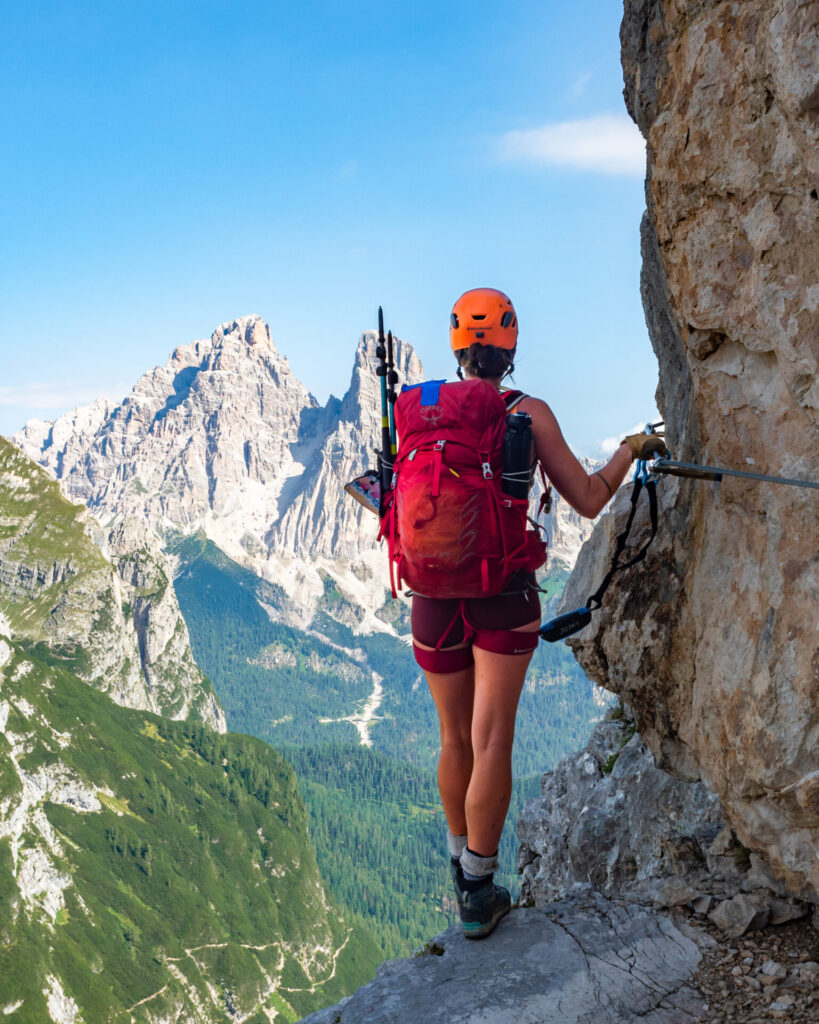
Today’s route is dominated by a long and exhilarating via ferrata, two-thirds of the epic Giro di Sorapis that circumnavigates the dramatic Sorapis peak. This is the most challenging of AV4’s unavoidable via ferrata and is among the wildest terrain you’ll encounter anywhere on the route, with rough trails increasing the navigational demands and frequent exposure necessitating careful footwork for the entire day.
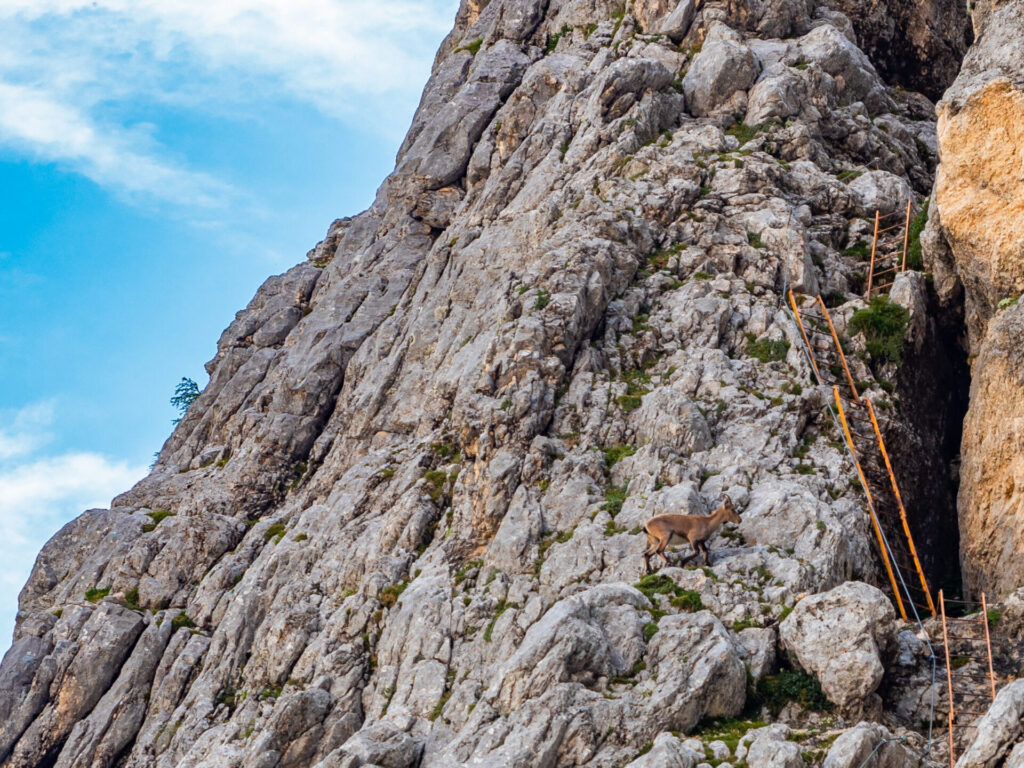
Although physically demanding, the rewards are immense. From airy vertical climbing on Via Ferrata Alfonso Vandelli to remote alpine meadows with grazing ibex and a wonderfully peaceful finish in the gardens of Rifugio San Marco, this is a huge day packed with scenery and a true sense of adventure.
- trail time: 6.5hrs
- distance: 11km
- elevation gain & loss: 1200m gain & 1300m loss
- via ferrate en route: Giro di Sorapis, Via Ferrata Alfonso Vandelli & Sentiero Carlo Minazio (loop; challenging)— refer to Tabacco Map 003 & Cicerone Vol.1 (route 59)
- huts: Rifugio San Marco, (Rifugio Galassi +1hr)
Days 5 & 6: Rifugio San Marco to Rifugio Antelao to Pieve di Cadore
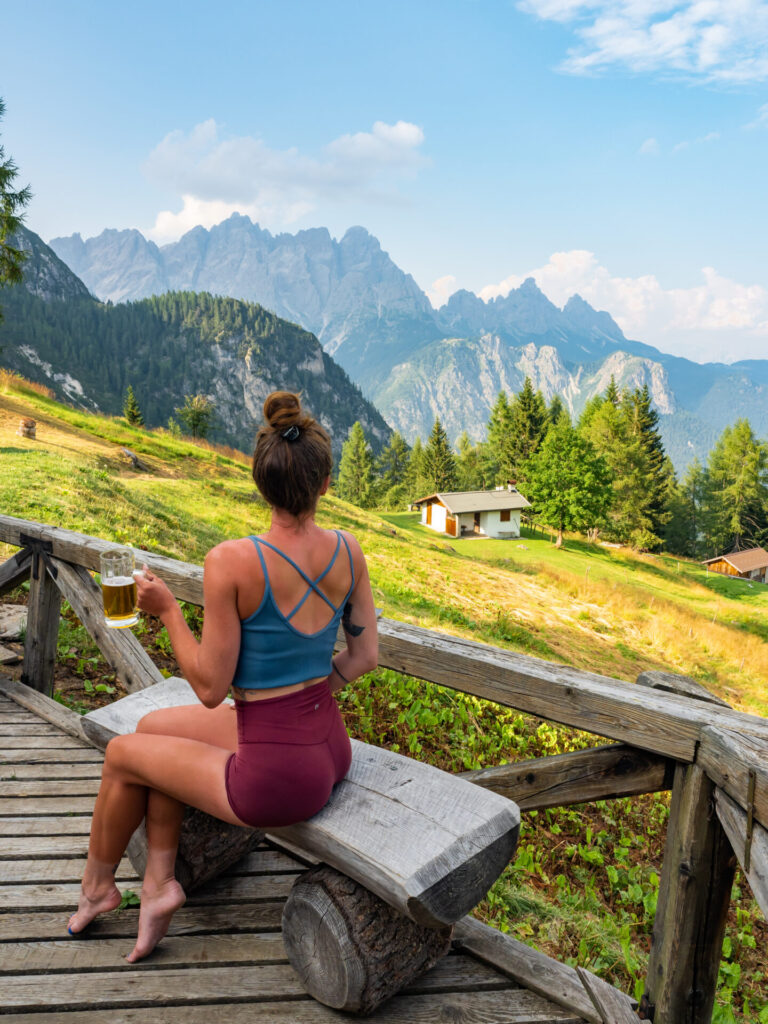
AV4 comes to a scenic end over the next 23km, traversing a stark glacial valley beneath Monte Antelao, the second-highest peak in the Dolomites, before descending through peaceful forests to Pieve di Cadore. From remote Rifugio Galassi, the route heads through a maze of moraine rubble to connect with Via Ferrata del Ghiacciaio, ascending enormous sloping slabs to reach Forcella del Ghiacciaio for one final taste of the adventurous terrain that makes Alta Via 4 so special.
Although it’s entirely possible to hike the remaining 10km to town in a single day (about 1.5hrs at a brisk clip, entirely downhill), I’d recommend lingering for one last night at Rifugio Antelao and stretching this into two days. It’s not only far cheaper than staying in Pieve di Cadore, but also a fitting way to savour one final evening in the mountains before returning to civilisation!
- trail time: 6.5hrs
- distance: 23km
- elevation gain & loss: 1270m gain & 2190m loss
- huts: Rifugio Antelao

What to expect on the trail
Navigation
Like most popular hiking areas in the Dolomites, Alta Via 4 is very well marked, with frequent signposts providing directions and sometimes even time estimates to relevant waypoints, such as mountain huts, high passes, and nearby towns (typically located at low passes).
Between these signposts and particularly through rough terrain where it can be more challenging to follow a trail, red and white flags have been painted onto the rock to aid in navigation.
The combination of signs, flags, and occasional cairns (small rock piles) are helpful in navigation, but some of the more rugged areas of AV4, such as the Giro di Sorapis, will require more advanced navigation, as will the side-trips and off-route via ferrata. With all this in mind, it’s highly recommend to use a GPS on AV4.


If you’re following my custom AV4 adventure route, the best way to stay on track is with my custom-built AV4 GPS map— packed with detailed daily tracks, 98+ waypoints, all the side trips & via ferrata described in this guide, plus extensive trail notes to help you navigate AV4 like an expert. UPDATED SEPT 2026 BASED ON USER FEEDBACK!
Available in both JSON and GPX formats, the map works seamlessly with GPS apps like CalTopo, Gaia, and AllTrails, or with Garmin devices and watches. Head to my storefront to purchase the map!


Terrain
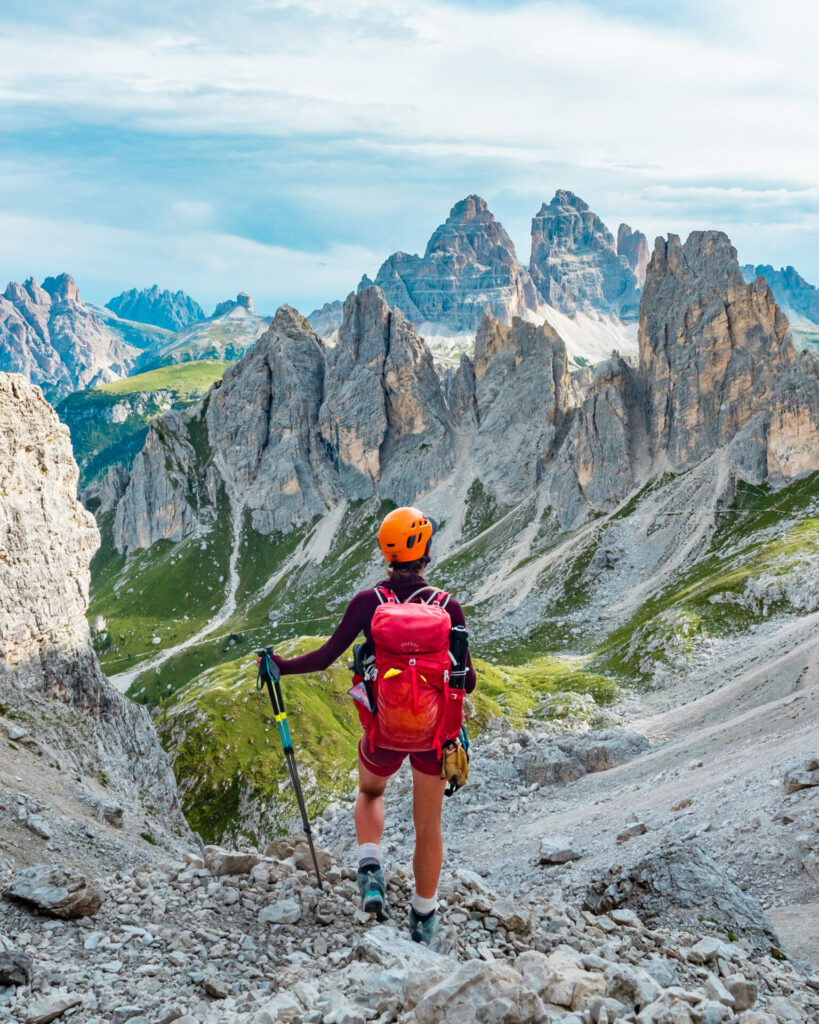
Alta Via 4 is no garden-variety hike— for all the time you spend on a busy, distinct trail, you’ll spend just as many hours hiking through rough and rocky terrain, traversing across scree fields, and scrambling with the protection of a fixed cable (whether you clip in or use the cable as a handline will be a matter of personal comfort).
Particularly as you get away from the popular day-hiking areas around Tre Cime, Cadini di Misurina, and Lago di Sorapis, instead hiking through more remote and rugged areas with frequent sections of via ferrata, the terrain becomes a little more physically demanding.
The group I took on AV4 in 2024 were experienced hikers, but Via Ferrata Alfonso Vandelli/Giro di Sorapis (unavoidable, en route sections!) were beyond what anyone had ever done and presented a lot of difficulty. What took me 6.5hrs as a solo climber took our small group 10hrs and some tears, so just be realistic with yourself about the demands of this terrain.
***In light of recent feedback on my quoted trail times, I’d also like to reiterate that all times within this guide are moving time ONLY, meant to represent a realistic minimum time between major waypoints— I’d highly recommend adding 1-2hrs onto each day to account for snack breaks and extended summit stops! This should give you a more realistic hut-to-hut hiking time for the day.
Food & other supplies
With an extensive network of mountain huts along Alta Via 4, hot food is always close at hand.
- All overnight huts offer a very basic breakfast (that I often found to be poor value for money and typically skipped). This is usually bread, spreads, tea or coffee, occasionally yogurt, and if you’re lucky some meat and cheese for about 10-15€.
- Some huts offer hot lunch options for those passing through (for about 10-15€, you can enjoy a hot pasta dish or a pizza, which is particularly enticing if you’ve skipped brekky), while others will sell you a packed lunch to-go (typically consisting of a sandwich, apple, granola bar, and chocolate for about the same price).
- Simple snacks like chips and chocolate bars are available for purchase at some of the busier huts.
- All overnight huts also whip up excellent evening meals, either included as part of half-board lodging (50-75€ including a bed, 3-course dinner, and breakfast) or a la carte (10-15€ for most dishes). This is where mountain huts in the Dolomites really shine— an example of a standard evening meal would be soup and bread as a starter, hearty goulash and polenta as a main, and some sort of pastry as dessert. Rest assured, you will not go hungry (even as a vegetarian!).
- Alta Via 4 passes through a single town, Misurina, and this is truly your one and only opportunity to stock up on any groceries or personal items without detouring. As per my recommended AV4 itinerary, this restock would be on midday of Day 3, so plan accordingly!
Read more about hut food in this post: Everything you need to know about mountain huts (rifugi) in the Italian Dolomites


Water access
Thanks to the dry, rocky landscape of AV4, water along the trail is extremely limited, so you should fill up each morning with enough water to get you through the day. Water is available in all of the mountain huts along Alta Via 4, but there’s ongoing debate as to whether the tap water is safe to drink.
Out of an abundance of caution, some of the hut staff will advise against drinking water directly out of the sink (although I did in most places), so I’d recommend bringing a lightweight filter, which will also serve you well along the trail, filling up in occasional streams. I implore you not to buy the plastic water bottles for sale in the huts, as it’s an incredible source of waste and altogether unnecessary with proper planning!

Essential gear for Alta Via 4
Below is a very short list of essential gear for AV4, including your via ferrata kit and your most crucial safety equipment! For a full Alta Via 4 packing list, check out this post: Complete Alta Via packing list: what to pack for hut-to-hut hikes in the Dolomites

daypack (25–35L): Osprey Tempest 30 (women’s) / Osprey Talon 33 (men’s)
I’d recommend something in the 25-35L range with sturdy hip belts, a good suspension system, and some back venting. I used the Osprey Talon 33L unisex pack and comfortably carried 16kg on Alta Via 4 (much of which was camera gear, so you can expect your pack to be ~10-12kg!).

helmet: Black Diamond Half Dome Helmet (women’s) / (men’s)
For via ferrata routes, a light climbing helmet is essential to protect against rockfall, which might come from other climbers above or even unstable areas of the mountain.
And for routes that wind through dark tunnels (like Via Ferrata De Luca/Innerkofler), it can also be handy for protecting your head against bumps. Bring a headlamp for these via ferrata.

climbing harness: Black Diamond Momentum (women’s) / (men’s)
A climbing harness is how you’ll connect your via ferrata lanyard to yourself for protection on exposed routes. This is essential safety equipment and you CANNOT do AV4 without it! I love the fit and comfort of this crag climbing harness and have used it on countless adventures, including both times that I did Alta Via 4.

via ferrata lanyard: Petzel Scorpio Vertigo Lanyard
A via ferrata lanyard connects to your climbing harness and is then used to clip into the cable for continuous protection along exposed or challenging routes; the shock absorber helps distribute force in the event of a fall.
After trying several different styles, I personally prefer these flick-lock carabiners for ease of use and this bungee-style lanyard for improved mobility on the rock.

climbing gloves: Metolius Half Finger Climbing Gloves
Although not technically required, you’ll enjoy via ferrata a lot more with climbing gloves to protect your hands from cable-burn, particularly when down-climbing. I like these half-finger gloves, which maximise dexterity for climbing— plus, I can still operate my camera/phone with them on!

trekking poles: Black Diamond Trail Trekking Poles
For all the rough terrain you’ll encounter on AV4, trekking poles are incredibly helpful and a lightweight addition to your kit.

Never, EVER hit the trail without a satellite communicator— whether you’re sending messages back home, checking the weather, or communicating with emergency services, this small device can literally save your life.


Read more about the Dolomites
- Complete Alta Via packing list: what to pack for hut-to-hut hikes in the Dolomites
- Everything you need to know about mountain huts (rifugi) in the Italian Dolomites
- Via ferrata in the Italian Dolomites: the ultimate beginner’s guide
- 10 best via ferrata routes in the Italian Dolomites
- Alta Via 2: complete hiking + via ferrata route guide
- navigate confidently on & off the trail ->AV2 adventure route GPS map! (updated Sept 2026)
- Alta Via 4: complete hiking + via ferrata route guide
- navigate confidently on & off the trail ->AV4 adventure route GPS map! (updated Sept 2026)

The Comments
Mike
Hi There. We are planning to do the Alta Via 4 in mid September. We intend to purchase your custom GPS file. However, it appears that an update is scheduled for September 2026. Do you have an exact date for the release? If we buy now, will be get access to the newly updated version upon release? Thank you. Mike
brooke beyond
MikeHi Mike,
The updated map went live on 1 September, so if you purchase now, it’s the new version 🙂
And for anyone else who did purchase the previous version of my AV2 or AV4 map this year, an email blast will be going out this week inviting you to download the new version for free.
Happy trails!
xx bb
Tanya Binette
Hi Brooke, thank you for your invaluable guide! We’ll start the AV4 tomorrow. I’m wondering what you do for lunches/snacks? Are there many days where you can eat at a mountain hut or resupply snacks? I gather at least the Vandelli to San Marco day has no options for food en route, are there other days like that? Thanks for any information!
brooke beyond
Tanya BinetteHi Tanya, so glad you found the info helpful!
There are a few opportunities to eat lunch at huts, but really this is only possible if you arrive to the hut you’ll be staying at around lunchtime (since there typically aren’t options along the way).
Here’s an idea of where you might be able to eat en route:
– Rif Locatelli on Day 1 (before the via ferrata)
– Rif Fonda Savio on Day 2 (before the via ferrata) + you do pass a restaurant this day, but quite early into the route so it’s unlikely to be helpful for lunch
– On Day 3, my route brings you through the holiday town of Misurina, which has several good options for lunch and offers the potential to restock snacks. Depending on timing, you may also be able to eat lunch at Rif Vandelli on Day 3 (which I did!)
– definitely no options on Day 4
– maybe possible to order lunch at Rif Galassi on Day 5 (approximately half-way through the day)
Hope that helps!
xx bb
Ailbhe
Hi Brooke!
thanks for all the info and the map which I purchased, its exactly what we need. We are doing this in a few weeks and our first day is straight to Locatelli as Tre Scarperi was booked out. I provisionally have accommodation booked in San Candido which I can cancel but it’s quite expensive; I was wondering if you had any recommendations of other towns to stay in which allow you to still get started on walking early to have plenty of time at Locatelli for the other ferrata! I did some googling but struggled. Thanks
brooke beyond
AilbheHi Ailbhe, so happy to hear you’ve found the map helpful!
Unfortunately, there aren’t any good options outside of San Candido that I’m personally aware of… I just had a quick look at the trailhead (Alte Sage restaurant) and there are a few hotels up the road in the opposite direction, but I’m not sure these would be any more reasonably priced. It’s brutal in this area!
How many are in your party? I showed up at Tre Scarperi without a reservation and was able to get a bed, so this might also be an option worth considering if you aren’t more than, say, 3 people. It would be a small gamble, but especially if you’re hiking in September, might be worth the risk.
Best of luck!
xx bb
Harriet
Hi,
Thanks for all this information. I have been using to help me plan the Alta Via 4 route this late June. I was not able to get booking for Rifugio Vandelli, but hoping to keep trying until the moment for availability. Do you have a suggestion of an alternative route/booking for this part? Any strategies I could employ?
Thanks!
brooke beyond
HarrietHi Harriet, if you can’t get a spot at Vandelli, the best alternative would be staying in the town of Misurina on Day 3. On Day 4, you can bus to Tre Croci (I recommend this anyway, since it avoids 6km of road walking) and then it’s just 1.5hrs to Lago di Sorapis, right in front of Vandelli. Now the unfortunate part is that it makes this day LONG– and it’s already the longest day of the route, so you need to consider whether you’re comfortable with 10-14hrs of hiking on Day 4. There’s a bivouac in the middle of Day 4, but it’s very rustic and unstaffed, so probably not a good stopover point.
Hope that helps… and hopefully a spot in Vandelli becomes available, which does sometimes happen!
xx bb
Ashley Batey
Hey Brooke,
Any recommendation on how to abbreviate your itinerary to 3 days/ 2 nights or 4 days/3 nights? My husband and I love via ferrata and would love to get the best there is to offer for views and via ferrata on the Alta 4 trail.
brooke beyond
Ashley BateyHi Ashley, it would be very hard to condense into 3-4 days without running OR making actual cuts to the route. If you’re not opposed to shortening, then the logical end-point would be Misurina (after returning back from Sorapis) because it’s well-connected by bus.
Day 1: combine day 0 + day 1, stay at Locatelli
Day 2: as written, stay at Fonda Savio
Day 3: as written, stay at Vandelli
Day 4: hike back out to Misurina
If you prefer the 3-day option, you could also do day 3 to Sorapis and then hike back out to Misurina that same day, skipping the overnight at Vandelli.
Hope that helps!
xx bb
ado
Hey Brook,
thanks for your guide and was last week there. Sadly we could not complete it, because the Via Ferrata to Rifugio San Marco is Closed due a land slide. The Via Ferrata which you call Giro Sorpis 🙂 its true name is F. Berti and like mentioned, it is closed and one cannot get to San Marco anymore from that side.
Anyhow, amazing page and keep them coming.
brooke beyond
adoHi Ado, so disappointed to hear the route to San Marco is closed at the moment!
But to clarify, Giro Sorapis is the name popularly used to encompass a circular route with 3 distinct sections (2/3rds of which are part of AV4): Via Ferrata Alfonso Vandelli (steep ladders ascending from Rifugio Vandelli), Sentiero Carlo Minazio (steep, exposed trail sections around the left side of Sorapis), and Francesco Berti (NOT part of AV4– this descends back to Vandelli).
Hope that helps 🙂
xx bb
Andi
brooke beyondHey Brooke,
thank for this nice overview. Ferrata Berti (AV3) is closed at this Moment, Ferrata Vandelli (AV4) ist still open to this day. Means that Rif. Vandelli to Rif. San Marco is no problem.
Ferrata Berti was some very steep and demanding scrambling two years ago, so i would not enter this section at the moment.
Lexi
Hi, Brooke!
Thank you so much for this guide – my husband and I leave next Tuesday (!!) to begin the adventure for our honeymoon. We are following your itinerary and have your gpx downloaded.:)
I haven’t been able to find anything in your extensive guides about temperature – what can we expect, generally? I understand storms, etc, are unpredictable, but wondering if we will be hot during the day.
Again, thanks for your thorough guides – I feel much more prepared and confident!
Best,
Lexi
Sarah
Hi Brooke, thank you so much for all the helpful info! I was wondering how you usually think about weather forecasting in the dolomites? Ive been looking at MeteoBlue and Bergfex Wetter and they show thunderstorm risk pretty much all day for some days.
Sabrina
Hi Brooke! This guide is incredibly helpful as I’m putting together a solo Alta Via 4 plan for the end of June somewhat last minute 🙂
Quick question — what map app do you use on-trail in Italy? I’ve used Gaia (and sometimes Maps.me) just about everywhere in the world I’ve hiked, but looks like Gaia’s totally missing the Via Ferratas.. which seems pretty important!
I heard CalTopo’s app has gotten better but I’ve never used it… Any advice? 🙂
brooke beyond
SabrinaHey Sabrina, I find Caltopo to be by FAR the best GPS app on the market, and this is what I used to build my custom maps for AV4: https://shop.brookebeyond.com/b/av4
Sabrina
Hi Brooke! Attempting to put together a last min solo hike of the AV4 at the very end of June (June 27-July 1).
I know you said that in June, a single person should be OK to snag a bed at a hut without a reservation… but I think that was a couple years ago. When you did this trek last year again with a group, did it seem the same?
I’m having trouble securing reservations/contacting the huts. Do you reckon I’ll be OK to turn up reservation-less, if I’m hiking solo? Would suck to be turned away without a tent/etc after hiking so many hours each day!
brooke beyond
SabrinaHi Sabrina, at this time of year and as a solo hiker, you’re probably ok to risk it for the biscuit– from everything I’ve heard, they won’t turn you away, you’d just end up sleeping in the kitchen or the hallway on a spare mat.
Brandon
Hello there,
Do you have any insight or recommendations on doing the AV4 in reverse? Due to hut availability we are having to do it backwards. What are your thoughts?
brooke beyond
BrandonHi Brandon, you may have some difficulty descending on a few of the via ferrata that are almost exclusively used uni-directionally– it’ll be a lot of climbing down ladders, and if you encounter any other climbers, you’ll be passing in potentially sketchy circumstances. I’m particularly thinking of Via Ferrata Alfonso Vandelli. It may work out ok since this will be at the end of your day and the start of the day for those going in the typical direction… but something to be aware of.
Ben
Thanks for the post Brooke, really informative – I was wondering if you had a suggestion for an alternative hut as the Fonda-Savio is booked for the date I need it on this hike? Thanks heaps! Ben
brooke beyond
BenHey Ben,
Your best bet is Col de Varda– it’s about 3km past Fonda Savio (400m gain, 600m loss) and should take under 2hrs to get there. If you’re moving efficiently, there should still be time to do Via Ferrata Merlone before continuing onwards from Fonda Savio!
Hope that helps 🙂
xx bb
Amber
What do the numbers in front of the via ferrata grade mean? For example the 3 in 3c or 1 in 1b? Can a beginner handle these via ferrata if they have class 3/4 scrambling experience? Or would doing th AV2 be a better option?
Thanks!
brooke brisbine
AmberHi Amber,
I’d recommend checking out my guide to via ferrata in the Dolomites to understand the various rating systems– the one I’ve used here (from Cicerone) as well as other international standards. Basically, the numbers represent difficulty and the letters represent “commitment”, but you can see a lot more info here:
https://brookebeyond.com/via-ferrata-in-the-italian-dolomites#Via_ferrata_grading_system
This guide also has a lot of information to help you understand what level you can expect to tackle yourself. If you have done a fair bit of Class 3/4 scrambling and have no issue with heights, you should be fine to handle everything on AV4 or AV2! Just make sure you learn to use the gear– it’s not overly complicated, but it is unique to VF and you’ll feel a lot more secure with a good handle on clipping.
Hope that helps 🙂
xx bb
Hannah
This is an incredible blog post. Thank you for sharing. Im SO EXCITED to do the Alta Via 4 this July.
Im wondering what camera gear you took on this hike? Specifically what lenses/focal lengths.
Also, seriously blown away with your photography and the shots you got as a solo hiker!
Cheers
brooke brisbine
HannahThanks so much, Hannah! I shot on an Olympus EM5Mii with 12-40mm f2.8 and every shot with me in it was taken on my Peak Design tripod 🙂
Hope you have an amazing time on AV4!
xx bb
Martine
Hi Brooke,
First of all, thanks a lot for your very extended guide of the Alta Via 4! I am already super excited about exploring more of the dolomites by just reading your posts and have my eyes set on hiking the Alta Via 4. Why? Because I hike for the challenge and beautifull views and I have the feeling that with this Alta via I get both.
However, unfortunately I will have to do this hike solo as I do not know anyone ‘crazy’ enough to tackle it with me. But I have never attemted a solo hike.. Therefore my question is; is this hike “safe” for a solo hiker?
I have experience in hiking as I attemt multiple (day/multi-day) hikes during every holiday. I am not very experienced at via ferrata but are also not unknow to it. I am not afraid of heights and I can say that I am fit (I do boxing&running 4-5 times a week). But as mentioned I am unsure about the solo part. Will this hike be very remote / abandoned? Or will I enounter lots of other hikers (beginning July 2025)? Or would you suggest that I start off with another Alta Via for my first solo mission 😉
ps. I would rather not want to hike the Alta Via 1 since it is so hyped on the internet.
brooke brisbine
MartineHi Martine,
Alta Via 4 is a spectacular route, but its relative safety as a solo adventure depends heavily on your personal experience level. I did AV4 solo myself and absolutely loved it, but I’ve done a lot of solo hiking/climbing in the past and I prefer to be alone on the trail, so it was great for me. It sounds like you too are an experienced solo hiker, but you’ll need to think about the solo via ferrata aspect, as there are a few tricky sections along the route that you can’t avoid. I’d probably recommend warming up on at least one of the easier via ferrata that you can tackle from Rif. Locatelli on day 1 or 2– this should give you a good sense of where you’re at in terms of comfort and competence on the via ferrata, which will make you a lot more comfortable moving forward along the route, when VF becomes impossible to avoid.
In July, you will encounter many people along the first half of the trail, but the vast majority are day-hikers or overnighters not completing the entire AV4, so once you get to the second half of the trail, it is incredibly quiet and you may well find yourself hiking alone for hours without seeing another person. If this makes you nervous, it’s easy enough to make friends at one of the huts and walk as a group– I personally love the solitude, and AV4 does indeed provide the opportunity to be alone, so make of that what you will.
I agree AV1 is a zoo and I’d not recommend it; the other route that I love is Alta Via 2, but it is more than double the length, so I’m not sure if that fits into your plan. It’s hard to say definitively without knowing you, but I think you should go for it on AV4– there are plenty of bail-outs if you find it’s not for you, but I suspect you’ll love it.
Hope that helps 🙂
xx bb
Shannon
Hi Brooke,
You mention a gpx file for the AV4 to purchase. I am starting my solo adventure of the AV on 11th of September after the AV2 with a friend and would love to purchase your gpx file for the route as an extra back up plan. Is there a link I’m missing?
Kindly,
Shannon
brooke brisbine
ShannonHi Shannon,
You can find my custom GPS routes here: https://shop.brookebeyond.com
Both AV2 and AV4 are available for sale now!
Happy trails,
xx bb
Kimberly Deri
I recently came across your insightful blog post on Alta Via 4, and it has truly ignited my enthusiasm for embarking on the same adventure with my family in the Dolomites this August 2024. However, as we plan for this exciting journey, I have a concern regarding the suitability of the smallest member of our group—a 10-year-old child who will be 140 cm tall and weigh 26.3 kg at the time of our trip.
With a commendable background of two years of weekly indoor rock climbing and seven outdoor climbing trips, our young adventurer has showcased courage, skill, and proficiency in safety rope and knot techniques. My specific worry lies in the mechanical aspects of Via Ferratas, especially on the way through Giro di Sorapiss. Considering his height and effective reach, are there Via Ferrata sections along Alta Via 4 that might pose challenges due to certain handholds or grips being out of reach for him?
In essence, I’m seeking assurance on whether his height might limit his ability to complete the Alta Via 4 safely. Additionally, is there a minimum age requirement for undertaking this trail? Our primary goal is to ensure a secure and enjoyable experience for him. Your insights on this matter would be greatly appreciated. Thank you for your time!
brooke brisbine
Kimberly DeriHi Kimberly, I think this would be a fantastic family adventure!! Based on what you’ve described, it seems like he is better prepared for the challenges of AV4 than some adults! Acknowledging that I have not tested this theory personally (as I am 165cm), I do believe all of the ladders and pegs along the via ferrata would be within reach for a smaller person– protection is placed very generously along all vertical ascents and, given his extensive rock climbing experience indoors and outdoors, he sounds more than up to the task. I would say go for it!!
If you guys do head out to AV4 this summer, I would love if you came back and left another comment here with your experience, in case any other families have similar questions about their skilled but slightly smaller explorers tackling the route. I fully expect it to be a positive experience, but it would be great to hear your advice after undertaking the full trail 🙂
Happy adventures!
xx bb
DB
Thanks for all of the info!
brooke brisbine
DBThanks for reading!!
Happy trails 🙂
xx bb