• start here
  • about
  • group trips
  • brooke beyond

  • hiking guides
  • outdoor gear
    • hiking boots
    • hiking backpacks
    • cold-weather layers
    • backpacking tent
    • outdoor sleep system
    • backcountry food
    • day-hike packing list
    • hut-to-hut packing list
    • via ferrata packing list
    • backpacking packing list
    • mountaineering packing list

brooke beyond

Alta Via 4 Italian Dolomites hiking via ferrata guide
Europe / Italy

Via ferrata in the Italian Dolomites: the ultimate beginner’s guide

14 December 2023

Last Updated on 22 April 2025

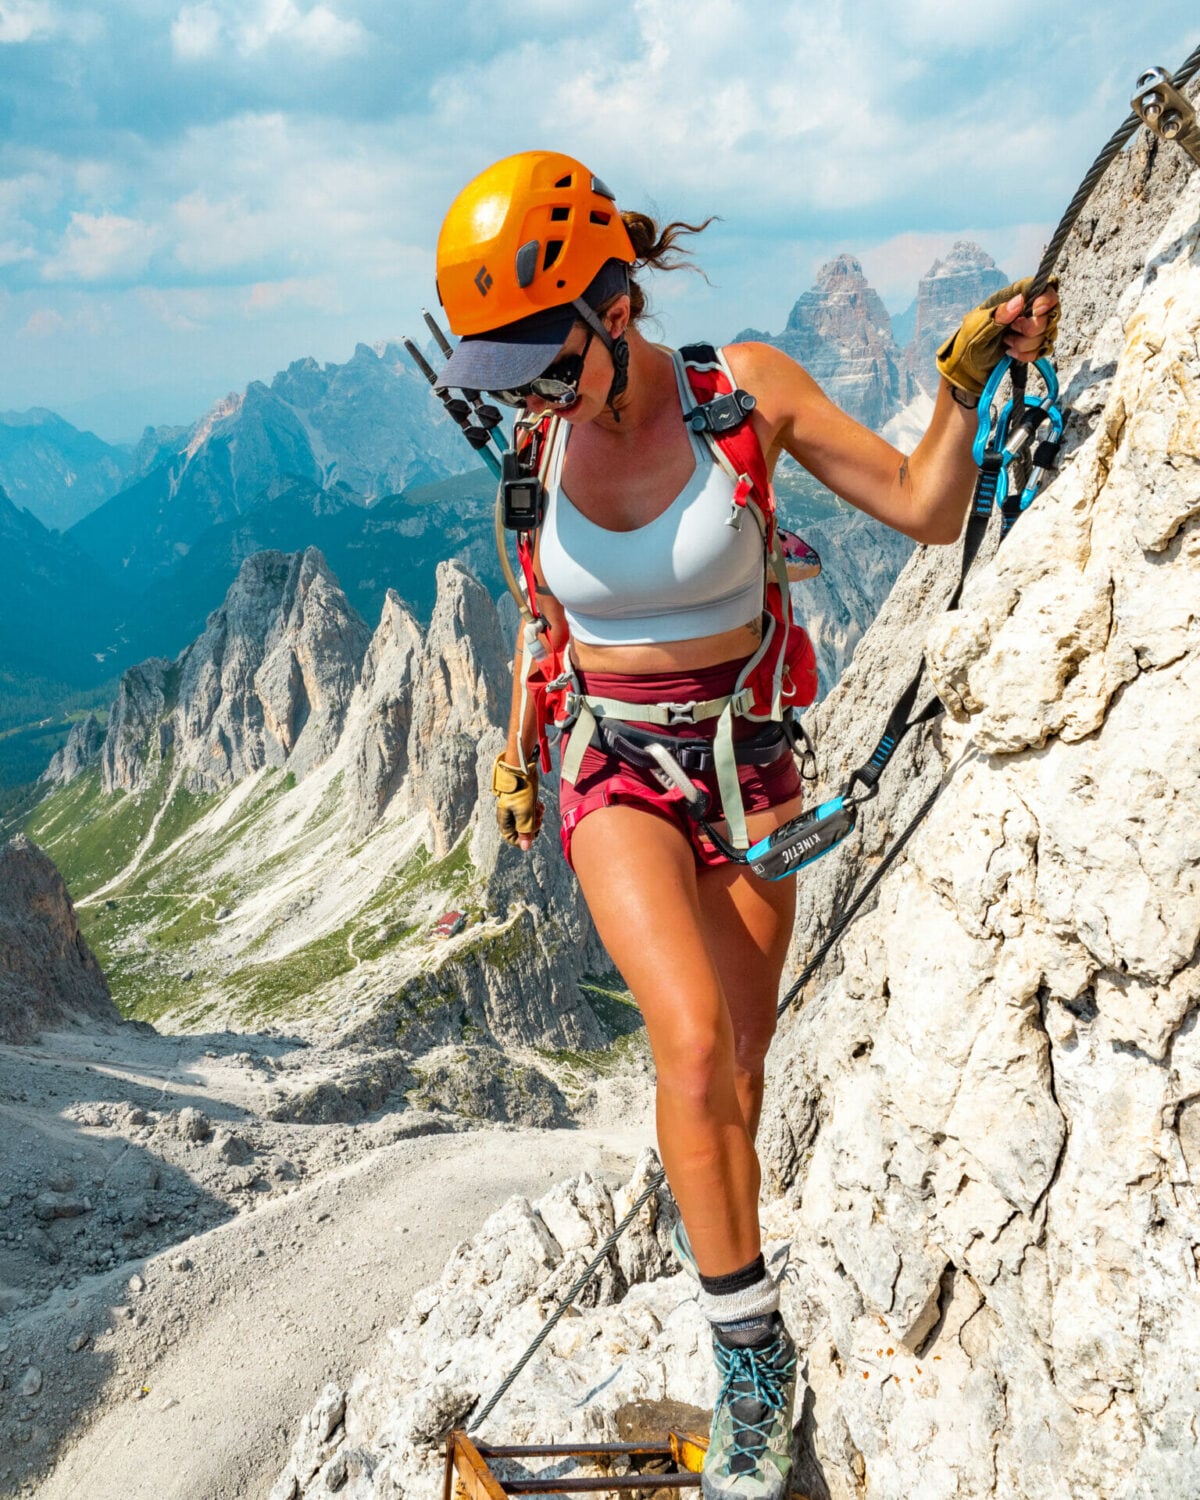
You’ve seen the photos: slender iron rungs leading up the side of a limestone cliff while a climber dangles dramatically over the void below, clipped only to a cable bolted into the mountainside. Invented right here in the Italian and Austrian Alps, the Dolomites are home to hundreds of via ferrata routes— more than anywhere else in the world!

Via ferrata is a spectacular form of protected climbing that brings the thrill of vertical ascents and lofty mountain summits to those without extensive climbing experience. Building on all of the knowledge shared in my introductory via ferrata guide, this post focuses specifically on via ferrata in the Italian Dolomites, including recommendations on preparing for your first climb, an explanation of the grading system, what to expect on a via ferrata route, and all the essential gear you’ll need to set off on your own adventure!

What's in this guide

Toggle
  • Via ferrata in the Italian Dolomites
    • What is via ferrata?
    • Via ferrata resources in the Dolomites
    • Where to find via ferrata routes
    • Do I need a permit or a guide for via ferrata?
    • Mountain insurance for the Dolomites
  • Via ferrata grading system
  • Via ferrata difficulty
  • Via ferrata gear list
    • Buying vs renting via ferrata gear
    • Connecting your via ferrata lanyard to your harness
  • What to expect on a via ferrata route
    • The approach
    • The cable
    • Types of climbing fixtures
    • Navigating the via ferrata
    • Climb on!
  • Preparing for your first via ferrata
  • Best via ferrata in the Dolomites

VIA FERRATA GEAR LIST SUMMARY

⭐️ daypack (25-35L): Osprey Tempest 30 (women’s) / Osprey Talon 33 (men’s)
⭐️ helmet: Black Diamond Half Dome Helmet (women’s) / (men’s)
⭐️ harness: Black Diamond Momentum (women’s) / (men’s)
⭐️ via ferrata lanyard: Petzel Scorpio Vertigo Lanyard
⭐️ climbing gloves: Metolius Half Finger Climbing Gloves
⭐️ mountaineering boots: La Sportiva Trango Tech GTX (women’s) / (men’s)
⭐️ PLB/SOS: Garmin InReach Mini 2

Via ferrata in the Italian Dolomites

What is via ferrata?

Literally “iron route” in Italian, this form of protected climbing was invented during WWI as a means of getting soldiers up and over challenging peaks with minimal technical experience or equipment. Today, it’s an amazing form of recreation that abounds in the Alps— you really haven’t experienced the Dolomites until you’ve climbed via ferrata!

Clipped into a fixed cable for continuous protection, via ferrata routes ascend steep rock faces and traverse exposed ledges through the use of ladders, pegs, stemples, and even the occasional bridge, bringing those with limited climbing experience to incredible heights. For a closer look at all of these different fixtures and climbing aids, check out the section What to expect on a via ferrata route below!

Via Ferrata Gusella
Alta Via 4 Italian Dolomites hiking via ferrata guide

Due to the Austrian heritage of South Tyrol, which encompasses much of the northern Dolomites, you’ll occasionally see via ferrata routes signed in German as Klettersteig, meaning “climbing path”.

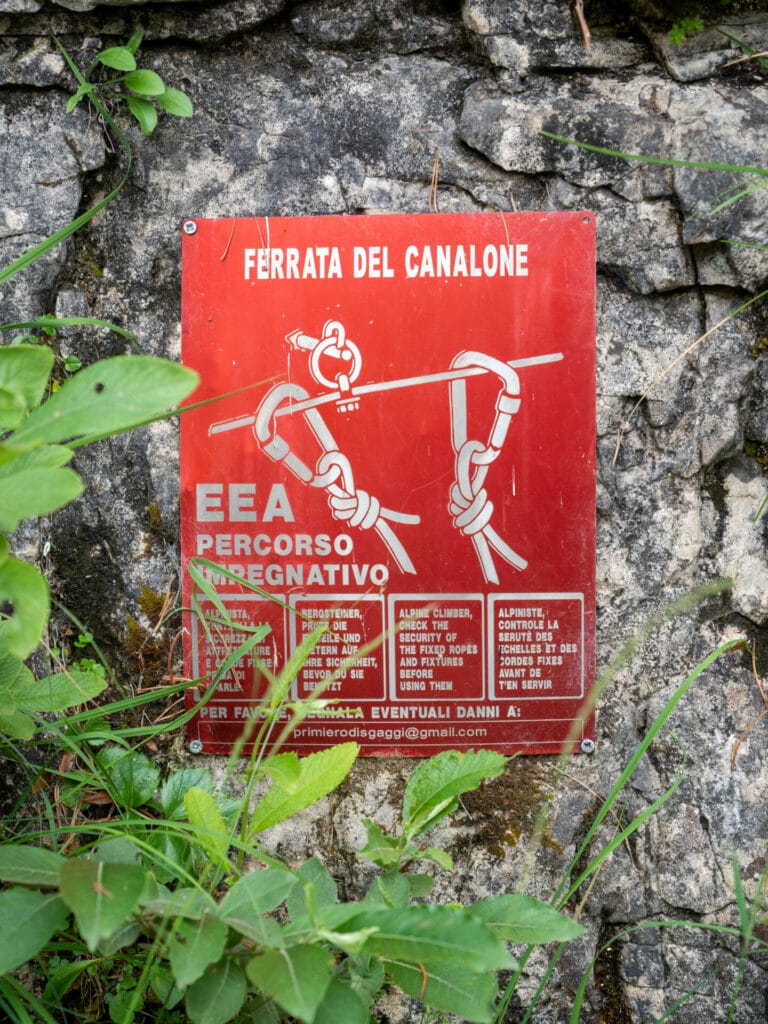
The other terminology you may see is EEA (Escursionisti Esperti con Attrezzatura Alpinistica, or Expert Hikers with Climbing Equipment), a classification for trails used by the Club Alpino Italiano; this is meant to represent a distinction from EE, which are expert-only trails that don’t necessarily require specialised equipment.

Alta Via 4 Italian Dolomites hiking via ferrata guide

Via ferrata resources in the Dolomites

Although information in English is becoming more plentiful on the internet, these print resources are an excellent starting point:

  • Via Ferratas of the Italian Dolomites: Vol 1: 75 routes-North, Central and East Ranges by Graham Fletcher & John Smith
  • Via Ferratas of the Italian Dolomites: Vol 2: Southern Dolomites, Brenta and Lake Garda by Graham Fletcher & John Smith
  • And, of course, my guide to the 10 best via ferrata in the Italian Dolomites!

Where to find via ferrata routes

There are hundreds of via ferrata routes throughout the Italian Dolomites, so you’ll struggle far more with narrowing down a few favourites than finding great options for your next climb. I compiled a list of my 10 favourite via ferrata in the Dolomites, but this is just a small taste of what’s available!

If you are eager to climb multiple via ferrata in the Dolomites without the logistics or expense of driving around the Alps (mountain tolls are insane!), then I’d absolutely recommend hiking one of the Alta Via (high routes). These are incredible trails that often include via ferrata or bring you right to the start of epic climbs, allowing you to tackle some of the region’s BEST routes that aren’t necessarily accessible as a day trip.

Read more about via ferrata along the Alta Via in my detailed guides for: Alta Via 2 (10-14 days) & Alta Via 4 (5-6 days).

Via Ferrata Gran Cir

Do I need a permit or a guide for via ferrata?

One of the best things about via ferrata in the Italian Dolomites is that it’s entirely free— if you have your own gear and are comfortable climbing without a guide, there are no required permits or fees!

As more privately-owned via ferrata pop up around the world, often charging hundreds of dollars for a guided tour regardless of your experience level, it’s refreshing to enjoy via ferrata entirely on your own terms in the Dolomites.

*For absolute beginners without any climbing experience, you may WANT to hire a guide or join a tour for your first via ferrata and I’d encourage you to do so!

Mountain insurance for the Dolomites

In addition to excellent hut discounts, Alpine Clubs throughout Europe offer insanely affordable emergency medical insurance that will cover you on via ferrata climbs. In the case of the Austrian Alpine Club, this includes 25,000€ in emergency rescue costs, 10,000€ in medical coverage, and unlimited repatriation, among other benefits. And the best part is that this insurance works across the entire WORLD (yes, you read that right)!!

I personally joined the Academic Section of the Austrian Alpine Club (Alpenverein Österreich, Akademische Sektion Innsbruck) because they were offering subsidised membership in 2022 for just 18€— annual dues have since increased to 69€ (+ add a partner for 53€), which is comparable to other clubs, but I find the Austrian website particularly easy to use and you can sign up entirely online, no need to visit an office!

If you’re staying at more than 5 mountain huts owned by the Club Alpino Italiano (which you do on both Alta Via 2 and Alta Via 4!), alpine club membership pays for itself in all the discounts you receive on accommodation, so you’re effectively getting mountain rescue insurance FOR FREE!

Via ferrata in the Dolomites beginner guide

Via ferrata grading system

There are quite a few scales used to rate the difficulty of via ferrata routes across the Alps (either with 5 or 6 levels, as per the table above), but all the ratings I’ve listed on my blog are from the Cicerone guidebook series, which use a number & a letter. 

  • The number (1-6) denotes difficulty of the route & considers exposure (1-4 directly correspond to F/PD/D/TD ratings on the Italian system; 5 & 6 correspond to ED)
  • The letter (A-C) represents “commitment”—basically, how remote the route is & how easy it would be to bail out. This isn’t used by many sources other than Cicerone, but I did find it useful in planning.

Notably, these ratings are rarely referenced on signs at the start of a route or indicated on a map, so it’s worth doing adequate research prior to setting off to ensure that you don’t find yourself in over your head on a challenging climb!

Alta Via 4 Italian Dolomites hiking via ferrata guide
Ascending the ladders of Via Ferrata Merlone

Via ferrata difficulty

The difficulty of via ferrata as a whole is very subjective (heavily influenced by your own experience, risk tolerance, and comfort with exposure), but there are plenty of beginner-appropriate routes spread across the Dolomites, as well as challenging routes when you’re ready. 

Yet another one of the fantastic things about via ferrata is that, unlike sport climbing, it can be done entirely solo and is not necessarily any more dangerous without a partner, as long as you know what you’re doing.

I wouldn’t recommend beginners set out alone, but those with prior climbing or via ferrata experience will definitely be able to tackle routes solo, which is great for those among us who often hike alone and still want to see some summits!

Climbing experience is a major asset for via ferrata, but it’s not a requirement. I’m only an intermediate sport climber (5.8-5.9) and I found 4s to be super fun. This is the whole beauty of via ferrata— it allows you to ascend otherwise challenging vertical walls without the need for rope handling, a belay partner, or 5.11 proficiency!

I’d say a good head for heights, careful footwork, and general fitness are the most crucial determinants of via ferrata success. Here’s a quick look at the relative difficult of different via ferrata routes ↯

Via Ferrata Sass d'Putia

1 or F (easy): tends to feel like an exposed hike, not higher than Class 2; this is mostly just walking on uneven terrain and you may not even need to clip on these after you get comfortable on the rock

example: Via Ferrata Sass d’Putia

Via Ferrata Piz da Cir

2 or PD (moderate): transitions to Class 3 scrambling, involving more use of hands & feet and increased exposure

example: Via Ferrata Piz da Cir V

Alta Via 4 Italian Dolomites hiking via ferrata guide

3 or D (difficult): consistent use of hands that is more comparable to Class 4 scrambling, typically a good deal of exposure and often with long, sustained vertical sections

example: Via Ferrata Merlone

Via Ferrata delle Trincee

4 or TD (very difficult): tends to involve very sustained vertical ascents with massive amounts of exposure; this feels more similar to low Class 5 multi-pitch climbing (with the benefit of a cable and fixed pegs). Beginners should not attempt 4+ unsupervised!

example: Via Ferrata delle Trincee

Alta Via 4 Italian Dolomites hiking via ferrata guide

5/6 or ED (extremely difficult): I never saw anything higher than a 4 in an entire month of climbing around the Dolomites, but 5/6 is likely to involve overhanging sections, lots of upper-body engagement & more frequent use of the rock; technical climbing experience is required

Via Ferrata Piz Duleda

Via ferrata gear list

Before setting out on a via ferrata, at the very minimum, you need a climbing/alpine harness, a via ferrata lanyard with a shock absorber, and a helmet. I’d also highly recommend fingerless leather climbing gloves for added comfort on the cable.

👉🏼 Tackling via ferrata as part of a larger hut-to-hut route? Check out my complete Alta Via packing list: what to pack for hut-to-hut hikes in the Dolomites


Alta Via 1 2 4 Packing List- Italian Dolomites

daypack (25-35L): Osprey Tempest 30 (women’s) / Osprey Talon 33 (men’s)

Depending on the length of the via ferrata route you’re tackling, I’d recommend something in the 25-35L range with sturdy hip belts, a good suspension system, and some back venting. I love my 33L Osprey Talon for via ferrata, as it’s lightweight and easy to climb with, yet still very comfortable for long approaches! I’ve used it on AV2, AV4, and countless other via ferrata routes!


helmet: Black Diamond Half Dome Helmet (women’s) / (men’s)

For via ferrata routes, a light climbing helmet is essential to protect against rockfall, which might come from other climbers above or even unstable areas of the mountain. And for routes that wind through dark tunnels, it can also be handy for protecting your head against bumps!


climbing harness: Black Diamond Momentum (women’s) / (men’s)

To connect your via ferrata lanyard safely to your person, you’ll need a harness; I love the fit and comfort of this crag climbing harness for long days on the trail!


via ferrata lanyard: Petzel Scorpio Vertigo Lanyard

The one piece of gear that is entirely unique to via ferrata is a lanyard, which consists of 2 auto-locking carabiners and an energy absorber connected in a Y-configuration. One end of the webbing is girth-hitched to your harness, while the other two ends are clipped into the cable during your climb.

Although you’ll see plenty of older European climbers using DIY systems that are nearly identical to tethers used in crag or alpine climbing, it’s still recommended to use a dedicated lanyard with in-built force absorption mechanisms— falls are rare on via ferrata, but could be massively damaging to your spine on a short static line.


climbing gloves: Metolius Half Finger Climbing Gloves

Although not a safety requirement for via ferrata, you’ll be infinitely more comfortable with a pair of leather climbing gloves, particularly when quickly descending down the cable. Personally, I prefer the dexterity of fingerless gloves, which allow for easy clipping while still protecting your hands from nasty blisters.


Alta Via 1 2 4 Packing List- Italian Dolomites

mountaineering boots: La Sportiva Trango Tech Leather GTX Boots (women’s) / (men’s)

While you can absolutely climb via ferrata in any boot or athletic shoe that’s comfortable for you, I love the stiff soles of my lightweight mountaineering boots for climbing metal ladders and traversing rough terrain/scree.


Alta Via 1 2 4 Packing List- Italian Dolomites

PLB/SOS: Garmin InReach Mini 2

Never, EVER head out on an adventure without a satellite communicator— whether you’re sending messages back home, checking the weather, or communicating with emergency services, this small device can literally save your life.

👉🏼 For a more detailed Dolomites packing list, read: Complete Alta Via packing list: what to pack for hut-to-hut hikes in the Dolomites


Buying vs renting via ferrata gear

Although it is technically possible to rent gear in the Dolomites (~20€ per day), it usually works out more convenient and economical to bring your own gear if you’re doing more than a few via ferrata.

You can easily outfit yourself in the essential gear for $200 if buying new and about half this if buying used— my best advice would be to purchase gear before your arrive in the Dolomites, as it is hugely inflated in local mountain shops. And don’t forget that you can also sell your gear when finished if you don’t intend to keep climbing!

For climbers, the only unique piece of gear that you’re likely to require is the via ferrata lanyard, and once again, these can be purchased inexpensively used and quite reasonably new.

Two different styles of Via ferrata lanyard

Connecting your via ferrata lanyard to your harness

The proper use of a helmet or gloves requires no explanation, but for those with absolutely no prior climbing experience, you may be wondering how to attach your via ferrata lanyard to your climbing harness: the loop of your lanyard should be attached using a simple girth hitch through the tie-in points on your harness, as per the handy diagram below, OR the belay loop, as in the photo above.

Alta Via 2 Italian Dolomites hiking via ferrata guide
Via Ferrata Porton

What to expect on a via ferrata route

The approach

Via ferrata routes in the Dolomites typically begin with an approach on trail, and this initial hike might be anywhere from a few minutes to several hours depending on the route and whether you’re starting from a carpark, trailhead, or a high mountain hut.

Alta Via 2 Italian Dolomites hiking via ferrata guide
approaching through a dirty gully
Alta Via 4 Italian Dolomites hiking via ferrata guide
some approaches even involve WWI tunnels!

The cable

Once you reach the start of the via ferrata, typically marked by a sign or at the very least a painted symbol, clip into the steel cable and begin the route! You should have a hand on the cable (pushing your carabiners along) at all times.

Although it is largely self-explanatory, there is still a best-practice method for clipping into the cable that should be used by beginners:

  • Attach both carabiners to the first stretch of cable (best practice is to clip in opposing directions, but the chance of 2 auto-lockers failing simultaneously is basically nil, so you’ll rarely see people actually climbing like this)
  • When you reach a bolt, you’ll need to move your carabiners to the next stretch of cable one at a time, ensuring that you always have ONE carabiner clipped to the cable
Alta Via 2 Italian Dolomites hiking via ferrata guide
Clipped into the cable
Alta Via 2 Italian Dolomites hiking via ferrata guide
Sign denoting the start of the via ferrata

Types of climbing fixtures

Once clipped into the cable, ascend the route using a variety of fixed protection or climbing fixtures bolted directly into the rock. These may include:

Alta Via 4 Italian Dolomites hiking via ferrata guide
Ladders
Alta Via 4 Italian Dolomites hiking via ferrata guide
flat pegs
Alta Via 2 Italian Dolomites hiking via ferrata guide
The cable itself
Alta Via 4 Italian Dolomites hiking via ferrata guide
simple pegs
Alta Via 4 Italian Dolomites hiking via ferrata guide
Bridges
Alta Via 2 Italian Dolomites hiking via ferrata guide
Suspension bridges!
Via ferrata in the Dolomites beginner guide
Stemples
Juliana Bike Trail Slovenia
& still more pegs

Navigating the via ferrata

Thanks to the continuous cable bolted into the rock, navigating through a via ferrata is typically very easy— simply slide your carabiners along the cable! When connecting two routes or tackling long circuits, however, you will usually need to do some navigation between sections of cable, which is aided by frequent flags and markers on the rock.

Alta Via 2 Italian Dolomites hiking via ferrata guide
Beginning of Via Ferrata Porton
Alta Via 4 Italian Dolomites hiking via ferrata guide
Trail markers on Via Ferrata delle Forcelle

Climb on!

Much to the delight of climbers and scramblers everywhere, via ferrata still presents plenty of opportunity to get your hands and feet on the actual rock— it’s not all about the fixtures! When rock quality is good and handholds are plentiful, you’ll find yourself leaning a lot more towards actual climbing (but with the added protection of a cable).

Still, you should have a hand on the cable at all times while ascending or descending via ferrata. Your lanyard would save you from a fatal fall, but even more so than other forms of climbing (where the rope is designed to handle repeated falls), the goal with via ferrata is not to fall at all. Remember: you are on a very unforgiving steel cable, NOT a dynamic climbing rope!

Via Ferrata Porton
Via Ferrata Porton

Preparing for your first via ferrata

While you definitely need solid footing and a head for heights, you don’t necessarily need any technical climbing experience for via ferrata, which is a big part of its appeal!

I’d only ever done a single via ferrata in Peru before I went to the Dolomites and climbed 15 routes from 1-4 in difficulty, many of them solo. However, general climbing experience is a HUGE asset. If you’ve only ever hiked on a trail, even for long distances, you will need to approach via ferrata as a complete beginner— but you can still do it!

Via Ferrata Brigata Tridentina
Alta Via 4 Italian Dolomites hiking via ferrata guide

There are some great how-to videos online that will help you understand via ferrata, but here’s what I recommend to beginners ↯

>> IF you have climbing experience: you can start on an easy route like Via Ferrata Sass d’Putia or Via Ferrata Gran Cir— these are little more than a steep hike and therefore a great way to practice using your gear in the real-world without substantial risk. Once you’re comfortable, work yourself up to gradually harder via ferrata.

>> IF you don’t have climbing experience: it may be prudent to hire a guide for your first day or go with a more experienced friend. As you’re starting out, be mindful of super busy routes (you’re more likely to have an accident if you feel rushed on the cable), but likewise avoid remote routes with limited bailout options. Take it easy and start slow!

Explore some of my favourite via ferrata in the Dolomites this post: 10 best via ferrata routes in the Italian Dolomites

Alta Via 4 Italian Dolomites hiking via ferrata guide
Giro di Sorapis

Best via ferrata in the Dolomites

With hundreds of via ferrata routes in the Dolomites, there’s no shortage of worthwhile climbing opportunities! I’ve assembled a list of my top 10 routes, likely to be expanded as I continue visiting this area of the coming years, so this is a great place to start ↯

10 best via ferrata routes in the Italian Dolomites

I hope you’ve enjoyed this crash-course on via ferrata! I’ve done my best to answer all of the most common questions that I’ve been asked on Instagram, but if burning questions remain, leave a comment below!

For professional instruction, I also highly recommend checking out the guided via ferrata offerings on Explore-Share. This is the perfect way to get into the sport safely and advance your skills!

Happy climbing xx bb

Read more about the Dolomites

Alta Via 2: complete hiking + via ferrata route guide

navigate confidently on & off the trail ->AV2 adventure route GPS map!

Alta Via 4: complete hiking + via ferrata route guide

navigate confidently on & off the trail ->AV4 adventure route GPS map!

Everything you need to know about mountain huts (rifugi) in the Italian Dolomites

Complete Alta Via packing list: what to pack for hut-to-hut hikes in the Dolomites

Via ferrata in the Italian Dolomites: the ultimate beginner’s guide

10 best via ferrata routes in the Italian Dolomites

TAGS:climbingdolomitesvia ferrata
0 Comments
Share
brooke beyond

Hey, I'm Brooke and I'm obsessed with getting off the beaten path, exploring backcountry gems & travelling beyond the ordinary! I left Australia 5 years ago after finishing a PhD in Biomechanics & have been travelling the world full-time ever since (joined by my life/climbing partner, James). Whether it’s road-tripping through Mexico, climbing alpine peaks in the Andes, scuba diving in the Red Sea, or tackling epic via ferrata in the Dolomites, I hope this blog will inspire your future adventures & help you find wonder in every corner of the globe. xx bb

Leave a Comment Cancel Comment

You May Also Like

11 October 2022

Alta Via 2 (day 11): Passo Cereda to Rifugio Boz

17 November 2016

History lessons in Kraków: Visiting Auschwitz and Kazimierz

9 November 2016

Biking around Lake Bled & Vintgar Gorge

hi, I’m brooke!

I'm obsessed with getting off the beaten path, exploring backcountry gems & travelling beyond the ordinary! I left Australia 5 years ago after finishing a PhD in Biomechanics & have been travelling the world full-time ever since (now joined by my life/climbing partner, James). I hope this blog will inspire your future adventures & help you find wonder in every corner of the globe. xx bb

read my story
currently exploring

currently exploring

mexico

read our gear guides

🥾 hiking boots

🎒 hiking backpacks

🌨️ cold-weather layers

⛺️ backpacking & alpine tents

🛌 sleeping bag & pads

🍪 backcountry food

📸 travel camera gear

✈️ travel clothing

trail guides

summit guides

itineraries

outdoor gear

GPS maps

recent posts

  • Climbing Iztaccíhuatl volcano

    2-week Mexico volcanoes itinerary: climbing Pico de Orizaba, Izta, Malinche & Toluca

    3 June 2025
  • Mexico City: the perfect 5-day itinerary for CDMX

    31 May 2025
  • Climbing Iztaccíhuatl volcano

    Driving in Mexico: essential road trip guide for foreigners

    28 May 2025
  • 10-day Rwanda road trip itinerary: gorillas, volcanoes & Lake Kivu

    25 May 2025
  • 2-week Patagonia itinerary: best of Torres del Paine & Los Glaciares/El Chaltén

    22 May 2025

@brookebeyond_
brooke ✨travel & mountain gal

@brookebeyond_

  • We took our own engagement photos in the Swiss Alps this summer and here’s how it went 👉🏼

(#8 might just be my personal fave 😂)

ALSO this post is for anyone who’s gotten the (woefully mistaken) impression that I am “naturally photogenic”
  • absolutely one of the most amazing little hikes we did in Switzerlnad this summer (& the competition was stiff) 🤩🏔️🌞🌸

📍Saxer Lücke

GETTING THERE: catch the Frümsen gondola to Staubernkanzel

HIKE: 1hr (2.5km, 250m gain) to this amazing viewpoint

WHEN TO GO: the best lighting is in the afternoon, these photos were taken around 4pm and it just kept getting better!
.
.
.
.
.
#swissalps #switzerland #saxerlücke #swisssummer #alpstein
  • the BEST easy hike in Zermatt 🏔️🥾✨

For spectacular views of the Matterhorn, the enormous Monte Rosa massif, and the Gorner Glacier (as well as 29 peaks over 4,000m!), there’s no better EASY hike than Riffelberg to Gornergrat, accessible via the Gornergrat Railway in Zermatt. 

The hike only takes about 2hrs at a leisurely pace (I did it 7 weeks after knee surgery!), so it’s suitable for families and non-hikers with even a basic level of fitness 🏃🏻‍♀️

🇨🇭 START FROM ZERMATT
- purchase tickets (day-of is fine) from Gornergrat Railway, right across from Zermatt train station

🚞 GORNERGRAT RAILWAY
- tickets from Zermatt to Riffelberg cost 42CHF ($50USD)— there’s no discount for return, so keep it flexible by purchasing one-way
- the train takes the about 25min, sit on the right side for best views!
- when you finish the hike at Gornergrat, buy a one-way ticket back to Zermatt for 66CHF ($80USD)
- save 50% on tickets with the Swiss Half Fare Card— the pass costs 120CHF ($150USD) and lasts for a whole month, it’s almost always worth it!) 

🥾 HIKE DETAILS: RIFFELSEE TO GORNERGRAT
- the route is 5km with 560m elevation gain (entirely uphill)
- the best views of the Matterhorn are around Riffelsee, where several small lakes offer perfect reflections
- near Rotenboden (the train station in between Riffelberg & Gornergrat), there are excellent rocky viewpoints of both Matterhorn and Monta Rosa— it’s easy to find quiet views if you hike around a bit!
- as you get closer to Gornergrat, Monte Rosa and the Gorner Glacier are right in your face
- almost everyone does this hike in reverse (Gornergrat to Riffelberg), I just personally hate hiking downhill— but you can swap if you’d rather descend the entire way!
  • 2 months after knee surgery and barely a week after I stopped walking with a knee brace and cane, I was honestly so proud to be able to do this (objectively very easy) 5km hike with 250m gain— it may not seem like much, but for me, this was a HUGE step forward 🥹

📍 Saxer Lücke, Switzerland 

it’s been an extremely challenging recovery, both physically and mentally… but the milestone moments always fill me with hope that things are indeed getting better ❤️‍🩹

special shoutout to my fiancé/hiking partner/personal cheering squad @slatojc for slowing down with me on the trail and always offering a hand down slippery rocks before I even have to ask
  • it’s another “if it wasn’t so stupid beautiful, I’d never set foot in this country again because it’s bleeding me dry” kinda summer 🇨🇭🌸☀️🏔️🦋✨

(hands up if you feel personally victimised by Swiss prices but you can’t stay away because MOUNTAINS 😭😭)
  • magical summer sunsets in Switzerland ✨
.
.
.
.
#swissalps #stoosridge #swisssummer #sunset
  • BEST EASY HIKES IN SWITZERLAND 🇨🇭❤️‍🩹

just 2 months after knee surgery, I found myself travelling through Switzerland— in search of easy hikes that were actually accessible post-op 🩼 

luckily, there’s hardly a better place in the world for easy hiking than the Swiss Alps!!

so whether you’re recovering from an injury, hiking with older parents/young children, or just a non-hiker who loves an epic view, this short list of HIGH VALUE viewpoints & hikes offer the most spectacular mountain scenery with minimal challenge

💸 BUDGET TIP: buy the Swiss Half Fare Card to save 50% all these gondolas and trains, which can seriously add up!!

- Stoos Ridge: take the Stoosbahn to the little village of Stoos + walk about 15min to the chairlift that can take you all the way up to Fronalpstock— you can walk as little or as much as you want up here, the views are amazing right away
- Riffelsee: take the Gornergrat Railway from Zermatt to Riffelsee + hike 20min to the 2 beautiful alpine lakes (then either hike 1hr up to Gornergrat or catch the train)
- Saxer Lücke: catch a gondola + hike 1hr (2.5km, 250m gain) to this amazing viewpoint— hardest on this list and not suitable for those with extremely limited mobility 
- Kleine Scheidegg: take the train or the gondola from Grindelwald + hike about 20min uphill to the lake
- Jungfraujoch: from Kleine Scheidegg, take the gondola to Jungfraujoch + walk around the viewing platforms
- Trockener Steg: take the gondola from Zermatt + walk 10min from the top of the cable car to the lake for incredible Matterhorn views
- Oeschinensee: 20min walk from the top of the Kandersteg cable car to the lake (bus also available), then you can walk as little or as much as you want around the lake or on the famous Panorama Trail
.
.
.
.
.
#easyhikes #swissalps #matterhorn #jungfraujoch #oeschinensee #stoos #switzerland
  • This is my 2nd summer back in Zermatt to climb the Matterhorn— and my 2nd summer NOT climbing the Matterhorn 😑

In 2023, a wicked snow storm blew through the night before my planned ascent and grounded all climbing parties… and then I had knee surgery less than 2 months before our repeat trip to Zermatt this year. I won’t lie, it’s been extremely disappointing to spend nearly 2 weeks in one of the most expensive places in the world, and STILL not do the thing I came here to do 😅

But alas, here we are in Zermatt again! (and apparently not for the last time)

Even though we are slowly going bankrupt, it’s a gorgeous place to be in the summer with no shortage of amazing trails!

Can’t wait to share some of what we’ve been up to— my first little hikes since surgery 🤩
  • we’ve spent the last several weeks in Switzerland and, in many ways, I couldn’t have chosen a better destination for post-knee-surgery recovery— where else in the world can you get views like THIS with 1hr of easy hiking?!

I’m not sure I’ll ever truly prefer the accessibility of the Alps to true backcountry… but there’s no denying that I couldn’t be outside any other way right now and it’s given me a whole new appreciation for the hundreds of gondolas, funiculars, and trains that connect non-hikers or mobility-impaired enthusiasts like myself to otherwise unreachable heights!

I’m enormously grateful for the opportunity to rehab my knee under legendary peaks rather than fluorescent indoor lights, so THANK YOU Switzerland 😍
follow @brookebeyond_

travel beyond the ordinary

Explore my travel guides, custom itineraries & blog posts with an interactive world map ✨

all destinations

  • We took our own engagement photos in the Swiss Alps this summer and here’s how it went 👉🏼

(#8 might just be my personal fave 😂)

ALSO this post is for anyone who’s gotten the (woefully mistaken) impression that I am “naturally photogenic”
  • absolutely one of the most amazing little hikes we did in Switzerlnad this summer (& the competition was stiff) 🤩🏔️🌞🌸

📍Saxer Lücke

GETTING THERE: catch the Frümsen gondola to Staubernkanzel

HIKE: 1hr (2.5km, 250m gain) to this amazing viewpoint

WHEN TO GO: the best lighting is in the afternoon, these photos were taken around 4pm and it just kept getting better!
.
.
.
.
.
#swissalps #switzerland #saxerlücke #swisssummer #alpstein
  • the BEST easy hike in Zermatt 🏔️🥾✨

For spectacular views of the Matterhorn, the enormous Monte Rosa massif, and the Gorner Glacier (as well as 29 peaks over 4,000m!), there’s no better EASY hike than Riffelberg to Gornergrat, accessible via the Gornergrat Railway in Zermatt. 

The hike only takes about 2hrs at a leisurely pace (I did it 7 weeks after knee surgery!), so it’s suitable for families and non-hikers with even a basic level of fitness 🏃🏻‍♀️

🇨🇭 START FROM ZERMATT
- purchase tickets (day-of is fine) from Gornergrat Railway, right across from Zermatt train station

🚞 GORNERGRAT RAILWAY
- tickets from Zermatt to Riffelberg cost 42CHF ($50USD)— there’s no discount for return, so keep it flexible by purchasing one-way
- the train takes the about 25min, sit on the right side for best views!
- when you finish the hike at Gornergrat, buy a one-way ticket back to Zermatt for 66CHF ($80USD)
- save 50% on tickets with the Swiss Half Fare Card— the pass costs 120CHF ($150USD) and lasts for a whole month, it’s almost always worth it!) 

🥾 HIKE DETAILS: RIFFELSEE TO GORNERGRAT
- the route is 5km with 560m elevation gain (entirely uphill)
- the best views of the Matterhorn are around Riffelsee, where several small lakes offer perfect reflections
- near Rotenboden (the train station in between Riffelberg & Gornergrat), there are excellent rocky viewpoints of both Matterhorn and Monta Rosa— it’s easy to find quiet views if you hike around a bit!
- as you get closer to Gornergrat, Monte Rosa and the Gorner Glacier are right in your face
- almost everyone does this hike in reverse (Gornergrat to Riffelberg), I just personally hate hiking downhill— but you can swap if you’d rather descend the entire way!
  • 2 months after knee surgery and barely a week after I stopped walking with a knee brace and cane, I was honestly so proud to be able to do this (objectively very easy) 5km hike with 250m gain— it may not seem like much, but for me, this was a HUGE step forward 🥹

📍 Saxer Lücke, Switzerland 

it’s been an extremely challenging recovery, both physically and mentally… but the milestone moments always fill me with hope that things are indeed getting better ❤️‍🩹

special shoutout to my fiancé/hiking partner/personal cheering squad @slatojc for slowing down with me on the trail and always offering a hand down slippery rocks before I even have to ask
  • it’s another “if it wasn’t so stupid beautiful, I’d never set foot in this country again because it’s bleeding me dry” kinda summer 🇨🇭🌸☀️🏔️🦋✨

(hands up if you feel personally victimised by Swiss prices but you can’t stay away because MOUNTAINS 😭😭)
We took our own engagement photos in the Swiss Alps this summer and here’s how it went 👉🏼

(#8 might just be my personal fave 😂)

ALSO this post is for anyone who’s gotten the (woefully mistaken) impression that I am “naturally photogenic”
We took our own engagement photos in the Swiss Alps this summer and here’s how it went 👉🏼

(#8 might just be my personal fave 😂)

ALSO this post is for anyone who’s gotten the (woefully mistaken) impression that I am “naturally photogenic”
We took our own engagement photos in the Swiss Alps this summer and here’s how it went 👉🏼

(#8 might just be my personal fave 😂)

ALSO this post is for anyone who’s gotten the (woefully mistaken) impression that I am “naturally photogenic”
We took our own engagement photos in the Swiss Alps this summer and here’s how it went 👉🏼

(#8 might just be my personal fave 😂)

ALSO this post is for anyone who’s gotten the (woefully mistaken) impression that I am “naturally photogenic”
We took our own engagement photos in the Swiss Alps this summer and here’s how it went 👉🏼

(#8 might just be my personal fave 😂)

ALSO this post is for anyone who’s gotten the (woefully mistaken) impression that I am “naturally photogenic”
We took our own engagement photos in the Swiss Alps this summer and here’s how it went 👉🏼

(#8 might just be my personal fave 😂)

ALSO this post is for anyone who’s gotten the (woefully mistaken) impression that I am “naturally photogenic”
We took our own engagement photos in the Swiss Alps this summer and here’s how it went 👉🏼

(#8 might just be my personal fave 😂)

ALSO this post is for anyone who’s gotten the (woefully mistaken) impression that I am “naturally photogenic”
We took our own engagement photos in the Swiss Alps this summer and here’s how it went 👉🏼

(#8 might just be my personal fave 😂)

ALSO this post is for anyone who’s gotten the (woefully mistaken) impression that I am “naturally photogenic”
We took our own engagement photos in the Swiss Alps this summer and here’s how it went 👉🏼

(#8 might just be my personal fave 😂)

ALSO this post is for anyone who’s gotten the (woefully mistaken) impression that I am “naturally photogenic”
We took our own engagement photos in the Swiss Alps this summer and here’s how it went 👉🏼

(#8 might just be my personal fave 😂)

ALSO this post is for anyone who’s gotten the (woefully mistaken) impression that I am “naturally photogenic”
@brookebeyond_
@brookebeyond_
•
Follow
We took our own engagement photos in the Swiss Alps this summer and here’s how it went 👉🏼 (#8 might just be my personal fave 😂) ALSO this post is for anyone who’s gotten the (woefully mistaken) impression that I am “naturally photogenic”
2 days ago
View on Instagram |
1/5
@brookebeyond_
@brookebeyond_
•
Follow
absolutely one of the most amazing little hikes we did in Switzerlnad this summer (& the competition was stiff) 🤩🏔️🌞🌸 📍Saxer Lücke GETTING THERE: catch the Frümsen gondola to Staubernkanzel HIKE: 1hr (2.5km, 250m gain) to this amazing viewpoint WHEN TO GO: the best lighting is in the afternoon, these photos were taken around 4pm and it just kept getting better! . . . . . #swissalps #switzerland #saxerlücke #swisssummer #alpstein
3 days ago
View on Instagram |
2/5
the BEST easy hike in Zermatt 🏔️🥾✨

For spectacular views of the Matterhorn, the enormous Monte Rosa massif, and the Gorner Glacier (as well as 29 peaks over 4,000m!), there’s no better EASY hike than Riffelberg to Gornergrat, accessible via the Gornergrat Railway in Zermatt. 

The hike only takes about 2hrs at a leisurely pace (I did it 7 weeks after knee surgery!), so it’s suitable for families and non-hikers with even a basic level of fitness 🏃🏻‍♀️

🇨🇭 START FROM ZERMATT
- purchase tickets (day-of is fine) from Gornergrat Railway, right across from Zermatt train station

🚞 GORNERGRAT RAILWAY
- tickets from Zermatt to Riffelberg cost 42CHF ($50USD)— there’s no discount for return, so keep it flexible by purchasing one-way
- the train takes the about 25min, sit on the right side for best views!
- when you finish the hike at Gornergrat, buy a one-way ticket back to Zermatt for 66CHF ($80USD)
- save 50% on tickets with the Swiss Half Fare Card— the pass costs 120CHF ($150USD) and lasts for a whole month, it’s almost always worth it!) 

🥾 HIKE DETAILS: RIFFELSEE TO GORNERGRAT
- the route is 5km with 560m elevation gain (entirely uphill)
- the best views of the Matterhorn are around Riffelsee, where several small lakes offer perfect reflections
- near Rotenboden (the train station in between Riffelberg & Gornergrat), there are excellent rocky viewpoints of both Matterhorn and Monta Rosa— it’s easy to find quiet views if you hike around a bit!
- as you get closer to Gornergrat, Monte Rosa and the Gorner Glacier are right in your face
- almost everyone does this hike in reverse (Gornergrat to Riffelberg), I just personally hate hiking downhill— but you can swap if you’d rather descend the entire way!
@brookebeyond_
@brookebeyond_
•
Follow
the BEST easy hike in Zermatt 🏔️🥾✨ For spectacular views of the Matterhorn, the enormous Monte Rosa massif, and the Gorner Glacier (as well as 29 peaks over 4,000m!), there’s no better EASY hike than Riffelberg to Gornergrat, accessible via the Gornergrat Railway in Zermatt. The hike only takes about 2hrs at a leisurely pace (I did it 7 weeks after knee surgery!), so it’s suitable for families and non-hikers with even a basic level of fitness 🏃🏻‍♀️ 🇨🇭 START FROM ZERMATT - purchase tickets (day-of is fine) from Gornergrat Railway, right across from Zermatt train station 🚞 GORNERGRAT RAILWAY - tickets from Zermatt to Riffelberg cost 42CHF ($50USD)— there’s no discount for return, so keep it flexible by purchasing one-way - the train takes the about 25min, sit on the right side for best views! - when you finish the hike at Gornergrat, buy a one-way ticket back to Zermatt for 66CHF ($80USD) - save 50% on tickets with the Swiss Half Fare Card— the pass costs 120CHF ($150USD) and lasts for a whole month, it’s almost always worth it!) 🥾 HIKE DETAILS: RIFFELSEE TO GORNERGRAT - the route is 5km with 560m elevation gain (entirely uphill) - the best views of the Matterhorn are around Riffelsee, where several small lakes offer perfect reflections - near Rotenboden (the train station in between Riffelberg & Gornergrat), there are excellent rocky viewpoints of both Matterhorn and Monta Rosa— it’s easy to find quiet views if you hike around a bit! - as you get closer to Gornergrat, Monte Rosa and the Gorner Glacier are right in your face - almost everyone does this hike in reverse (Gornergrat to Riffelberg), I just personally hate hiking downhill— but you can swap if you’d rather descend the entire way!
1 week ago
View on Instagram |
3/5
2 months after knee surgery and barely a week after I stopped walking with a knee brace and cane, I was honestly so proud to be able to do this (objectively very easy) 5km hike with 250m gain— it may not seem like much, but for me, this was a HUGE step forward 🥹

📍 Saxer Lücke, Switzerland 

it’s been an extremely challenging recovery, both physically and mentally… but the milestone moments always fill me with hope that things are indeed getting better ❤️‍🩹

special shoutout to my fiancé/hiking partner/personal cheering squad @slatojc for slowing down with me on the trail and always offering a hand down slippery rocks before I even have to ask
@brookebeyond_
@brookebeyond_
•
Follow
2 months after knee surgery and barely a week after I stopped walking with a knee brace and cane, I was honestly so proud to be able to do this (objectively very easy) 5km hike with 250m gain— it may not seem like much, but for me, this was a HUGE step forward 🥹 📍 Saxer Lücke, Switzerland it’s been an extremely challenging recovery, both physically and mentally… but the milestone moments always fill me with hope that things are indeed getting better ❤️‍🩹 special shoutout to my fiancé/hiking partner/personal cheering squad @slatojc for slowing down with me on the trail and always offering a hand down slippery rocks before I even have to ask
3 weeks ago
View on Instagram |
4/5
@brookebeyond_
@brookebeyond_
•
Follow
it’s another “if it wasn’t so stupid beautiful, I’d never set foot in this country again because it’s bleeding me dry” kinda summer 🇨🇭🌸☀️🏔️🦋✨ (hands up if you feel personally victimised by Swiss prices but you can’t stay away because MOUNTAINS 😭😭)
3 weeks ago
View on Instagram |
5/5

  • start here
  • about
  • group trips
  • destinations
  • hiking guides
  • outdoor gear
  • custom GPS maps
  • privacy
  • contact

COPYRIGHT © 2025 BROOKE BEYOND. TRAVEL BEYOND THE ORDINARY. Site Powered by Pix & Hue.


Loading Comments...