• start here
  • about
  • group trips
  • brooke beyond

  • hiking guides
  • outdoor gear
    • hiking boots
    • hiking backpacks
    • cold-weather layers
    • backpacking tent
    • outdoor sleep system
    • backcountry food
    • day-hike packing list
    • hut-to-hut packing list
    • via ferrata packing list
    • backpacking packing list
    • mountaineering packing list

brooke beyond

Bahia Concepcion Baja California Sur Mexico vanlife
Baja / Latin America / Mexico

The ultimate Baja camping guide (+ 35 of the best vanlife & RV campsites!)

15 February 2022

Last Updated on 13 December 2023

Coming fresh from a year of vanlife in the American West, we were convinced that Baja would present a big change to our usual boondocking and free camping— we expected mostly paid campgrounds and crowded RV Parks, and even fretted about how we’d find clean drinking water or fuel in between towns.

In reality, camping couldn’t be easier in Baja, and we spent a measly $24USD on camping for our entire 6 weeks on the peninsula. We’re now totally convinced that Baja is the ultimate vanlife destination!

Here’s everything you need to know about camping in Baja, including a comparison of sites, where to find services like clean water and fuel, and a comprehensive list AND map of the 35 campsites that we can personally recommend for the ultimate Baja vanlife adventure!

What's in this guide

Toggle
    • *Camping in Baja
      • Types of camping in Baja
        • RV Parks
        • Established campgrounds
        • Boondocking
      • How to find camping in Baja
      • Where to find clean drinking water in Baja
      • Where to find dump stations in Baja
      • Where to find fuel in Baja
      • About this camping list
      • Downloadable Google Map
  • Best campsites in Baja
    • Guadalupe Canyon (Mexicali), BN
    • San Felipe, BN
    • Bahía de los Ángeles, BN
    • Guerrero Negro, BCS
    • San Ignacio, BN
    • Mulegé, BCS
    • Bahía Concepción, BCS
    • Loreto, BCS
    • La Paz, BCS
    • La Ventana & Los Barriles, BCS
    • Cabo Pulmo National Park, BCS
    • East Cape, BCS
    • Los Cabos (San José del Cabo & Cabo San Lucas)
    • Todos Santos, BCS

*Camping in Baja

Types of camping in Baja

RV Parks

RV Parks offer the most complete facilities for campers (hot showers, clean toilets, on-site dump station, laundry, WIFI) and are often located in very desirable locations, right in the centre of town or even on the beach.

Particularly for those in larger rigs who require shore power and regular services, you can’t really beat the convenience of an RV Park, and those available in Baja are very similar to what you’d find in the American West. If you don’t need facilities, though, these can be poor value compared to all the inexpensive or even free camping available on the peninsula!

  • Facilities: electrical hook-ups, dump station, toilets, hot water showers, laundry, WIFI, sometimes even a pool
  • Typical cost: 250-800 pesos ($12-40USD)
San Felipe Baja Norte Mexico Vanlife
Beach access in front of an RV Park in San Felipe, Baja Norte

Established campgrounds

On several of Baja’s more popular beaches, locals have established campgrounds that charge a small fee for day access or overnight camping, which helps support clean-up and the maintenance of very basic facilities.

These campsites are an excellent budget-friendly option for self-contained vans and RVs who don’t need many amenities but still prefer the safety and social aspect of camping near other travellers. In many cases, these campsites are in incredible locations and a destination in and of themselves!

  • Facilities: toilets, palapas, occasionally a restaurant (which might offer WIFI for customers)
  • Typical cost: 100-300 pesos ($5-15USD)
Bahia Concepcion Baja California Sur Mexico vanlife
Paid camping at Playa Santispac on Bahía Concepción, BCS

Boondocking

Amazingly, the Baja Peninsula offers an astounding variety of free camping and boondocking options— it easily rivals the American West in terms of stunning, remote campsites where you can enjoy your surroundings without paying a single peso!

Much of Baja’s best boondocking is directly on the beach (you’re permitted to camp on just about any beach for free, unless there’s an established site), and although you can typically do this without 4WD, you’ll definitely want an air compressor, pressure gauge, and rugged all-terrain tires to access the best boondocking spots.

Check out this article for more tips on driving in Baja: The ultimate road-tripper’s guide to Baja, Mexico

  • Facilities: none
  • Typical cost: FREE!
Bahia de los Angeles Baja California Norte Mexico vanlife
Boondocking at Playa La Gringa in Bahía de los Angeles, Baja Norte

How to find camping in Baja

To find campsites when we’re on the road, we use iOverlander, an awesome crowd-sourced camping app that collates reviews from travellers across the world to provide up-to-date info on millions of campsites and their access, amenities, price (where relevant) & heaps of other useful info.

The iOverlander app for iPhone or Android even works (with minor limitations) without service! This is always the first place we look for campsite info when we’re researching a new place, and it’s truly an invaluable resource for any road trip.

You’ll find that iOverlander is the MAIN resource used by everyone travelling through Baja, so it’s frequently updated and very reliable. During your trip, make sure to give back to future travellers by leaving your own reviews!

For mobile service in Mexico, I use Airalo, an amazing app that offers data eSIM packages for nearly every country in the world— you can activate the eSIM entirely from your phone, so you’ll have service as soon as you drive across the border into Baja without needing to track down a local mobile shop!

Use code BROOKE2994 for $3 off your first eSIM with Airalo!

Where to find clean drinking water in Baja

One of our biggest concerns before travelling to Baja was refilling our fresh water tank, but it truly couldn’t be easier to find purified water (agua purificada) on the road in Mexico!

Locals rely on “water stores” for their own drinking water, so every single town will have a designated shop where you can purchase clean water, and almost all of these will allow you to fill your tank directly with a hose (manguera).

  • Over 6 weeks in Baja, we spent just $14USD on water— expect to pay about 1 peso per litre (less than $0.05USD)!
Mulege Baja California Sur vanlife road trip Mexico
Filling water in Baja, Mexico

Where to find dump stations in Baja

Although we never used them ourselves, it seems to me that the easiest and most convenient place to find dump stations in Baja is at RV Parks.

iOverlander is a great app for iPhone or Android where travellers mark these and other similar RV facilities throughout the peninsula!

Where to find fuel in Baja

In the not so distant past, all petrol stations in Mexico were government-operated— you’ll still see heaps of Pemex around, particularly in small towns, but you’ll also find familiar US petrol stations like Chevron, Arco, and even Costco in larger cities.

We consistently found Costco Fuel to be ~3 pesos cheaper than all other petrol stations, which may not sound like much, but adds up to around $13USD if you’re filling the tank!

  • A 24-gallon (90L) fuel tank like the one in our Promaster 2500 van costs about 1400-1800 pesos ($70-85) to fill, which works out to be very similar to fuel prices we were paying in Washington or Oregon, and even a little cheaper than California.
  • Expect to pay around 19-22 pesos per litre.

In Baja, gas station attendants always fill your tank for you, so it’s helpful to familiarise yourself with a few phrases:

  • magna for standard unleaded petrol
  • lleno, por favor for a full tank
  • es posible pagar con tarjeta if you wish to pay by credit card (which I’d recommend, since this will blow through your cash quickly and you’ll definitely need it when paying for food and camping)

These attendants work entirely on tips, so it’s a good idea to carry around some 10 pesos coins and 20 peso notes for tipping— we gave a larger tip if they washed our windscreen, which most do!

San Felipe Baja Norte Mexico Vanlife
Petrol station in Baja, Mexico

About this camping list

  • The camping list below ONLY includes sites where we personally camped OR that we visited to for the day, and it is definitely reflective of our own preference for free or inexpensive sites with limited facilities (dry camping) but with spectacular scenery. For 6 weeks in Baja, we spent just $24USD on camping!
  • Campsite information and prices are current as of January 2022.
  • All campsites listed here are also accessible with 2WD (and we drove to all of them in our front-wheel drive Promaster van), but often it will be necessary to air-down your tires or camp further back from the beach to avoid getting stuck—use your best judgement and, when in doubt, get out and walk the route to confirm it’s passable for your vehicle!
  • With the exception of Loreto in Baja California Sur, I’ve included at least one free boondocking option for every single town mentioned in this post & in my recommended Baja itinerary!
  • CAMPING FACILITIES: KEY
  • 💦 water fill
  • 🌮 food
  • 🔌 hook-ups available
  • 🚽 toilets
  • 🚿 showers
  • 🧺 laundry 
  • 📶 mobile reception
  • 💻 WIFI

Downloadable Google Map

ALL 35 of the campsites recommended in this post are available on the downloadable Google Map below! Save it to your phone to access camping information during your time in Baja:

Best campsites in Baja

Guadalupe Canyon (Mexicali), BN

1 | Guadalupe Canyon Oasis

  • incredible campground located in the heart of Guadalupe Canyon, offering private hot spring pools of various sizes & car or tent camping
  • be warned that it is a long & treacherous drive to get here, but it’s worth the effort for 22hrs of private soaking (plus, there’s some great hiking in the canyon)
  • bookings required
  • Facilities: 🚽🚿
  • Cost: $40-125USD
  • Read more: HOW TO VISIT GUADALUPE CANYON OASIS HOT SPRINGS IN BAJA CALIFORNIA
Guadalupe Canyon Oasis Hot Springs Mexicali Baja
One of our favourite campsites at Guadalupe Canyon Oasis

2 | Laguna Salada

  • on your way out of Guadalupe Canyon, it’s possible to boondock on the perimeter of Laguna Salada (the dry lakebed) to avoid driving back to Mexicali at night
  • we did so with another couple for safety (due to being very exposed), but experienced no trouble and the locals seemed fine with us being there
  • Facilities: none
  • Cost: FREE!
Guadalupe Canyon Oasis Hot Springs Mexicali Baja
Laguna Salada

San Felipe, BN

3 | San Felipe Brewing Co

  • with permission (& the purchase of some beer), it’s possible to camp in the sandy parking lot of this craft brewery about 10min north of San Felipe in Playa del Oro
  • excellent beer & lively atmosphere, with ping pong tournaments and pool tables
  • a particularly good option considering how expensive the RV parks are in town!
  • Facilities: 📶💻
  • Cost: FREE!
San Felipe Baja Norte Mexico Vanlife

4 | Campo San Felipe RV Park

  • of San Felipe’s many overpriced beachfront RV Parks, this is in an excellent location with clean facilities & even a pool
  • heaps of food, shops & the Malecón all within quick walking distance
  • Facilities: 🔌🚽🚿📶💻
  • Cost: 650 pesos

Bahía de los Ángeles, BN

5 | Playa La Gringa

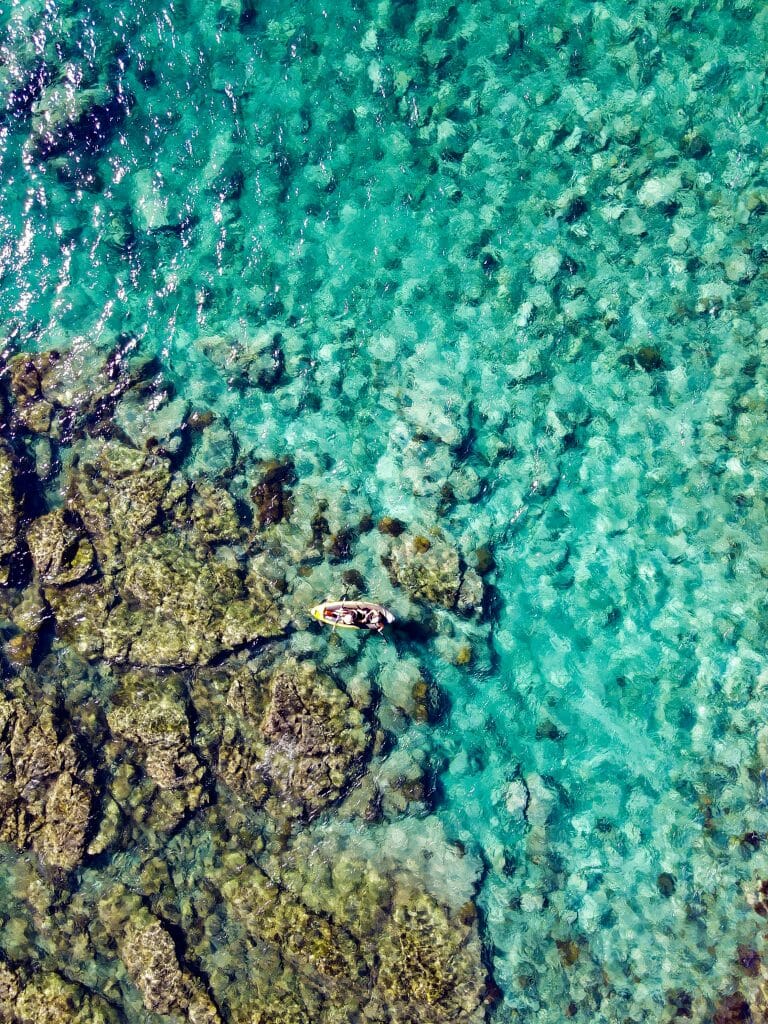
  • beachfront camping on rocky shores 15min from town with excellent access for kayaking, snorkelling & fishing (crabs, clams, octopus)
  • heaps of space & privacy, yet possible to socialise
  • Read more: VANLIFE DIARIES #40: BAHÍA DE LOS ÁNGELES, SAN IGNACIO & MULEGÉ, BAJA MEXICO
  • Facilities: none
  • Cost: FREE!
Bahia de los Angeles Baja California Norte Mexico vanlife
Camping at Bahía de los Ángeles

6 | Campo Archelon

  • beautiful eco-focused, beach-front campground in town with hot showers, excellent WIFI & a delicious onsite café (Siete Filos)
  • upgraded sites with palapas offer more space (additional 40p/p), otherwise expect to be VERY close to your neighbours
  • great community vibes & a perfect spot to meet other travellers headed south through Baja
  • reserve during busy season
  • Facilities: 🌮🚽🚿💻
  • Cost: 120 pesos per person for standard site OR 160 pesos per person for palapa site
Bahia de los Angeles Baja California Norte Mexico vanlife
Sunrise at Bahía de los Ángeles

Guerrero Negro, BCS

7 | Hidden spot in the sand dunes

  • hidden spot behind the sand dunes about 10min from town & 2min off the highway
  • nothing fancy, but safe and comfortable enough for a night
  • Facilities: 📶
  • Cost: FREE!
Bahia de los Angeles Baja California Norte Mexico vanlife
Whale bones in Guerrero Negro

8 | Ojo de Liebre

  • this is one of the best spots on the entire peninsula for whale watching & it’s possible to organise boat tours from the campsite
  • only open during the grey whale season (mid-Jan to early-Apr)
  • Facilities: 🌮🚽📶
  • Cost: 100 pesos for standard site or 200 pesos with palapa
gray whale
Photo by Andre Estevez on Pexels.com

San Ignacio, BN

9 | Don Chon RV Park 

  • this is one of several basic RV parks located on the shores of the lagoon
  • with towering palms and waterfront access, it’s truly an oasis experience
  • Facilities: 🚽
  • Cost: 100 pesos
Camp on the shores of the San Ignacio Lagoon

Mulegé, BCS

10 | Punta Prieta

  • gorgeous boondocking site about 10min from town with excellent 4G reception
  • wildlife sightings from this rocky beach include dolphins, blow fish, sting rays & sea turtles (we kayaked through a pod of about 100 dolphins, and it was one of my all-time favourite experiences!)
  • Facilities: 📶
  • Cost: FREE!
Mulege Baja California Sur vanlife road trip Mexico

11 | Huerta Don Chano RV Park

  • well-appointed campground located in a shady part of town
  • perfect for those who need clean facilities while exploring Mulegé
  • as one of the only established camping options, you’re sure to meet plenty of other Baja vanlifers
  • additional 100p for hook-up
  • Facilities: 🔌🚽🚿🧺📶💻
  • Cost: 200 pesos
Mulege Baja California Sur vanlife road trip Mexico
Misión de Mulege

Bahía Concepción, BCS

12 | Playa Santispac

  • without question, the BEST of Bahía Concepción’s many beautiful beachfront campsites!
  • soft white sand & clear turquoise water, fantastic kayaking/SUPing right from the doors of your van, hotsprings nearby, gorgeous sunrise views
  • reportedly quite busy at certain times of the year (multiple rows of RVs), but we managed to find a beachfront spot more than 150m from our nearest neighbours in January
  • toilets/showers are extremely rough, 2 on-site restaurants provide passable WIFI (no mobile reception)
  • Facilities: 🌮🚽🚿
  • Cost: 200 pesos (we paid 300p for 2 nights)
Bahia Concepcion Baja California Sur Mexico vanlife
Stepping out of the van and onto the beach at Playa Santispac

13| Playa El Coyote

  • another popular beachfront option a few minutes south on the bay with similar water access for kayak/SUP & rough facilities (as with those listed above)
  • fresh seafood sold onsite
  • Facilities: 🌮🚽🚿
  • Cost: 200 pesos
Bahia Concepcion Baja California Sur Mexico vanlife
Camping at Playa Coyote

14 | Playa El Requeson

  • unique for its narrow sand-spit that essentially offers 2 beachfronts & wonderful views
  • very protected water for swimming, snorkelling, kayaking, etc (be mindful of the tide-line when parking)
  • Facilities: 🌮🚽🚿
  • Cost: 200 pesos
Bahia Concepcion Baja California Sur Mexico vanlife
Bahía Concepción

15 | Private rocky beach

  • one of the only water-front boondocking options on the bay
  • located at the southern end of Bahía Concepción on a rocky beach just off the highway among cactus gardens & thousands of seashells
  • completely hidden from view, safe for camping
  • no reception, but wonderful solitude & a few fire rings
  • Facilities: none
  • Cost: FREE!
Bahia Concepcion Baja California Sur Mexico vanlife

Loreto, BCS

16 | Rivera del Mar RV Park

  • situated a few blocks off the beach & easy walking distance to town
  • well-maintained RV park with hot showers, washer/dryer facilities (35p per load) & great WIFI 
  • Facilities: 🔌🚽🚿🧺📶💻
  • Cost: 200 pesos

17 | Romanita RV Park

  • spacious RV park that also offers hot showers, WIFI, washing facilities (but no dryers)
  • a bit closer to the beach and to town than Rivera above
  • organised boat tours to Isla Coronado for $35USD p/p (possible to sign up even as a non-guest)
  • Facilities: 🔌🚽🚿🧺📶💻
  • Cost: 250 pesos
Loreto Baja California Sur Mexico vanlife
Strolling through the streets of Loreto

La Paz, BCS

18 | Playa Tecolote

  • north of La Paz & just beyond Playa Balandra
  • busy beach popular with local families, but entirely free for camping & not terribly busy after day-trippers clear out
  • several restaurants onsite, water taxis available to Balandra, paid toilet facilities (5p)
  • incredible number of sea birds at sunset
  • Facilities: 🌮🚽
  • Cost: FREE!
La Paz Tecolote Balandra Baja California Sur Mexico vanlife
Sunset at Playa Tecolote

19 | El Mogote

  • plentiful boondocking available at this prominent sandbar north of the city
  • in calm & clear conditions, it’s possible to see whale sharks right from the shore
  • very sandy, but accessible in 2WD with caution
  • Read more: SWIMMING WITH WHALE SHARKS & SEA LIONS IN LA PAZ, BCS MEXICO: AN AMAZING TOUR WITH BAJA ADVENTURE CO
  • Facilities: none
  • Cost: FREE!
La Paz whale shark sea lion snorkel tour Baja
Snorkelling with whale sharks in the Bay of La Paz

20 | MAREA Public Parking

  • great option for safe, free, conveniently located street camping in La Paz; let the security guard at MAREA know you’re staying outside in the public area & they will watch your van
  • Facilities: 📶
  • Cost: FREE!

21 | Peace Centre

  • Secure camping area within central La Paz, only a few blocks from the Malecón
  • hot showers, WIFI, friendly staff
  • limited room (only about 8 vans), so be prepared with other options
  • Facilities: 🚽🚿📶💻
  • Cost: 300 pesos
La Paz Baja California Sur Mexico vanlife
La Paz Malecón

La Ventana & Los Barriles, BCS

22 | Hot Springs

  • drive about 10min out of town past El Sargento & follow the somewhat rough (but manageable) dirt road out to the beach to find these free natural hot springs right on the shoreline
  • several options for boondocking at or near the hot springs & these continue for several kilometres down the dirt road to the north
  • hot springs only accessible at low tide; check tide charts here 
  • Facilities: 📶
  • Cost: FREE!
La Ventana Baja California Sur Mexico vanlife

23 | El Sargento Beach

  • beachfront campsite right in the middle of La Ventana, incredibly popular for kitesurfers
  • walking distance to heaps of food & shops
  • cold showers & decent facilities
  • many RVs staying for the season, possible to negotiate lower rate for multiple days 
  • Facilities: 🌮🚽🚿📶
  • Cost: 250 pesos

24 | Ensenada de Muertos

  • less than 30min from La Ventana, this hidden gem on the coast has some of the best snorkelling in all of Baja 
  • free to camp in the Restaurant 1535 parking lot directly in front of the water
  • decent WIFI, access to facilities only during business hours  if you purchase a drink or meal
  • Read more: VANLIFE DIARIES #42: LA VENTANA, ENSENADA DE MUERTOS & CABO PULMO NATIONAL PARK, BAJA MEXICO
  • Facilities: 🌮💻
  • Cost: FREE!
Ensenada de Muertos Baja California Sur Mexico vanlife

25 | Los Barriles Rec Centre

  • free overnight parking at the Recreation Centre in Los Barriles
  • no access to facilities after-hours, but safe & quiet for a few nights
  • Facilities: 📶
  • Cost: FREE!

Cabo Pulmo National Park, BCS

26 | Abandoned RV Park

  • our favourite free camping in the national park!
  • right as you’re driving into town, there’s a small rocky beach next to what was once a beachfront RV park, just south of Punta Cabo Pulmo
  • excellent water access for kayaking & snorkelling, prime whale watching (we saw about 50 whales from our campsite)
  • decent 3G service & only a few minutes to walk into town
  • Read more: A COMPLETE GUIDE TO VISITING CABO PULMO NATIONAL PARK IN BAJA CALIFORNIA SUR, MEXICO
  • Facilities: 📶
  • Cost: FREE!
Cabo Pulmo National Park Baja California Sur Mexico vanlife

27 | El Arbolito

  • this paid beach provides access to some of the park’s best snorkelling (50p per person for day access)
  • also offers overnight camping in what is essentially just a sandy parking lot
  • Facilities: 🌮🚽🚿📶
  • Cost: 150 pesos per person
Cabo Pulmo National Park Baja California Sur Mexico vanlife
Snorkelling with sea turtles at Los Arbolitos

28 | Los Frailes

  • sandy beach just beyond town, incredibly popular with long-term travellers & snow birds (many of whom park their RVs here for 5 months of the year, enjoying weekly food delivery, trash pick-up & water access from a nearby well)
  • plenty of space available either on the beachfront or across the road in the arroyo
  • beach is accessible to 2WD, but air down your tires & walk the road to scope out the safest route through the sand
  • great snorkelling around the rocky north end of the beach & a beautiful stretch of pristine sand on the opposite side
  • Facilities: 💦 🌮
  • Cost: FREE!
Cabo Pulmo National Park Baja California Sur Mexico vanlife
Camping on the sandy beach at Los Frailes

East Cape, BCS

29 | Playa La Fortuna

  • possible to park on or just in front of this sandy beach on the East Cape
  • no facilities or mobile reception, but there is an upscale sushi restaurant just above the beach where you can find food, toilets & WIFI
  • heaps of humpback whales offshore, plus good beginner surfing
  • Facilities:
  • Cost: FREE!

30 | Playa El Cardón

  • another excellent beach off Camino Cabo Este just north of Shipwrecks where you can camp on the sand
  • no facilities but spectacular views, particularly of whales
  • Facilities:
  • Cost: FREE!
East Cape Los Cabos beach Baja Mexico
Camping on Baja’s East Cape

Los Cabos (San José del Cabo & Cabo San Lucas)

31 | Desert Park Nature Reserve

  • sandy beach outside of San José del Cabo, sandwiched between 2 upscale resorts
  • very comfortable overnight parking just a few steps off the beach
  • Facilities: 📶
  • Cost: FREE!

32 | Street parking in the Art District

  • a few options for free street parking in the Art District of San José
  • can be very loud during the Art Walk or on weekends/holidays, but safe & secure for sleeping
  • Facilities: 🌮📶
  • Cost: FREE!
San Jose del Cabo Baja Mexico
Street parking in San Jose del Cabo

33 | Playa Palmilla

  • beautiful free beach between San José del Cabo and Cabo San Lucas
  • busy with locals & tourists in the afternoon, but possible to stay in the parking lot overnight
  • Facilities: 🚽🚿📶
  • Cost: FREE!

Todos Santos, BCS

34 | La Pastora

  • fantastic (& very popular) boondocking site a few minutes out of Todos Santos
  • frequent humpback whale sightings right off shore during the winter
  • decent mobile reception, perfect place to post up for a week or several
  • Read more: VANLIFE DIARIES #44: TODOS SANTOS & TAKING THE FERRY FROM BAJA TO MAZATLÁN, SINALOA IN MAINLAND MEXICO
  • Facilities: 📶
  • Cost: FREE!
Todos Santos Baja Mexico beach vanlife
Blood orange sunsets at La Pastora

35 | Secreto de las Rocas

  • beautiful beach & rocky coastline between Cabo San Lucas & Todos Santos, available for boondocking
  • just off the highway, but quiet after dark (very popular spot for watching the sunset)
  • Facilities: 📶
  • Cost: FREE!

You are legally required to have Mexican auto insurance before driving across the border, after extensive research, I choose an affordable policy with Baja Bound (which worked in Baja & mainland Mexico). Spoiler: we had an ACCIDENT in Mexico a few months later and the agents at Baja Bound handled the entire process for us, from speaking to the police, getting insurance information from the other driver, and we didn’t pay a single PESO out of pocket— I truly can’t recommend this company highly enough!

Read more about Baja, Mexico

start here -> The ultimate road-tripper’s guide to Baja, Mexico

How to get the best Mexican auto insurance for a converted van or camper

Vanlife Baja & Mexico: A guide to crossing the border + all required permits (FMM & TIP)

The ultimate Baja camping guide (+ 35 of the best vanlife & RV campsites!)

Baja vanlife road trip itinerary for 1-3 months (+ driving directions & camping in 2023)

Ferry from Baja to mainland Mexico (La Paz to Mazatlán)

TAGS:travel guidesvanlifevanlife guidesvanlife mexico
14 Comments
Share
brooke beyond

Hey, I'm Brooke and I'm obsessed with getting off the beaten path, exploring backcountry gems & travelling beyond the ordinary! I left Australia 5 years ago after finishing a PhD in Biomechanics & have been travelling the world full-time ever since (joined by my life/climbing partner, James). Whether it’s road-tripping through Mexico, climbing alpine peaks in the Andes, scuba diving in the Red Sea, or tackling epic via ferrata in the Dolomites, I hope this blog will inspire your future adventures & help you find wonder in every corner of the globe. xx bb

Leave a Comment Cancel Comment

The Comments

  • Miguel
    28 January 2024

    La Pastora (Todos Santos) has not allowed overnight camping since last winter. It is now day use only. The police will show up if called by locals.

    Reply
    • brooke brisbine
      Miguel
      22 February 2024

      Hi Miguel, thanks so much for the update, that is helpful information!

      Reply
  • Stanford
    20 November 2023

    Hi Brooke,

    Thank you for the info. I’ll be traveling down the Baja in December with my dog. Any info on pets being accepted at camp sites and shaded parking options as we will be staying in my Jeep/tent.

    Stanford & Floyd.

    Reply
    • brooke brisbine
      Stanford
      24 November 2023

      Hi Stanford & Floyd!

      Based on the number of dogs I saw in Baja, I wouldn’t imagine you’d have any issue at all! Shaded options will be a little trickier… it might be worth investing in an awning or rigging up a DIY, which is what we did. Limited usefulness in wind, but great to provide shade on beachfront camping that otherwise would have just been all-day intense UV.

      Hope that helps a little bit & wishing you an amazing trip, Baja is the absolute best!!

      xx bb

      Reply
  • Kat Maggrah
    19 August 2023

    Hi Brooke – thanks for this page. It will be very helpful on my upcoming trip. I’ll be travelling as a solo female. Any thoughts on safety other than the obvious of not going anywhere after dark?
    How about border crossings and the double vehicle insurance?
    Thanks again

    Reply
    • brooke brisbine
      Kat Maggrah
      16 November 2023

      Hi Kat, hope you’re enjoying a beautiful (& safe!) trip through Baja! It’s a relatively tame place to travel and basic common sense will get you far– not driving at night or camping in sketchy spots are the big ones. The border crossing is very easy, the checkpoints along the way will be more stressful, but again, not anything you can’t handle!

      Happy travels 🙂
      xx bb

      Reply
  • DA
    6 April 2023

    Thanks indeed for all the info.
    All in costs, including van running costs, how much would you say you are spending per day – assuming you also spend some money on the tourist attractions too.

    Thanks in advance.

    Reply
    • brooke brisbine
      DA
      16 November 2023

      Hi DA, great question! I have a super detailed breakdown of vanlife costs so I can tell you with precision that I spent an average of $64/day for literally everything in Baja– fuel, food, activities, camping fees, CAR INSURANCE, laundry, SIM cards…

      Hope that helps 🙂
      xx bb

      Reply
  • Ian
    17 February 2023

    Hi Brooke,
    Nice Blog and pictures 📸.
    I’ve been Fulltime for a little over 6 years. My first year I started In Key West Florida and drove West going to Every national park and monument West of the Mississippi. I drove the Entire West coast from the Canadian border down to Cabo and back to Florida, 26,000 miles. They add up quickly. Now on my 6th year I have 168k time to slow down a bit. I usually spend my winters in South Florida or Southern Baja.
    Thanks again for your blog. Looking forward to reading and seeing more.

    Reply
    • brooke brisbine
      Ian
      16 November 2023

      Wow, Ian, that sounds like such an incredible adventure! Are you in a van or truck camper or??

      Winter in Baja is the ultimate, in my mind!

      Happy travels 🙂
      xx bb

      Reply
  • Zak and Fal
    5 February 2023

    This is such a great blog! Thank you so much for such informative tips… We’ve been using a ton of these while planning our own trip to Baja!! 🙂

    – Zak and Fal

    Reply
    • brooke brisbine
      Zak and Fal
      27 September 2023

      Thanks for reading, Zak & Fal, I’m so glad to hear you found this post helpful in planning your trip to Baja!!

      It is truly amazing. Hope you had an incredible time 🙂

      xx bb

      Reply
  • Anonymous
    6 November 2022

    Thank you for all the helpful information. As we are planning to travel to the Baja in January 2023, I was looking to somewhere to find tips that would make the trip less stressful and more enjoyable. So glad I found your site.

    Reply
    • brooke brisbine
      Anonymous
      16 November 2023

      Well, thank you so much for reading and I’m super glad it helped you!

      Hope you had a fantastic trip 🙂
      xx bb

      Reply

You May Also Like

30 January 2015

San Telmo: Paris on Steroids

2 May 2020

11 amazing things to do in San Gil: a guide to Colombia’s adventure capital

4 May 2020

How to get from San Gil to Medellín (bus or flight): Colombia transport guide

hi, I’m brooke!

I'm obsessed with getting off the beaten path, exploring backcountry gems & travelling beyond the ordinary! I left Australia 5 years ago after finishing a PhD in Biomechanics & have been travelling the world full-time ever since (now joined by my life/climbing partner, James). I hope this blog will inspire your future adventures & help you find wonder in every corner of the globe. xx bb

read my story
currently exploring

currently exploring

mexico

read our gear guides

🥾 hiking boots

🎒 hiking backpacks

🌨️ cold-weather layers

⛺️ backpacking & alpine tents

🛌 sleeping bag & pads

🍪 backcountry food

📸 travel camera gear

✈️ travel clothing

trail guides

summit guides

itineraries

outdoor gear

GPS maps

recent posts

  • Climbing Iztaccíhuatl volcano

    2-week Mexico volcanoes itinerary: climbing Pico de Orizaba, Izta, Malinche & Toluca

    3 June 2025
  • Mexico City: the perfect 5-day itinerary for CDMX

    31 May 2025
  • Climbing Iztaccíhuatl volcano

    Driving in Mexico: essential road trip guide for foreigners

    28 May 2025
  • 10-day Rwanda road trip itinerary: gorillas, volcanoes & Lake Kivu

    25 May 2025
  • 2-week Patagonia itinerary: best of Torres del Paine & Los Glaciares/El Chaltén

    22 May 2025

@brookebeyond_
brooke ✨travel & mountain gal

@brookebeyond_

  • We took our own engagement photos in the Swiss Alps this summer and here’s how it went 👉🏼

(#8 might just be my personal fave 😂)

ALSO this post is for anyone who’s gotten the (woefully mistaken) impression that I am “naturally photogenic”
  • absolutely one of the most amazing little hikes we did in Switzerlnad this summer (& the competition was stiff) 🤩🏔️🌞🌸

📍Saxer Lücke

GETTING THERE: catch the Frümsen gondola to Staubernkanzel

HIKE: 1hr (2.5km, 250m gain) to this amazing viewpoint

WHEN TO GO: the best lighting is in the afternoon, these photos were taken around 4pm and it just kept getting better!
.
.
.
.
.
#swissalps #switzerland #saxerlücke #swisssummer #alpstein
  • the BEST easy hike in Zermatt 🏔️🥾✨

For spectacular views of the Matterhorn, the enormous Monte Rosa massif, and the Gorner Glacier (as well as 29 peaks over 4,000m!), there’s no better EASY hike than Riffelberg to Gornergrat, accessible via the Gornergrat Railway in Zermatt. 

The hike only takes about 2hrs at a leisurely pace (I did it 7 weeks after knee surgery!), so it’s suitable for families and non-hikers with even a basic level of fitness 🏃🏻‍♀️

🇨🇭 START FROM ZERMATT
- purchase tickets (day-of is fine) from Gornergrat Railway, right across from Zermatt train station

🚞 GORNERGRAT RAILWAY
- tickets from Zermatt to Riffelberg cost 42CHF ($50USD)— there’s no discount for return, so keep it flexible by purchasing one-way
- the train takes the about 25min, sit on the right side for best views!
- when you finish the hike at Gornergrat, buy a one-way ticket back to Zermatt for 66CHF ($80USD)
- save 50% on tickets with the Swiss Half Fare Card— the pass costs 120CHF ($150USD) and lasts for a whole month, it’s almost always worth it!) 

🥾 HIKE DETAILS: RIFFELSEE TO GORNERGRAT
- the route is 5km with 560m elevation gain (entirely uphill)
- the best views of the Matterhorn are around Riffelsee, where several small lakes offer perfect reflections
- near Rotenboden (the train station in between Riffelberg & Gornergrat), there are excellent rocky viewpoints of both Matterhorn and Monta Rosa— it’s easy to find quiet views if you hike around a bit!
- as you get closer to Gornergrat, Monte Rosa and the Gorner Glacier are right in your face
- almost everyone does this hike in reverse (Gornergrat to Riffelberg), I just personally hate hiking downhill— but you can swap if you’d rather descend the entire way!
  • 2 months after knee surgery and barely a week after I stopped walking with a knee brace and cane, I was honestly so proud to be able to do this (objectively very easy) 5km hike with 250m gain— it may not seem like much, but for me, this was a HUGE step forward 🥹

📍 Saxer Lücke, Switzerland 

it’s been an extremely challenging recovery, both physically and mentally… but the milestone moments always fill me with hope that things are indeed getting better ❤️‍🩹

special shoutout to my fiancé/hiking partner/personal cheering squad @slatojc for slowing down with me on the trail and always offering a hand down slippery rocks before I even have to ask
  • it’s another “if it wasn’t so stupid beautiful, I’d never set foot in this country again because it’s bleeding me dry” kinda summer 🇨🇭🌸☀️🏔️🦋✨

(hands up if you feel personally victimised by Swiss prices but you can’t stay away because MOUNTAINS 😭😭)
  • magical summer sunsets in Switzerland ✨
.
.
.
.
#swissalps #stoosridge #swisssummer #sunset
  • BEST EASY HIKES IN SWITZERLAND 🇨🇭❤️‍🩹

just 2 months after knee surgery, I found myself travelling through Switzerland— in search of easy hikes that were actually accessible post-op 🩼 

luckily, there’s hardly a better place in the world for easy hiking than the Swiss Alps!!

so whether you’re recovering from an injury, hiking with older parents/young children, or just a non-hiker who loves an epic view, this short list of HIGH VALUE viewpoints & hikes offer the most spectacular mountain scenery with minimal challenge

💸 BUDGET TIP: buy the Swiss Half Fare Card to save 50% all these gondolas and trains, which can seriously add up!!

- Stoos Ridge: take the Stoosbahn to the little village of Stoos + walk about 15min to the chairlift that can take you all the way up to Fronalpstock— you can walk as little or as much as you want up here, the views are amazing right away
- Riffelsee: take the Gornergrat Railway from Zermatt to Riffelsee + hike 20min to the 2 beautiful alpine lakes (then either hike 1hr up to Gornergrat or catch the train)
- Saxer Lücke: catch a gondola + hike 1hr (2.5km, 250m gain) to this amazing viewpoint— hardest on this list and not suitable for those with extremely limited mobility 
- Kleine Scheidegg: take the train or the gondola from Grindelwald + hike about 20min uphill to the lake
- Jungfraujoch: from Kleine Scheidegg, take the gondola to Jungfraujoch + walk around the viewing platforms
- Trockener Steg: take the gondola from Zermatt + walk 10min from the top of the cable car to the lake for incredible Matterhorn views
- Oeschinensee: 20min walk from the top of the Kandersteg cable car to the lake (bus also available), then you can walk as little or as much as you want around the lake or on the famous Panorama Trail
.
.
.
.
.
#easyhikes #swissalps #matterhorn #jungfraujoch #oeschinensee #stoos #switzerland
  • This is my 2nd summer back in Zermatt to climb the Matterhorn— and my 2nd summer NOT climbing the Matterhorn 😑

In 2023, a wicked snow storm blew through the night before my planned ascent and grounded all climbing parties… and then I had knee surgery less than 2 months before our repeat trip to Zermatt this year. I won’t lie, it’s been extremely disappointing to spend nearly 2 weeks in one of the most expensive places in the world, and STILL not do the thing I came here to do 😅

But alas, here we are in Zermatt again! (and apparently not for the last time)

Even though we are slowly going bankrupt, it’s a gorgeous place to be in the summer with no shortage of amazing trails!

Can’t wait to share some of what we’ve been up to— my first little hikes since surgery 🤩
  • we’ve spent the last several weeks in Switzerland and, in many ways, I couldn’t have chosen a better destination for post-knee-surgery recovery— where else in the world can you get views like THIS with 1hr of easy hiking?!

I’m not sure I’ll ever truly prefer the accessibility of the Alps to true backcountry… but there’s no denying that I couldn’t be outside any other way right now and it’s given me a whole new appreciation for the hundreds of gondolas, funiculars, and trains that connect non-hikers or mobility-impaired enthusiasts like myself to otherwise unreachable heights!

I’m enormously grateful for the opportunity to rehab my knee under legendary peaks rather than fluorescent indoor lights, so THANK YOU Switzerland 😍
follow @brookebeyond_

travel beyond the ordinary

Explore my travel guides, custom itineraries & blog posts with an interactive world map ✨

all destinations

  • We took our own engagement photos in the Swiss Alps this summer and here’s how it went 👉🏼

(#8 might just be my personal fave 😂)

ALSO this post is for anyone who’s gotten the (woefully mistaken) impression that I am “naturally photogenic”
  • absolutely one of the most amazing little hikes we did in Switzerlnad this summer (& the competition was stiff) 🤩🏔️🌞🌸

📍Saxer Lücke

GETTING THERE: catch the Frümsen gondola to Staubernkanzel

HIKE: 1hr (2.5km, 250m gain) to this amazing viewpoint

WHEN TO GO: the best lighting is in the afternoon, these photos were taken around 4pm and it just kept getting better!
.
.
.
.
.
#swissalps #switzerland #saxerlücke #swisssummer #alpstein
  • the BEST easy hike in Zermatt 🏔️🥾✨

For spectacular views of the Matterhorn, the enormous Monte Rosa massif, and the Gorner Glacier (as well as 29 peaks over 4,000m!), there’s no better EASY hike than Riffelberg to Gornergrat, accessible via the Gornergrat Railway in Zermatt. 

The hike only takes about 2hrs at a leisurely pace (I did it 7 weeks after knee surgery!), so it’s suitable for families and non-hikers with even a basic level of fitness 🏃🏻‍♀️

🇨🇭 START FROM ZERMATT
- purchase tickets (day-of is fine) from Gornergrat Railway, right across from Zermatt train station

🚞 GORNERGRAT RAILWAY
- tickets from Zermatt to Riffelberg cost 42CHF ($50USD)— there’s no discount for return, so keep it flexible by purchasing one-way
- the train takes the about 25min, sit on the right side for best views!
- when you finish the hike at Gornergrat, buy a one-way ticket back to Zermatt for 66CHF ($80USD)
- save 50% on tickets with the Swiss Half Fare Card— the pass costs 120CHF ($150USD) and lasts for a whole month, it’s almost always worth it!) 

🥾 HIKE DETAILS: RIFFELSEE TO GORNERGRAT
- the route is 5km with 560m elevation gain (entirely uphill)
- the best views of the Matterhorn are around Riffelsee, where several small lakes offer perfect reflections
- near Rotenboden (the train station in between Riffelberg & Gornergrat), there are excellent rocky viewpoints of both Matterhorn and Monta Rosa— it’s easy to find quiet views if you hike around a bit!
- as you get closer to Gornergrat, Monte Rosa and the Gorner Glacier are right in your face
- almost everyone does this hike in reverse (Gornergrat to Riffelberg), I just personally hate hiking downhill— but you can swap if you’d rather descend the entire way!
  • 2 months after knee surgery and barely a week after I stopped walking with a knee brace and cane, I was honestly so proud to be able to do this (objectively very easy) 5km hike with 250m gain— it may not seem like much, but for me, this was a HUGE step forward 🥹

📍 Saxer Lücke, Switzerland 

it’s been an extremely challenging recovery, both physically and mentally… but the milestone moments always fill me with hope that things are indeed getting better ❤️‍🩹

special shoutout to my fiancé/hiking partner/personal cheering squad @slatojc for slowing down with me on the trail and always offering a hand down slippery rocks before I even have to ask
  • it’s another “if it wasn’t so stupid beautiful, I’d never set foot in this country again because it’s bleeding me dry” kinda summer 🇨🇭🌸☀️🏔️🦋✨

(hands up if you feel personally victimised by Swiss prices but you can’t stay away because MOUNTAINS 😭😭)
We took our own engagement photos in the Swiss Alps this summer and here’s how it went 👉🏼

(#8 might just be my personal fave 😂)

ALSO this post is for anyone who’s gotten the (woefully mistaken) impression that I am “naturally photogenic”
We took our own engagement photos in the Swiss Alps this summer and here’s how it went 👉🏼

(#8 might just be my personal fave 😂)

ALSO this post is for anyone who’s gotten the (woefully mistaken) impression that I am “naturally photogenic”
We took our own engagement photos in the Swiss Alps this summer and here’s how it went 👉🏼

(#8 might just be my personal fave 😂)

ALSO this post is for anyone who’s gotten the (woefully mistaken) impression that I am “naturally photogenic”
We took our own engagement photos in the Swiss Alps this summer and here’s how it went 👉🏼

(#8 might just be my personal fave 😂)

ALSO this post is for anyone who’s gotten the (woefully mistaken) impression that I am “naturally photogenic”
We took our own engagement photos in the Swiss Alps this summer and here’s how it went 👉🏼

(#8 might just be my personal fave 😂)

ALSO this post is for anyone who’s gotten the (woefully mistaken) impression that I am “naturally photogenic”
We took our own engagement photos in the Swiss Alps this summer and here’s how it went 👉🏼

(#8 might just be my personal fave 😂)

ALSO this post is for anyone who’s gotten the (woefully mistaken) impression that I am “naturally photogenic”
We took our own engagement photos in the Swiss Alps this summer and here’s how it went 👉🏼

(#8 might just be my personal fave 😂)

ALSO this post is for anyone who’s gotten the (woefully mistaken) impression that I am “naturally photogenic”
We took our own engagement photos in the Swiss Alps this summer and here’s how it went 👉🏼

(#8 might just be my personal fave 😂)

ALSO this post is for anyone who’s gotten the (woefully mistaken) impression that I am “naturally photogenic”
We took our own engagement photos in the Swiss Alps this summer and here’s how it went 👉🏼

(#8 might just be my personal fave 😂)

ALSO this post is for anyone who’s gotten the (woefully mistaken) impression that I am “naturally photogenic”
We took our own engagement photos in the Swiss Alps this summer and here’s how it went 👉🏼

(#8 might just be my personal fave 😂)

ALSO this post is for anyone who’s gotten the (woefully mistaken) impression that I am “naturally photogenic”
@brookebeyond_
@brookebeyond_
•
Follow
We took our own engagement photos in the Swiss Alps this summer and here’s how it went 👉🏼 (#8 might just be my personal fave 😂) ALSO this post is for anyone who’s gotten the (woefully mistaken) impression that I am “naturally photogenic”
2 days ago
View on Instagram |
1/5
@brookebeyond_
@brookebeyond_
•
Follow
absolutely one of the most amazing little hikes we did in Switzerlnad this summer (& the competition was stiff) 🤩🏔️🌞🌸 📍Saxer Lücke GETTING THERE: catch the Frümsen gondola to Staubernkanzel HIKE: 1hr (2.5km, 250m gain) to this amazing viewpoint WHEN TO GO: the best lighting is in the afternoon, these photos were taken around 4pm and it just kept getting better! . . . . . #swissalps #switzerland #saxerlücke #swisssummer #alpstein
3 days ago
View on Instagram |
2/5
the BEST easy hike in Zermatt 🏔️🥾✨

For spectacular views of the Matterhorn, the enormous Monte Rosa massif, and the Gorner Glacier (as well as 29 peaks over 4,000m!), there’s no better EASY hike than Riffelberg to Gornergrat, accessible via the Gornergrat Railway in Zermatt. 

The hike only takes about 2hrs at a leisurely pace (I did it 7 weeks after knee surgery!), so it’s suitable for families and non-hikers with even a basic level of fitness 🏃🏻‍♀️

🇨🇭 START FROM ZERMATT
- purchase tickets (day-of is fine) from Gornergrat Railway, right across from Zermatt train station

🚞 GORNERGRAT RAILWAY
- tickets from Zermatt to Riffelberg cost 42CHF ($50USD)— there’s no discount for return, so keep it flexible by purchasing one-way
- the train takes the about 25min, sit on the right side for best views!
- when you finish the hike at Gornergrat, buy a one-way ticket back to Zermatt for 66CHF ($80USD)
- save 50% on tickets with the Swiss Half Fare Card— the pass costs 120CHF ($150USD) and lasts for a whole month, it’s almost always worth it!) 

🥾 HIKE DETAILS: RIFFELSEE TO GORNERGRAT
- the route is 5km with 560m elevation gain (entirely uphill)
- the best views of the Matterhorn are around Riffelsee, where several small lakes offer perfect reflections
- near Rotenboden (the train station in between Riffelberg & Gornergrat), there are excellent rocky viewpoints of both Matterhorn and Monta Rosa— it’s easy to find quiet views if you hike around a bit!
- as you get closer to Gornergrat, Monte Rosa and the Gorner Glacier are right in your face
- almost everyone does this hike in reverse (Gornergrat to Riffelberg), I just personally hate hiking downhill— but you can swap if you’d rather descend the entire way!
@brookebeyond_
@brookebeyond_
•
Follow
the BEST easy hike in Zermatt 🏔️🥾✨ For spectacular views of the Matterhorn, the enormous Monte Rosa massif, and the Gorner Glacier (as well as 29 peaks over 4,000m!), there’s no better EASY hike than Riffelberg to Gornergrat, accessible via the Gornergrat Railway in Zermatt. The hike only takes about 2hrs at a leisurely pace (I did it 7 weeks after knee surgery!), so it’s suitable for families and non-hikers with even a basic level of fitness 🏃🏻‍♀️ 🇨🇭 START FROM ZERMATT - purchase tickets (day-of is fine) from Gornergrat Railway, right across from Zermatt train station 🚞 GORNERGRAT RAILWAY - tickets from Zermatt to Riffelberg cost 42CHF ($50USD)— there’s no discount for return, so keep it flexible by purchasing one-way - the train takes the about 25min, sit on the right side for best views! - when you finish the hike at Gornergrat, buy a one-way ticket back to Zermatt for 66CHF ($80USD) - save 50% on tickets with the Swiss Half Fare Card— the pass costs 120CHF ($150USD) and lasts for a whole month, it’s almost always worth it!) 🥾 HIKE DETAILS: RIFFELSEE TO GORNERGRAT - the route is 5km with 560m elevation gain (entirely uphill) - the best views of the Matterhorn are around Riffelsee, where several small lakes offer perfect reflections - near Rotenboden (the train station in between Riffelberg & Gornergrat), there are excellent rocky viewpoints of both Matterhorn and Monta Rosa— it’s easy to find quiet views if you hike around a bit! - as you get closer to Gornergrat, Monte Rosa and the Gorner Glacier are right in your face - almost everyone does this hike in reverse (Gornergrat to Riffelberg), I just personally hate hiking downhill— but you can swap if you’d rather descend the entire way!
1 week ago
View on Instagram |
3/5
2 months after knee surgery and barely a week after I stopped walking with a knee brace and cane, I was honestly so proud to be able to do this (objectively very easy) 5km hike with 250m gain— it may not seem like much, but for me, this was a HUGE step forward 🥹

📍 Saxer Lücke, Switzerland 

it’s been an extremely challenging recovery, both physically and mentally… but the milestone moments always fill me with hope that things are indeed getting better ❤️‍🩹

special shoutout to my fiancé/hiking partner/personal cheering squad @slatojc for slowing down with me on the trail and always offering a hand down slippery rocks before I even have to ask
@brookebeyond_
@brookebeyond_
•
Follow
2 months after knee surgery and barely a week after I stopped walking with a knee brace and cane, I was honestly so proud to be able to do this (objectively very easy) 5km hike with 250m gain— it may not seem like much, but for me, this was a HUGE step forward 🥹 📍 Saxer Lücke, Switzerland it’s been an extremely challenging recovery, both physically and mentally… but the milestone moments always fill me with hope that things are indeed getting better ❤️‍🩹 special shoutout to my fiancé/hiking partner/personal cheering squad @slatojc for slowing down with me on the trail and always offering a hand down slippery rocks before I even have to ask
3 weeks ago
View on Instagram |
4/5
@brookebeyond_
@brookebeyond_
•
Follow
it’s another “if it wasn’t so stupid beautiful, I’d never set foot in this country again because it’s bleeding me dry” kinda summer 🇨🇭🌸☀️🏔️🦋✨ (hands up if you feel personally victimised by Swiss prices but you can’t stay away because MOUNTAINS 😭😭)
3 weeks ago
View on Instagram |
5/5

  • start here
  • about
  • group trips
  • destinations
  • hiking guides
  • outdoor gear
  • custom GPS maps
  • privacy
  • contact

COPYRIGHT © 2025 BROOKE BEYOND. TRAVEL BEYOND THE ORDINARY. Site Powered by Pix & Hue.


Loading Comments...