
Absolutely everything you need to know about a land-based trip to the Galápagos (without a cruise)
Last Updated on 9 July 2026
Inspiration for a young Charles Darwin’s Theory of Natural Selection, the Galápagos Islands are home to the greatest number of unique land and marine species in the entire world, all descended from animals on the mainland and adapted over time to thrive on these volcanic islands off the coast of Ecuador. For snorkellers, scuba divers, twitchers, and general wildlife enthusiasts, there is truly no better place to get up close and personal with all variety of birds, sharks, rays, turtles, tortoises, fish, and iguanas. And despite its popularity among travellers, the Galápagos still remains rugged and unspoilt, a pristine environment closely protected from pollution and over-commericalisation and even large crowds.
Without a doubt, visiting the Galápagos is an awe-inspiring, bucket-list experience, but one that often has the reputation of being incredibly expensive and therefore unattainable for many travellers. In reality, it’s totally possible to experience the best of the Galápagos on a modest budget by constructing your own land-based itinerary. This guide contains absolutely everything you need to know in order to plan a DIY budget trip to the Galápagos Islands, including when to visit, how to get there, how to travel between islands, where to base yourself, how to book tours, what things cost, and more!
Planning your trip to the Galápagos
About the Galápagos
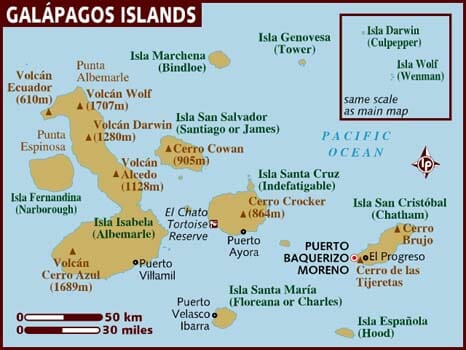
The Galápagos Islands are a group of 13 major, 6 minor, and countless smaller volcanic islands about 1,000km off the coast of Ecuador in the Pacific Ocean, the oldest of which formed nearly 4 million years ago. As well as being the first ever UNESCO World Heritage Site, about 98% of the Galápagos Archipelago is a protected national park; this is one of the most biodiverse places on the planet, with each island sustaining a variety of unique flora and fauna, so the opportunities to explore are truly endless.
Of the 13 major islands, only 4 welcome overnight visitors, so this guide will focus primarily on these islands, in addition to recommending some uninhabited islands that can be visited on a day tour with a naturist guide. Read on to discover why a land-based itinerary is the best choice!
Cruise vs DIY trip
The Galápagos have long-since been a popular cruise destination for honeymooners or serious scuba divers, and dozens of ships offer sailings ranging from 4-10 days out to multiple islands, many of which are only accessible with a tour. You can find some pretty incredible packages that include all your food and activities, but expect to pay thousands of dollars for the experience.
As much as I would have absolutely loved to explore the Galápagos from a boat, it’s cost-prohibitive for a budget backpacker— but thankfully it’s not the only way to travel in the Galápagos!
Land-based Galápagos trips have really gained popularity in recent years as more and more travellers look to avoid the $5,000 cruise price tag and build their own DIY island-hopping itinerary. Essentially, this involves staying in a hotel on one or more of the islands and spending your days exploring either on your own or by organising day tours out to popular islands nearby. The good news is that you can see HEAPS this way, you’ll be more flexible and independent, and you can do it all for $1-2,000 for 8 days, depending on how many tours you want to join.
Weather
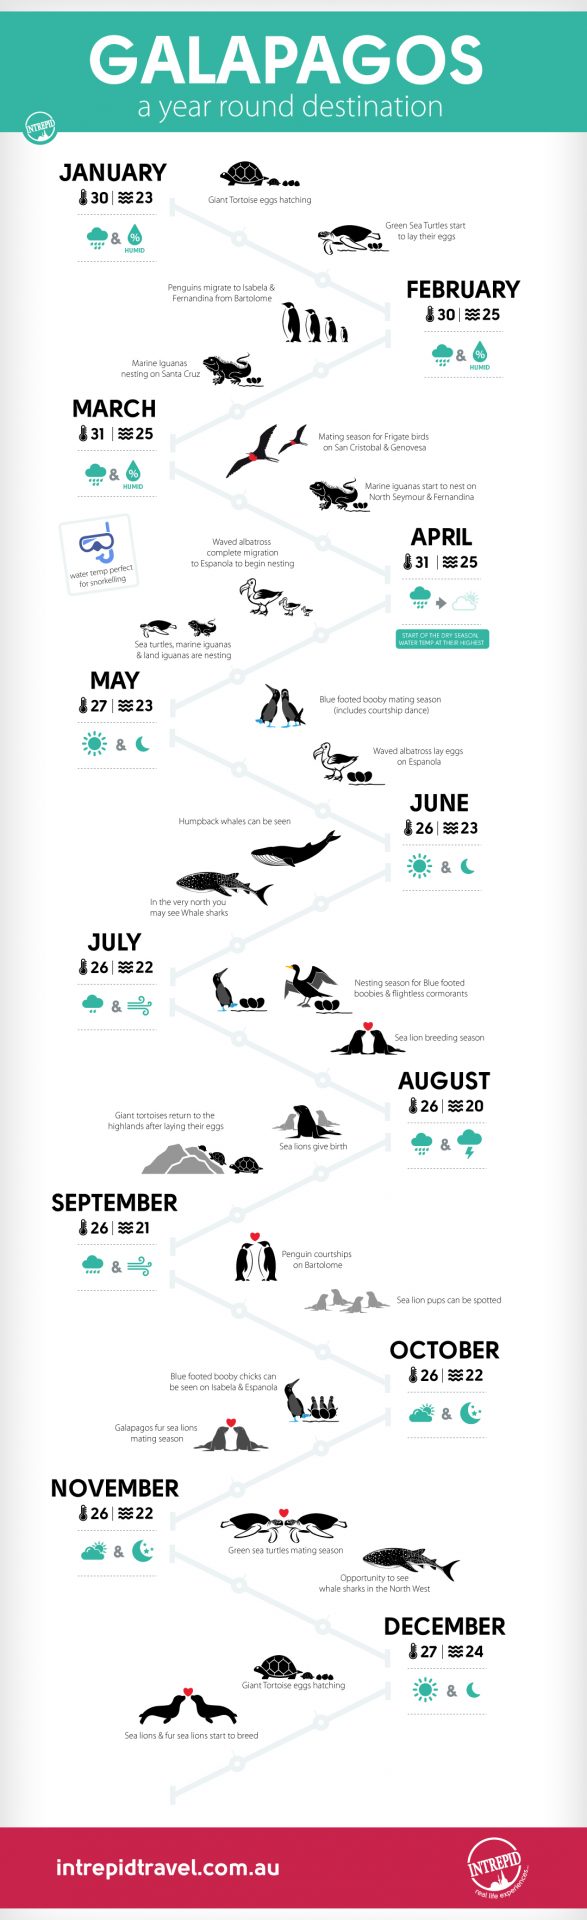
The Galápagos experience two seasons: a wet, warmer season from December to June and a dry, colder season from July to November.
Both water temps and underwater visibility can be better in the wet season, and although the rain is more consistent, it tends to only be in the afternoon and can easily be worked around. Plus, it rains even during the dry season!
On the other hand, a good wet suit and a clever selection of snorkelling/diving sites can easily mitigate dry season concerns about water temperature and visibility. I had a wonderful time in my 7mm wetsuit in September, and didn’t have to contend with many afternoon showers at all. Also note that the “cold” season doesn’t actually mean it will be cold on the islands— the air temperature doesn’t fluctuate more than a few degrees throughout the year, hovering comfortably between 20-30C most of the time. Basically, weather probably won’t be the factor that dictates when you visit.
When to visit
Despite varied weather throughout the year, the Galápagos are definitely a year-round destination, with different months offering better opportunities for spotting certain animals, but every month boasting plenty of wildlife. If there’s something special bringing you to the Galápagos, like diving with whale sharks or giant manta rays, then you will need to plan around their migratory or breeding patterns, but if you’re just coming to see heaps of anything and everything, then you really can’t go wrong.
High season in the Galápagos is from November to March and June to August, so visiting outside these times, especially around September and October, will ensure fewer crowds, better tour availability, and even lower prices on accommodation. Flight prices can also drop during these off-peak times, and considering this is the biggest expense in a land-based Galápagos trip, it may well be the deciding factor for when you go.
Getting to & from the Galápagos
From mainland Ecuador to the Galápagos
Choosing an airport
Every visitor to the Galápagos will travel through mainland Ecuador, either flying from Quito or Guayaquil out to the islands on a ~2hr flight. LATAM, TAME, and Avianca all operate daily flights from the mainland to Baltra (GPS), which is the main airport for the islands located near Santa Cruz and the route I’d recommend for most people. Note that this airport is also called Seymour, so just be sure the airport code is GPS.
There is also a small airport on San Cristóbal (SCY) and this can be a good option for those planning time on the island, but if you’re just visiting Santa Cruz, Isabela, or Floreana, Baltra (GPS) makes far more sense and is typically cheaper.
Buying flights
Ecuadorian residents are eligible for cheaper airfare to the Galápagos, but I’ve heard of a few instances of third-party booking sites mistakenly selling these cheaper fares to foreigners, who then have to pay the difference (usually $150USD) upon arrival at the airport.
To avoid surprises like this, it’s best to buy your airfare directly through the airline (LATAM, TAME, and Avianca) or find a third-party booking site that specifically asks about your residency.
Departing the mainland
Flying from Quito or Guayaquil, you will need to arrive at the airport with enough time to perform a few extra security measures before your journey to the islands (2hrs before your flight should be enough).
In the Departures hall, you’ll see a signed area near the check-in counters for those travelling to the Galápagos— you need to purchase a Transit Control Card for $20 (which you should keep with your passport for the return journey) and put your bags through an additional biosecurity screening (they are mostly concerned about foreign dirt, like on hiking boots, or fruits and nuts).
The process was incredibly quick and easy, and when you’re done you’ll be able to check in for your flight and go through all the normal bag drop and airport security procedures.
For packing tips, check out this post: GALÁPAGOS PACKING LIST: WHAT TO PACK FOR A LAND-BASED TRIP
-

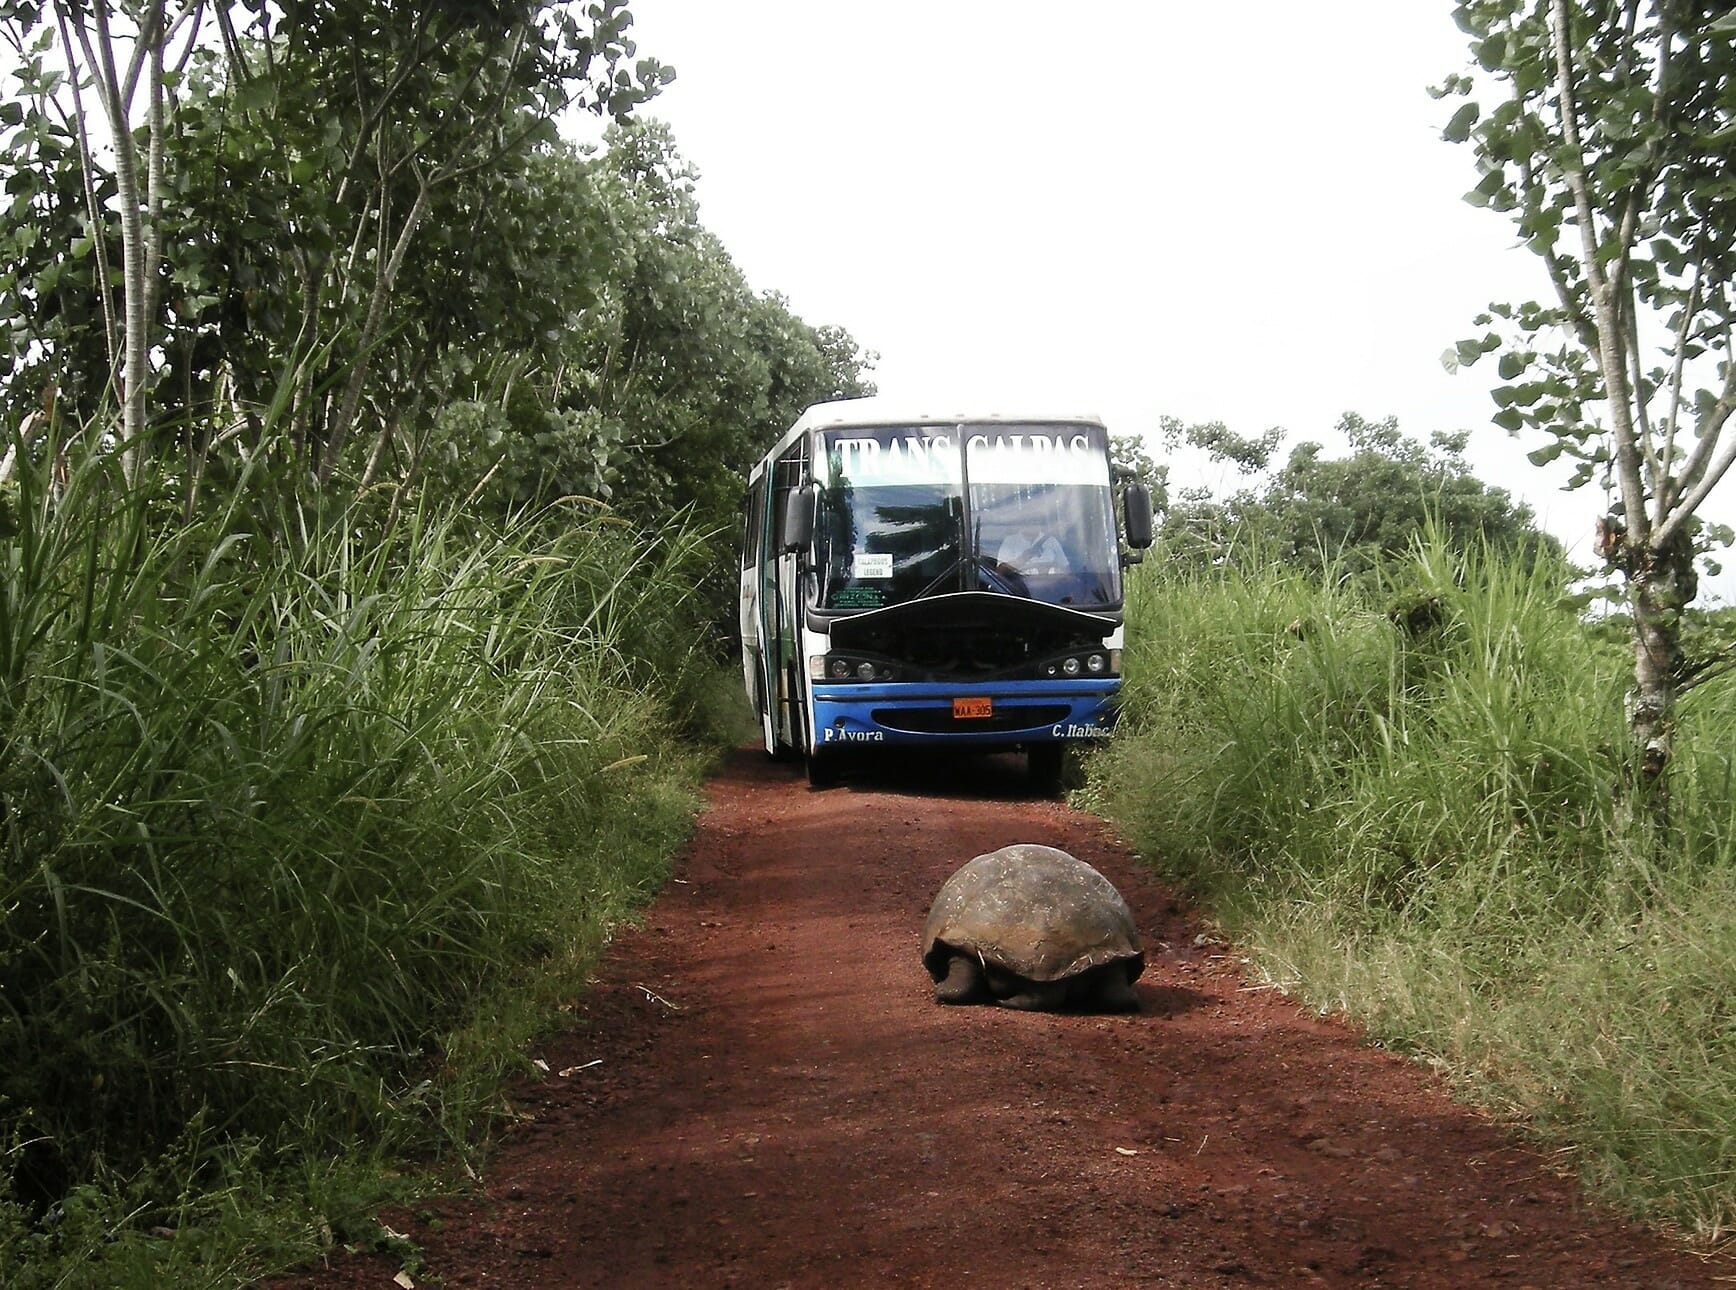
- Bus between Puerto Ayora and Itabaca Canal
From Baltra Airport (GPS) to Puerto Ayora
National park fee
When you arrive in the Galápagos, the first thing you’ll do is queue up to pay the $100 National Park fee. It’s expensive, but it’s absolutely unavoidable and actually an excellent way to contribute to the continued protection of the islands.
Getting to the Itabaca Canal
Immediately after paying the park fee, you also need to buy a ticket for the shuttle running between the airport and the Itabaca Canal ($5 each way, and I’d recommend buying a return ticket so you can skip the queue on your way back).
Because the Galápagos airport is on Baltra, a tiny island just north of Santa Cruz, you’ll need to take a shuttle to the canal, cross over to Santa Cruz on a quick boat, and then either take a bus or taxi across the island to Puerto Ayora. This is the main town on Santa Cruz and also the port for ferries out to Isabela, San Cristóbal, and Floreana, so pretty much everyone will make this same journey.
At the Itabaca Canal, your bags will be transferred onto a boat that will carry you across to Santa Cruz. The boat ride is less than 10min and costs $1, payable on board. On the other side, you can collect your bags and continue onwards to Puerto Ayora via bus or taxi.
Getting to Puerto Ayora
The bus costs $5 per person and a taxi costs $20 total, so if there’s a couple people sharing, the taxi isn’t a whole lot more expensive and is quicker (because you won’t need to wait for everyone’s luggage to be loaded up on the bus, but also because the taxi will deliver you directly to your hotel).
Expected travel times
As a rough guide, here’s how much time you need to conservatively allow for each section of the journey between Baltra airport and Puerto Ayora or other islands:
- Biosecurity screening at the airport and collection of customs cards ~15min
- Shuttle ($5) from airport to Itabaca Canal (including all the bags being loaded) ~30min
- Ferry ($1) across the Itabaca Canal (including all the bags being transferred) ~30min
- Taxi ($20) from the Itabaca Canal to Puerto Ayora ~40min OR bus ($5) from the Itabaca Canal to Puerto Ayora ~60min
- Ferry ($30) from Santa Cruz to Isabela, San Cristóbal, or Floreana ~2.5hrs + 30min early to check in
As you can see, it probably isn’t wise to book any tours too closely after your flight’s arrival, as it can easily take 2-2.5hrs to actually get from the airport to Puerto Ayora. Similarly, on the way back to the airport at the end of your trip, I’d recommend budgeting 2hrs of travel time from the centre of town (and arriving 90min ahead of your flight is more than enough, the airport is minuscule).
-

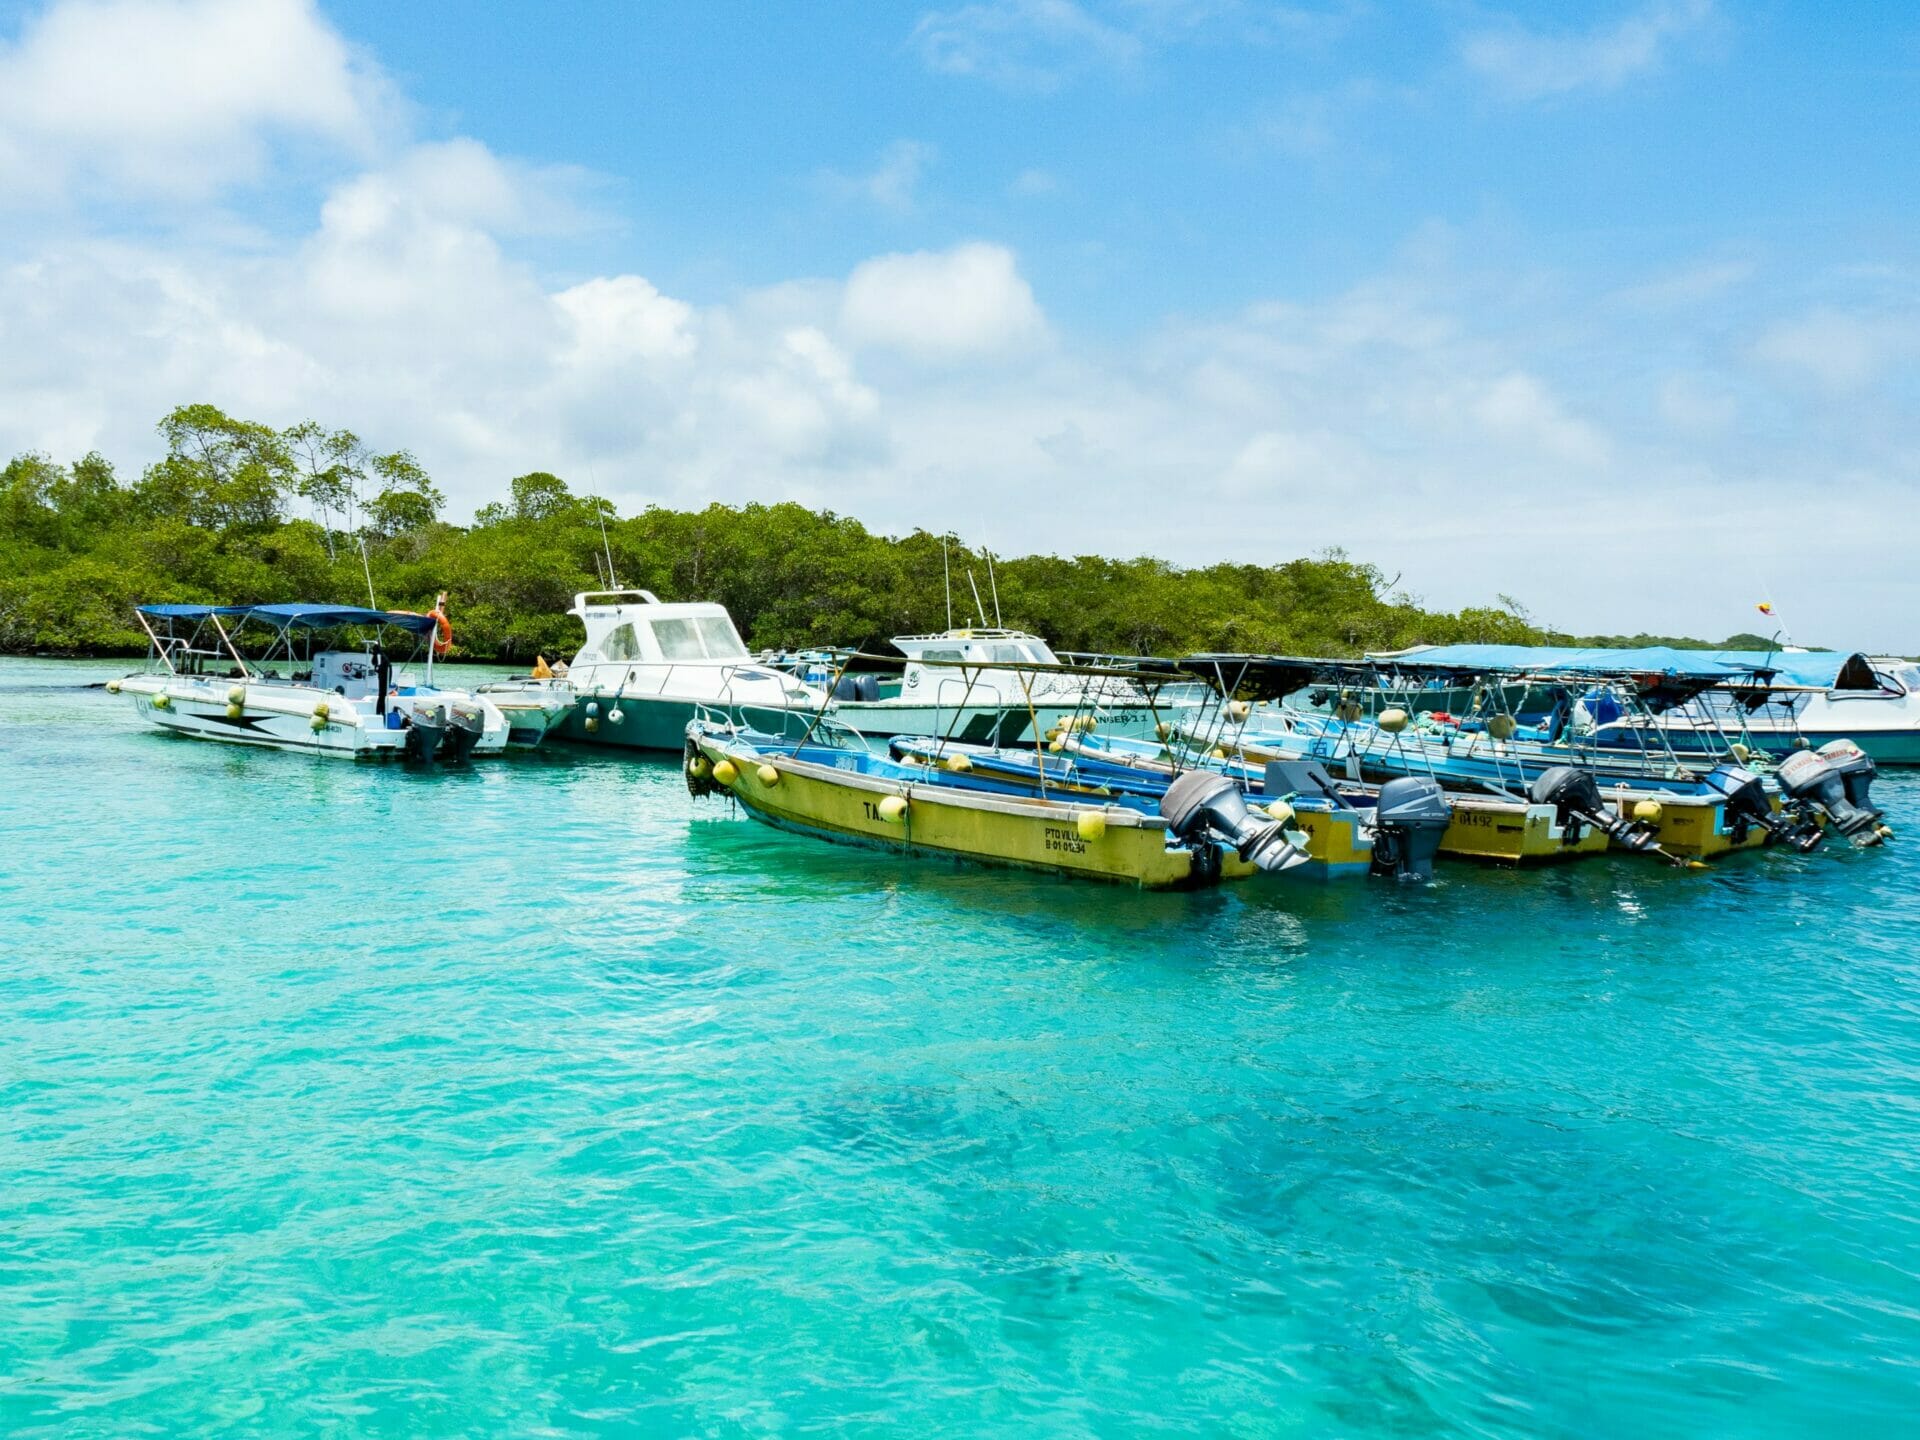
- Ferry pier at Puerto Villamil, Isla Isabela

From Puerto Ayora to Isabela, San Cristóbal, or Floreana
Purchasing ferry tickets
Once in Puerto Ayora, ferries depart daily for Isabela, San Cristóbal, and Floreana, the 3 other islands you are able to travel to independently and stay overnight.
- Santa Cruz to Isla Isabela: 7am, 2pm
- Santa Cruz to San Cristóbal: 7am, 2pm
- Santa Cruz to Floreana: 7am
These inter-island ferries cost $30 each way and can be booked online in advance or last-minute at any of several dozen tour agencies in Puerto Ayora. All of the journeys are roughly 2-2.5hrs, but the morning ferries tend to be faster and less choppy, so I’d definitely recommend this if you have a choice.
Check-in & boarding
You should arrive at the port around 30min before your ferry to allow time for check-in and a quick biosecurity screening. When you show your tickets, you’ll be given a lanyard with the name of your boat, which will be called during the boarding process. You could be the first boat to leave or the last, hence the need to arrive at least a bit before the actual departure time.
Water taxi
The first leg of the journey is a quick water taxi ride out to the ferry, which will be anchored somewhere in the harbour. The boat ride is usually only a couple minutes and costs 0.50c or $1 per person, depending on the distance (not included in the price of your ferry ticket).
Ferry ride
Directly from the water taxi, you’ll board a medium-sized speed boat, usually with cushioned seating around the perimeter (facing inwards) and the luggage loaded into the centre and the back.
I’d strongly recommend grabbing a spot in the middle of the boat so that you’ll be sheltered from the sun and ocean spray— it also seems to be a slightly smoother ride here, which will hopefully prevent sea sickness. Still, taking Kwells or Dramamine during check-in is a good idea!
When you arrive at your destination, you’ll get on another water taxi (paying 0.50c or $1 again) and then hop off at the port with your luggage. Again, all of the ferry rides are around 2hrs, but allow 2.5-3hrs in your schedule to be on the safe side, especially if you are booking a flight or tour later in the day.
On Isla Isabela only, you’ll also need to pay a $10 arrival tax before continuing into town.

Cycling on Isla Isabela
Getting around the Galápagos
Island hopping
Inter-island ferries
I talked about the ferry journey from Santa Cruz (Puerto Ayora) to Isabela, San Cristóbal, and Floreana above, but it’s important to understand that these are really the only ferry routes.
In other words, it’s not possible to get directly from San Cristóbal to Isabela or from Isabela to Floreana etc without chartering a boat— all of these islands are connected through Santa Cruz, so you will need to take a boat, for example, from San Cristóbal to Santa Cruz and another boat from Santa Cruz to Isabela if this is the itinerary you plan. For that reason (and also because there is heaps to see on this island!), Santa Cruz will be a central part of pretty much every trip to the Galápagos.
Ferries departures from Isabela, San Cristóbal & Floreana:
- Isabela to Santa Cruz: 6am, 3pm
- San Cristóbal to Santa Cruz: 7am, 3pm
- Floreana to Santa Cruz: 3pm
Just like the ferries departing from Santa Cruz, these ferries also cost $30 each way and can be booked online in advance or last-minute at tour agencies on the islands. Follow the same advice for checking in as listed above.
Inter-island flights
If you really want to avoid circuitous ferry routes with multiple transfers (and have a lot of extra cash in your budget), it is possible to fly between Baltra (GPS), San Cristóbal (SCY), and even Isabela (which I hadn’t mentioned previously because this airport doesn’t connect to the mainland). The flight time between any 2 islands is 25-45min. Also note that there is a total baggage limit of 11kg.
I wouldn’t recommend inter-island flights unless you are seriously desperate to avoid the ferry, because it is usually around $175USD one way (as opposed to $30 for the ferry), but it’s good to know the option is there. The flights are operated by Emetebe and can be booked on their website. At the time of writing, this was the schedule:
- Baltra to Isabela: 12.30pm, 1pm
- Baltra to San Cristóbal: 12.30pm, 1pm
- Isabela to Baltra: 8.15am, 8.30am
- Isabela to San Cristóbal: 1.15pm, 2pm
- San Cristóbal to Baltra: 7.15am, 7.30am
- San Cristóbal to Isabela: 7.15am, 7.30am
-
- Water taxis in the Galápagos
Getting around the islands
The best way to get around on the islands is to use your feet! It should come as no surprise that the Galápagos aren’t a destination that requires a hire car or public transport. Even on larger islands like Isabela, the hotels, restaurants, and tour agencies are all clustered around the port in a tiny town, which makes getting around extremely easy. On all of the islands, you should be able to comfortably walk from your accommodation to dinner, to the ferry, and to just about anything you need.
If you did need to take a taxi in between your hotel and the ferry because of heavy luggage, it would only be a couple dollars for most journeys. Bikes are also a good option for exploring outside the main towns and can be hired at tour agencies for $2-3/hr. For more specifics on getting around Santa Cruz and Isabela, check out these posts:
- GALÁPAGOS ON A BUDGET: SANTA CRUZ ISLAND & PUERTO AYORA TRAVEL GUIDE
- GALÁPAGOS ON A BUDGET: ISLA ISABELA & PUERTO VILLAMIL TRAVEL GUIDE

Los Tuneles
Which islands to visit in the Galápagos
There are 4 islands in the Galápagos that you can actually stay on: Santa Cruz, Isabela, San Cristóbal, and Floreana.
It’s hard to say which islands are “the best” or which you should definitely choose, because they all offer something different. Assuming you only have 1 week days, you’ll probably want to choose just 2 main islands to visit, but with 2 weeks, you can easily stay on all 4 islands and explore farther.
1 | Santa Cruz
-
- Charles Darwin Research Station

As the most populous and developed of the Galápagos Islands, Santa Cruz is the centrepiece of just about any travel itinerary, with the main town of Puerto Ayora providing often the only connection between other islands and acting as the primary departure point for some of the most popular day tours out to nearby Santa Fé, South Plaza, Bartolomé, and North Seymour Islands.
Santa Cruz is also surrounded by some of the archipelago’s best dive sites, including Gordon Rocks, Mosquera Island, Seymour Channel, and Daphne Minor, all of which are visited by enormous schools of hammerhead sharks, rays, reef sharks, turtles, and plenty of colourful marinelife. On the island itself, there are also free or inexpensive activities you can do without a tour, such as snorkelling at Tortuga Bay (BYO or rent a snorkel in town), swimming at Las Grietas (60c water taxi), or visiting the Charles Darwin Research Station.
Read this guide: GALÁPAGOS ON A BUDGET: SANTA CRUZ ISLAND & PUERTO AYORA TRAVEL GUIDE
2 | Isabela
-
- Las Tintoreras tour from Isla Isabela

Formed by 6 different shield volcanos about a million years ago, Isla Isabela is both the youngest and largest of the Galápagos Islands, home to a wide diversity of land and marine species, as well as an incredibly varied landscape. There’s hardly more than a handful of restaurants and shops in town, and certainly none of the (admittedly still very quiet) bustle of Santa Cruz. This is the real Galápagos, unpolished and raw and incredibly magical.
On Isabela, you’ll find world-class snorkelling at Los Tuneles and Las Tintoreras, trekking up Volcán Chico or Volcán Sierra Negro, and plenty of places to explore around the island without a tour, like the scenic cycle track through Los Humedales, lagoons full of flamingos, and secluded beaches perfect for swimming.
Read this guide: GALÁPAGOS ON A BUDGET: ISLA ISABELA & PUERTO VILLAMIL TRAVEL GUIDE
3 | San Cristóbal
-
- San Cristóbal Galapagos

The historic first landing point of Charles Darwin in 1835, San Cristóbal is another popular island to visit on a land-based itinerary. Its main town of Puerto Baquerizo Moreno is the capital of the Galápagos province, and as such San Cristóbal is home to most of the archipelago’s government offices and facilities. Even so, there are plenty of amazing places to explore around the island!
Cerro Brujo, Ochoa Beach, and Puerto Chino are all wonderful swimming and snorkelling beaches on the island. Accessible as an easy day trip from San Cristóbal, Kicker Rock is also one of the best snorkelling and diving sites in the Galápagos, featuring an abundance of sharks, rays, sea lions, sea turtles, and reef fish.
4 | Floreana
-
- Flamingos in the Galápagos

Most closely associated with the scandal of several eccentric Europeans who “colonised” the island in the 1930s and the mysterious disappearances that followed, Floreana was intermittently used by pirates as far back as the 1600s, making it the longest inhabited island in the Galápagos. Today, however, there are just 100 residents on Floreana; if Isabela feels rugged and uncommercialised, this little island and its main town of Puerto Velasco is even more so.
Floreana’s best known attraction is Post Office Bay, a barrel that has been used for several hundred years to send mail all over the world— drop a letter in the box and collect others bound for your own country, sending them out when you return home. Floreana is also a paradise for wildlife, including graceful flamingos, green sea turtles, and a variety of sharks, with pristine beaches and crystal clear snorkelling found around the island.
Islands you can see on a day tour
Many of the Galápagos Islands are only possible to visit with a guided tour (and some are distant enough that they are really only accessible for cruise ships or liveaboard dive boats), but it’s still possible to visit plenty of beautiful places on a land-based trip.
The 6 islands below will require a tour group or at least a certified naturalist guide, but you can easily arrange this when you arrive in the Galápagos, all without an expensive cruise. On top of these islands, there are also a number of islands that you can snorkel or dive around (just not walk on).
5 | Bartolomé
- Best for: incredible colourful landscape; snorkelling at Pinnacle Rock; spotting Galápagos Penguins, Sally Lightfoot Crabs, Whitetip Sharks, and all types of rays
- Accessible from: Santa Cruz
- Read more: A DAY TRIP TO ISLA BARTOLOMÉ, THE MOST PHOTOGENIC ISLAND IN THE GALÁPAGOS
-
- Isla Bartolomé

6 | South Plaza
- Best for: colourful landscapes with cactus forests and pink lichen; colonies of sea lions, land iguanas, finches, and pelicans; snorkelling at Punta Carrión (north tip of Santa Cruz, but typically included in the day tour to South Plaza)
- Accessible from: Santa Cruz
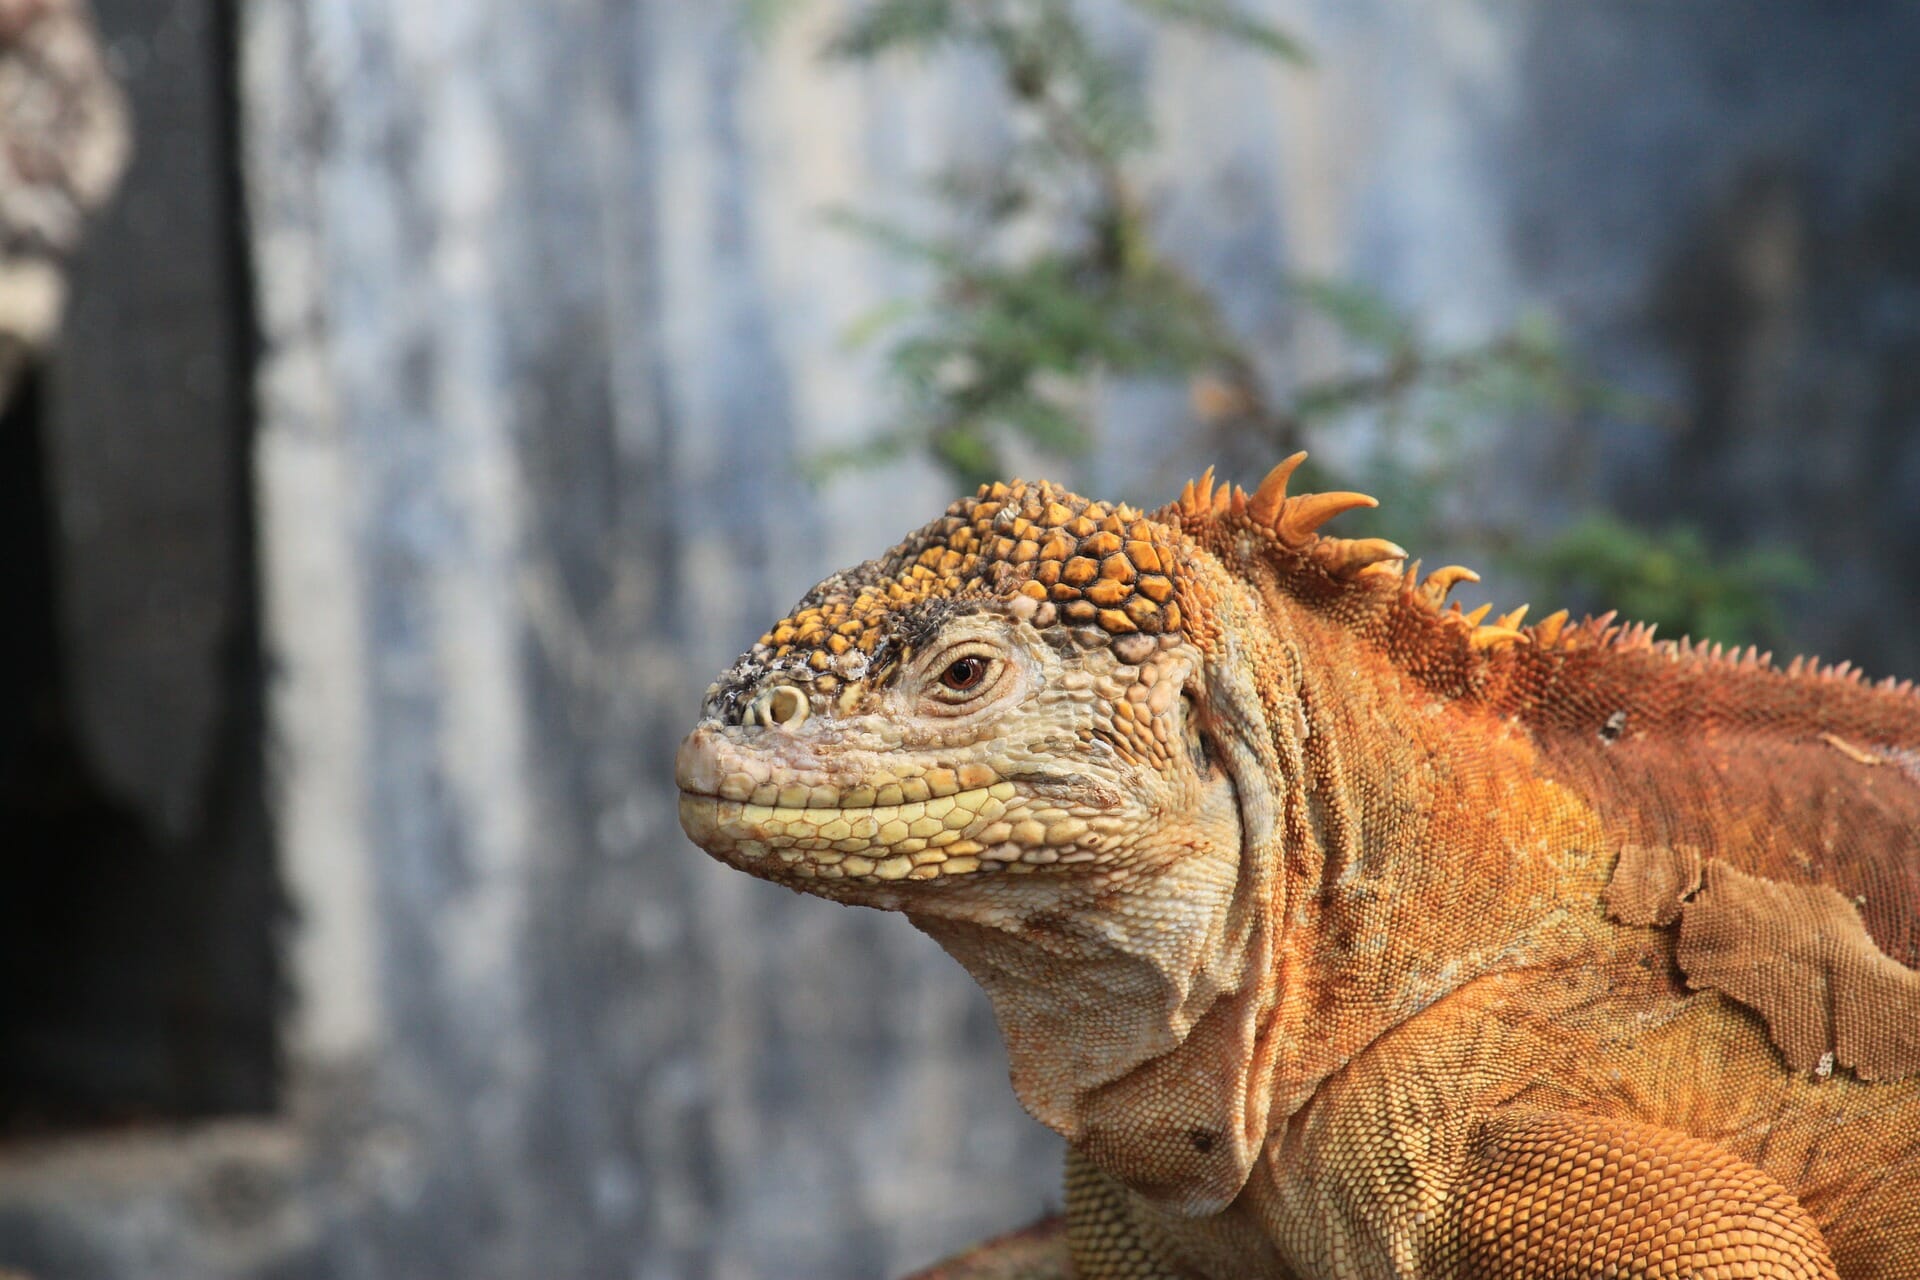
-

- Land iguana
7 | Española
- Best for: Diving with Hammerhead Sharks, rays, reef sharks, Galápagos Eels, and Red-lipped Batfish; spotting sea lions, Waved Albatross, Mockingbirds, Blue-Footed and Nazca Boobies, Swallow-tailed Gulls, and Green and Red Marine Iguanas
- Accessible from: San Cristóbal
-
- Galápagos Sea Lions

8 | North Seymour
- Best for: Bird watching, including Frigate birds, Blue-Footed Boobies, and pelicans; snorkelling at Las Bachas (on Santa Cruz, but typically included in the day tour to North Seymour)
- Accessible from: Santa Cruz
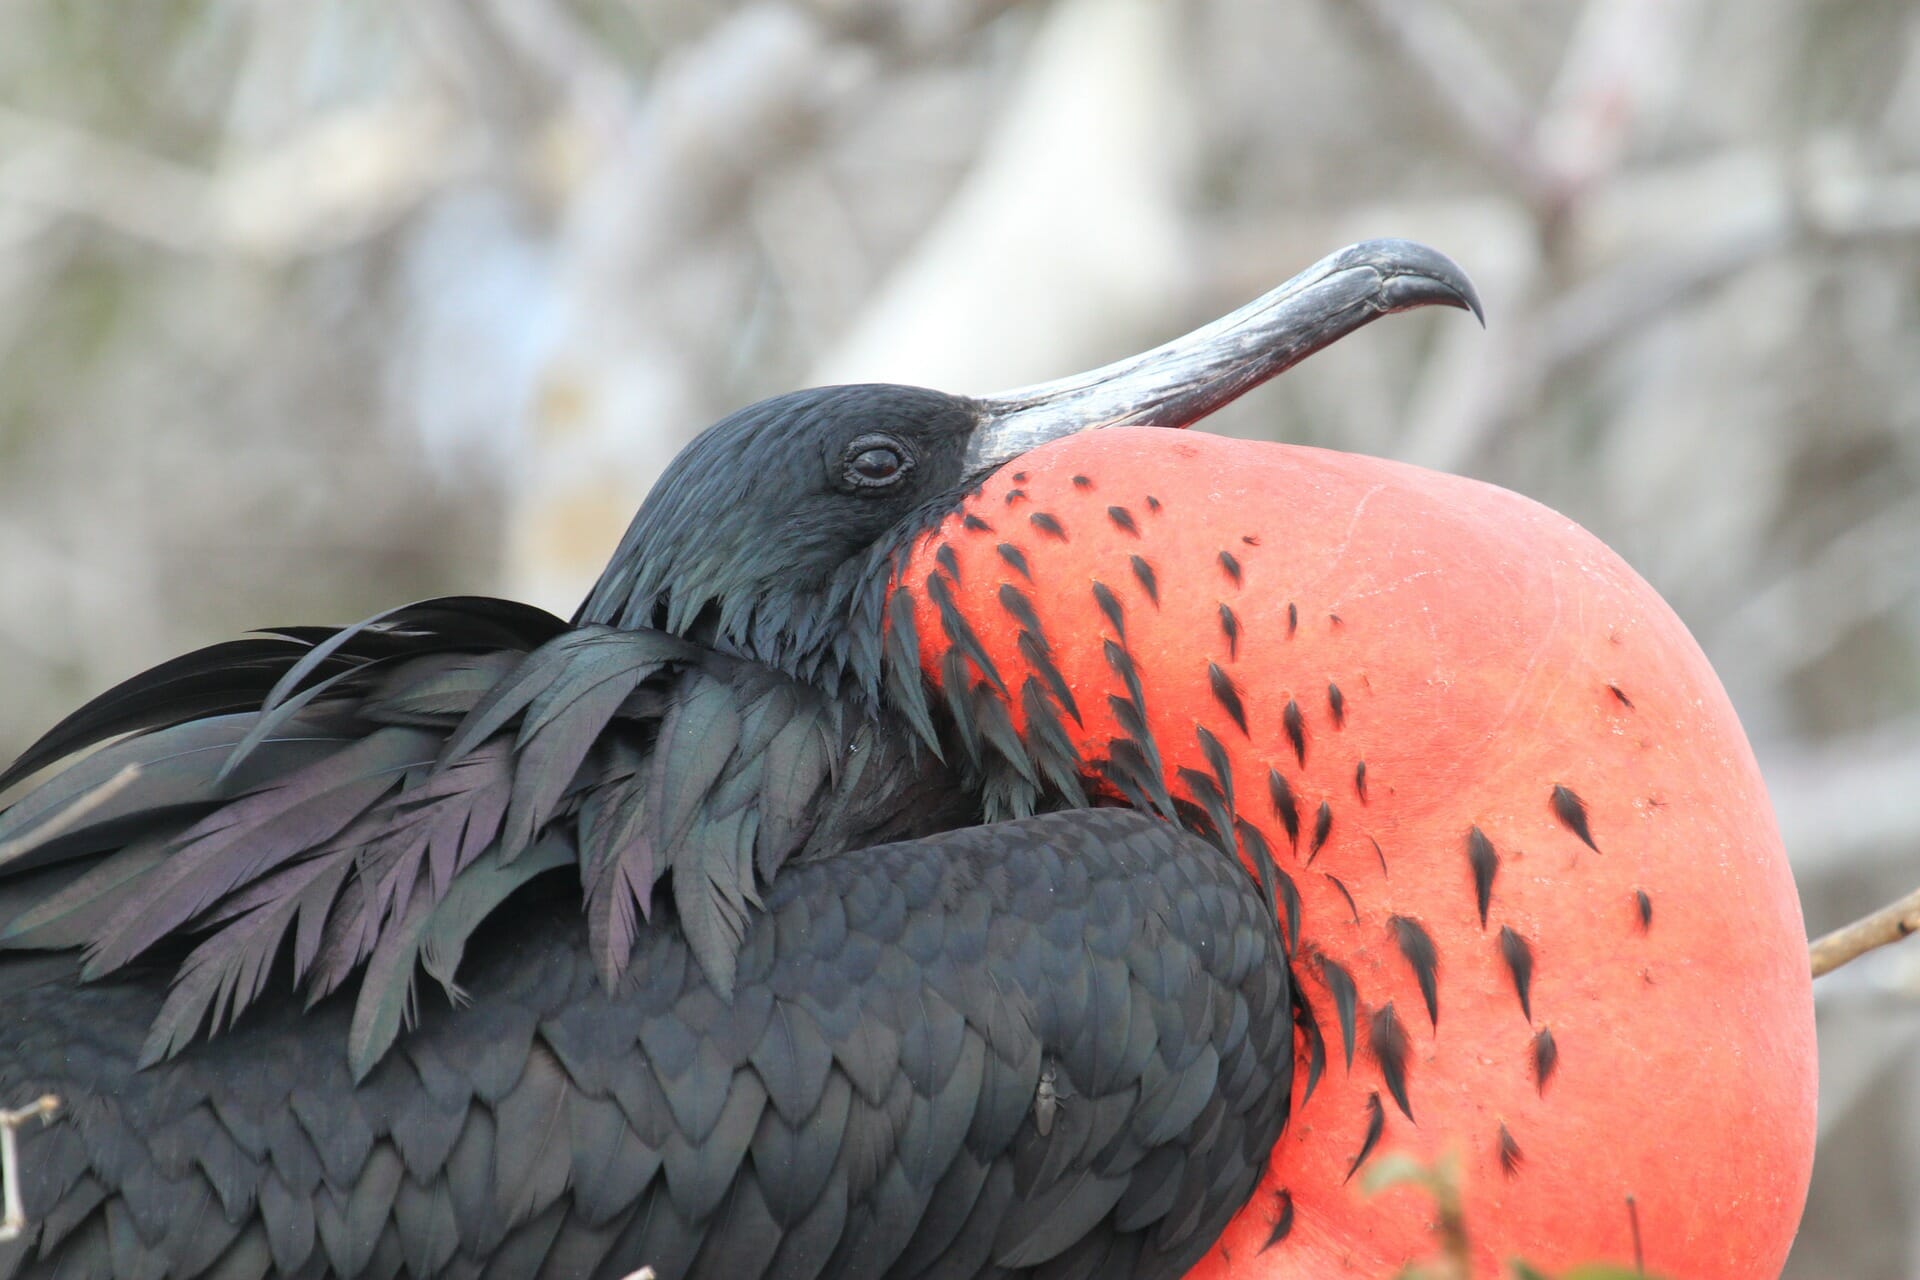
-
- Frigate bird
9 | Santa Fé
- Best for: Wildlife including land iguanas, lava lizards, Yellow Warblers, sea lions; snorkelling with sharks, rays, and sea turtles
- Accessible from: Santa Cruz
-
- Golden Rays at Los Tuneles on Isla Isabela


Blue-Footed Booby
Practical considerations for the Galápagos
Language barrier
Despite being much more English-friendly than mainland Ecuador, there are definitely still some situations in the Galápagos where you will need a basic knowledge of Spanish to communicate effectively with the locals. Tour guides all speak reasonably good English, but I found that waiters, shop owners, and hotel staff often spoke little to none.
Thankfully, people are extremely friendly and willing to take the time to understand you— I speak some Spanish, but my mum doesn’t speak any and she was able to get by, albeit with a little more effort. Menus often include an English translation and any informative signs posted by the government will include English, too. Basically, you’ll be fine in the Galápagos without Spanish, but your trip will be easier and more enjoyable if you can learn a bit.
Money
Ecuador did away with sucres in 2000 due to skyrocketing inflation and now uses the US Dollar as their official currency, although you will sometimes get change in a mix of Ecuadorian coins and US coins.
Some restaurants, hotels, and tour agencies in the Galápagos accept credit card, but the fee can be exorbitant (around 12%), so it’s definitely best to pay with cash. There are ATMs in Puerto Ayora (Santa Cruz) on Avenida Charles Darwin and there’s also an ATM on San Cristóbal, but none on Isabela or Floreana, so make sure you travel with enough cash for your entire stay on these islands.
I’d also recommend bringing some USD from the mainland, as there is a $300 withdrawal limit at most ATMs in the Galápagos and that goes quickly when you’re paying for all accommodation and tours in cash. Having a stash to start out with is helpful.
-

- Diving with Hammerhead Sharks in the Galápagos

Budget
Even on a budget-conscious land-based trip, the Galápagos isn’t ever going to be a “cheap” destination, largely because of the flights and tour costs associated with diving or snorkelling around the islands. Getting a good idea of what to expect before you arrive should help you allocate funds accordingly, saving money where you can and splurging on a few can’t-miss experiences.
- Flights from Quito/Guayaquil to Baltra: $300-500USD return
- Fees and taxes
- National Park fee: $100USD
- Isabela arrival tax: $10USD
- Transportation
- Shuttle bus from airport to Itabaca Canal: $5USD each way
- Ferry across the canal: $1USD each way
- Taxi from Itabaca Canal to Puerto Ayora: $20USD
- Bus from Itabaca Canal to Puerto Ayora: $5USD each way
- Taxi around Puerto Ayora: $1-2USD
- Ferry between islands: $30USD
- Water taxi: 0.50c-$1USD
- Accommodation
- Inexpensive hostel: $15-20/night
- Mid-range hotel: $40-80/night
- Upscale resort like Finch Bay Hotel: starting at $600/night
- Tours
- Day trip to another island (incl. breakfast, lunch, snorkelling): $150-250USD
- Day tour around the island (sometimes incl. lunch): $30-120USD
- Scuba diving: $150USD (2 dives)
- Food
- Sit-down breakfast: $5-10USD
- Breakfast from a bakery: $1-2USD
- Lunch or dinner in a nice restaurant: $15-30USD
- Dinner in Los Kioskos (Santa Cruz): $8-15USD
- Specials menu/menu del día (set or semi-set dinner with starter, main course, drink, and sometimes desert): $5-8USD
- Mixed drinks or cocktails: $4-10USD
- Glass of wine: $8-12USD
Drinking water
The water in the Galápagos is far cleaner than what you’ll find elsewhere in Ecuador, but it’s still a good idea to drink filtered water to prevent getting sick.
I absolutely hate buying multiple plastic water bottles a day when I’m travelling, especially in a pristine marine environment like the Galápagos where you can see firsthand the animals that would suffer from your plastic waste, so I strongly recommend bringing a filtered water bottle like this one. You’ll be able to fill up directly from any tap (or even a natural freshwater source) without fear of getting sick!
-

- Puerto Villamil, Isla Isabela

Packing list for the Galápagos
Instead of just jotting down a few essential items, I wrote a whole post dedicated to packing for the Galapagos: GALÁPAGOS PACKING LIST: WHAT TO PACK FOR A LAND-BASED TRIP
Read more about the Galápagos
GALÁPAGOS ON A BUDGET: SANTA CRUZ ISLAND & PUERTO AYORA TRAVEL GUIDE
GALÁPAGOS ON A BUDGET: ISLA ISABELA & PUERTO VILLAMIL TRAVEL GUIDE
SNORKELLING AT LOS TUNELES: THE BEST DAY TOUR ON ISLA ISABELA, GALÁPAGOS
SNORKELLING AT LAS TINTORERAS ON ISLA ISABELA, GALÁPAGOS
LOS HUMEDALES & EL MURO DE LAS LÁGRIMAS: A GUIDE TO CYCLING TO THE WALL OF TEARS ON ISLA ISABELA
A DAY TRIP TO ISLA BARTOLOMÉ, THE MOST PHOTOGENIC ISLAND IN THE GALÁPAGOS
GALÁPAGOS PACKING LIST: WHAT TO PACK FOR A LAND-BASED TRIP
THE PERFECT 2-3 WEEK GALÁPAGOS & MAINLAND ECUADOR TRAVEL ITINERARY
The Comments
PostsFromAFlashpacker
Whoa. This is such a comprehensive guide to DIY in Galapagos! Thank you so much!
brooke brisbine
PostsFromAFlashpackerThanks so much for reading and glad you found the post helpful 🙂
Happy travels!
xx bb
Dr. Andri Wibowo
Dear Brooke,
Hello, I am Andri, a wildlife enthusiast from Jakarta (Indonesia). I read your article and found it interesting, complete and helpful. I have plan to visit Galapagos next April 2023, and find that all the ‘cruise-based’ operators are very expensive. Do you have any suggestion on a trusted and worthy Galapagos land-based tour operator ? Thank you 🙏🏻
brooke brisbine
Dr. Andri WibowoHi Andri, thanks for reading! I don’t necessarily have a recommendation for a packaged tour in the Galapagos, but I did use a few companies for different day tours and can definitely recommend: https://pahoehoegalapagos.com
Happy travels 🙂
xx bb